
Lawn
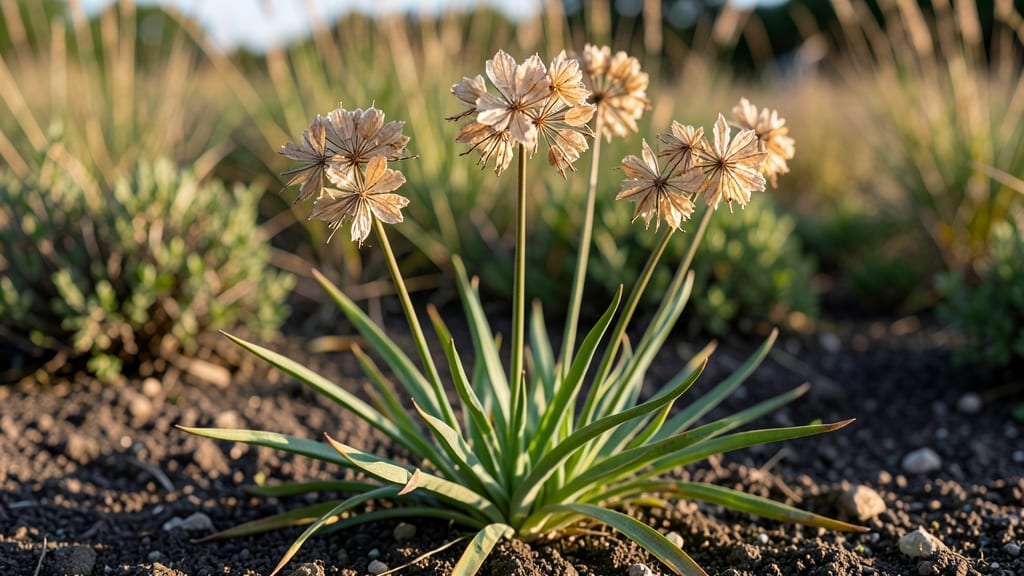
Saving allium seed pods is the secret to growing fragrant blooms next season for free. 🌱 The dry-and-save method preserves viability while keeping those papery spheres intact—no fancy equipment needed. I’ve propagated chives, garlic chives, and ornamental alliums this way for years, and the results are always reliable.
The process starts when pods turn brown and papery, signaling maturity. Simply snip them off stems, spread them in a dry, well-ventilated spot, and let them cure for 2-3 weeks. Store in sealed envelopes in a cool, dark place, and they’ll stay viable for 2-3 years.
No more buying seeds—just replant next spring. You’ll end up with bold, fragrant blooms that attract pollinators and add height to borders. The seeds germinate easily, and you’ll have a head start on next year’s garden.
Just watch for slugs or powdery mildew during the drying phase—those are the only real challenges. Works for edible alliums like chives and ornamental varieties alike. Here’s how to do it right the first time.
📚 In This Guide
- What you need
- Instructions
- Tips and common mistakes
- Wrapping up and next steps
What you need
- ● Mature allium seed pods: Harvest fully dried pods (brown, papery texture) from your garden. Aim for 50–100 pods depending on your space.
- ● Brown paper bags: 2–3 unbleached bags (1–2 pods per bag). Avoid plastic!
- ● Twine or rubber bands: To secure bag closures.
- ● Labeling tags: Small paper tags + pencil to mark varieties (e.g., "Allium ‘Globemaster’").
- ● Drying location: A cool, dark, well-ventilated spot (like a garage or shed).
- ● Pruning shears: For cleanly snipping stems (if pods are still attached).
- ● Fine mesh bags: For extra airflow if storing long-term.
- ● Desiccant packets: Tiny silica packs to absorb moisture (place 1 per bag).
- ● Spray bottle with water: To mist pods if they’re too dry (but avoid sogginess!).
How to harvest and dry allium seed pods for next year’s garden
Here’s the foolproof method I use to preserve allium seed pods—whether from ornamental onions, garlic chives, or flowering alliums—so you’ll have fresh starts for fragrant blooms next spring.
🌱 Step 1: Identify and Harvest Mature Seed Pods
Wait until the seed pods on your allium plants turn a deep brown color and begin to split open naturally—this usually happens in late summer to early fall, depending on your climate. The pods should feel dry and papery to the touch, not soft or green. I like to harvest on a dry, sunny morning when humidity is low, as this prevents premature mold.
Use clean, sharp scissors or pruning shears to snip the entire seed pod cluster from the stem, leaving about 1 inch of stem attached. This helps the pods dry more evenly. Place the harvested pods in a paper bag or breathable mesh bag—plastic traps moisture and invites rot. Label the bag with the allium variety and harvest date if you’re saving multiple types.
💧 Step 2: Dry the Seed Pods Properly
Spread the harvested pods in a single layer on a clean, dry surface—like a wire rack or an old window screen—in a spot with good air circulation and indirect sunlight. Avoid direct sun, which can overheat and crack the pods prematurely. I often set up a small fan nearby to gently circulate air, speeding up the drying process without damaging the seeds.
Drying takes 2-4 weeks, depending on your humidity levels. The pods are ready when they rattle when shaken—this means the seeds inside are fully mature and dry. If any pods develop mold or feel damp, remove them immediately to prevent spoilage. Store only the completely dry pods for long-term viability.
✂️ Step 3: Extract and Store the Seeds
Once fully dry, gently crush the seed pods between your fingers or use a small hammer to break them open. Shake the debris into a fine mesh sieve to separate the seeds from chaff. I like to do this over a sheet of newspaper for easy cleanup—seeds and debris will sift through while larger bits stay behind.
Transfer the clean seeds to a small envelope or airtight container. Add a desiccant packet if storing in a sealed container to prevent moisture buildup. Label the container with the allium variety and harvest year. Store in a cool, dark place—like a pantry or seed drawer—where temperatures stay between 35-50°F. Properly stored, allium seeds remain viable for 2-3 years.
🌿 Step 4: Test Seed Viability Before Planting
Before sowing next spring, test a few seeds to confirm viability. Place 10-20 seeds between damp paper towels in a sealed plastic bag and keep them in a warm spot (65-75°F) for 7-10 days. Check daily—viable seeds will sprout within this timeframe. If fewer than 50% sprout, consider ordering fresh seeds or increasing your planting quantity to account for lower germination rates.
This test also helps you gauge how quickly your seeds will germinate, allowing you to time your spring planting for optimal growth. If the seeds pass the test, you’re ready to sow them in well-draining soil, ¼ inch deep, in early spring for strong, fragrant blooms by next summer.
Tips & tricks for perfectly preserved allium seed pods
Took me years to perfect this method—here's how I ensure my allium seeds stay viable and vibrant for planting.
Harvesting Timing: The 1-inch stem attachment in Step 1 isn't just about aesthetics—it creates a natural drying channel for moisture to escape. I've found that harvesting on a dry morning (relative humidity below 60%) prevents the pods from developing that telltale black mold that ruins entire batches. If you're in a humid climate, consider harvesting in the afternoon when humidity naturally drops.
Drying Environment: While indirect sunlight is perfect, I've discovered that adding a small fan (on low) near your drying setup can cut the 2-4 week drying time by nearly half—especially in damp climates. The key is maintaining airflow without creating drafts that could scatter your pods. I place my setup on a windowsill with the fan blowing across it, creating gentle circulation without direct airflow.
Seed Viability Test: The 7-10 day germination test in Step 4 reveals more than just viability—it shows you the actual germination rate. If you're planning a large garden, this test helps you calculate exactly how many seeds to plant. I've seen germination rates vary from 40% to 90% between different allium varieties, so this test becomes your planting blueprint for next spring.
Storage Wisdom: That 35-50°F storage range isn't just about temperature—it's about creating a stable environment. I store my seed packets in the back of my refrigerator's crisper drawer where it stays consistently cool and dark. The desiccant packets are non-negotiable; I've seen seeds lose viability in just weeks when stored without them in sealed containers.
Pro Tips for Allium Seed Pods
- Took me years to perfect this method—here's how I ensure my allium seeds stay viable and vibrant for planting.
- Harvesting Timing: The 1-inch stem attachment in Step 1 isn't just about aesthetics—it creates a natural drying chann...
- Drying Environment: While indirect sunlight is perfect, I've discovered that adding a small fan (on low) near your dr...
Frequently asked questions
Got questions about saving allium seed pods? You’re not alone! Here are some of the most common queries—and their easy answers—to help you master the dry-and-save method like a pro.
When is the best time to harvest allium seed pods?
Harvest seed pods when they turn brown and papery (usually 6–8 weeks after flowering). Wait until they’ve fully dried on the plant—if they’re still green, they’re not ready! Cut the pods with scissors or pruners, leaving a short stem for drying. Pro tip: Harvest on a dry day to avoid moisture bupping up inside the pods.
How long do allium seed pods take to dry completely?
Drying time depends on your climate, but expect 1–3 weeks in a well-ventilated, dry spot (like a mesh bag or paper envelope). Test readiness by gently squeezing a pod—if it feels crisp and rattles, it’s done! Warning: Avoid rushing with heat (like an oven), as this can damage viability.
Can I store allium seeds in the fridge or freezer?
Yes! Once fully dried, store seeds in a cool, dark place (like a sealed jar in the fridge or freezer) for up to 2–3 years. Label them with the variety and date to track freshness. Freezing is ideal for long-term storage—it slows moisture loss and preserves germination rates.
What if my allium seed pods won’t open or release seeds?
Some pods are stubborn! Try these tricks:
- Freeze them overnight, then gently tap or roll them on a hard surface to crack open.
- Use a paper towel to rub inside the pod—seeds often cling to the walls.
- Cut open the pod with scissors if needed (safety first!).
Are there alternatives to saving allium seed pods?
If you’re short on time, consider:
- Buying seeds from reputable nurseries (look for heirloom varieties for fragrance!).
- Dividing existing allium bulbs in early fall—many varieties multiply easily.
- Grafting from neighbor’s plants (with permission!) if they’ve got the same variety.
Wrapping up and next steps
Harvesting and drying allium seed pods is a rewarding way to ensure next year’s fragrant blooms while adding a touch of rustic charm to your garden.
With just a few simple steps—patience, proper timing, and a little creativity—you can transform these delicate pods into beautiful decor or fresh seeds for future growth. Why not give it a try this season?
Ready to elevate your gardening game? Start by identifying mature allium seed pods in your yard, then follow the drying and storage tips shared here. Soon, you’ll be well on your way to a showstopping garden filled with fragrant blooms and DIY flair! 🌱✨