
Container Gardens
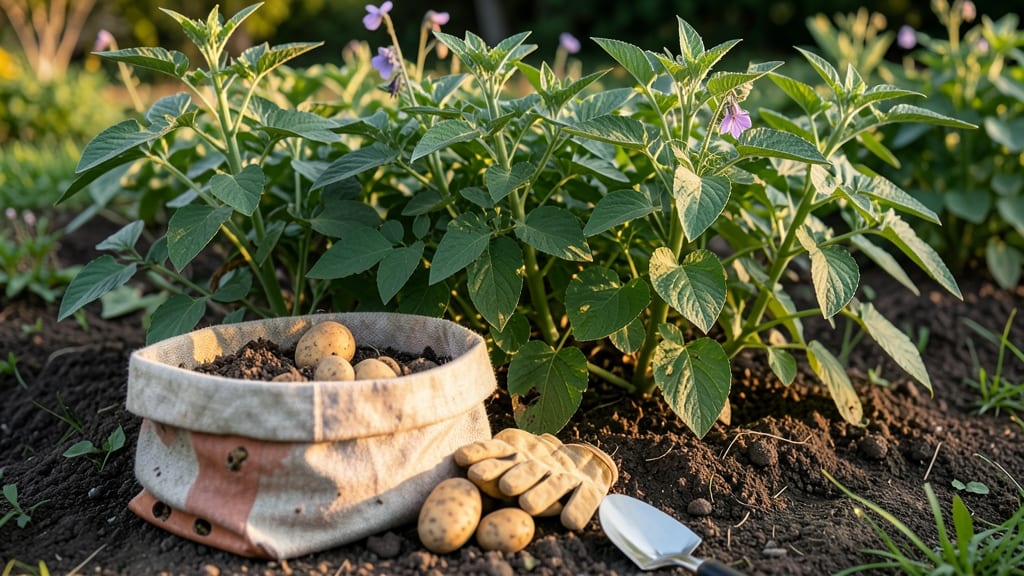
Planting seed potatoes in containers lets you grow a full harvest on a balcony or patio—no yard required. 🌱 I learned the hard way that regular pots won’t work; you need deep containers (at least 10 inches tall) to give those tubers room to swell underground.
The secret starts with chitting—pre-sprouting your seed potatoes in a bright, cool spot for 4-6 weeks before planting. This head start means faster growth and bigger yields once you tuck them into their containers.
You’ll need well-draining potting mix (no garden soil—it compacts too much) and containers with drainage holes to prevent rot. Plant your chitted potatoes 4-6 inches deep, spacing them 6-8 inches apart. As the stems grow, mound soil around them up to the leaves (this encourages more tuber formation).
Water consistently—never let the soil dry out completely—but avoid soggy conditions that invite disease. A sunny spot with at least 6 hours of direct sunlight daily is non-negotiable for sweet, starchy potatoes.
By midsummer, you’ll be harvesting baby potatoes you can eat straight from the container, and the main crop will be ready when the foliage yellows and dies back. The best part? No digging—just tip the container, shake out the soil, and there’s your harvest.
Even in small spaces, you can grow enough for a season’s worth of mashed potatoes, roasted wedges, or crispy fries. The key is patience and proper container setup—skip the shortcuts, and you’ll get restaurant-quality spuds from your balcony.
Container gardening cuts out weeds, soil-borne pests, and gopher problems, but it does require vigilance against aphids and blight. Rotate your containers yearly to prevent disease buildup, and choose varieties like ‘Yukon Gold’ or ‘Red Pontiac’ that thrive in confined spaces.
With the right setup, you’ll be harvesting potatoes that put your grocery store buys to shame—all from a spot smaller than your coffee table.
📚 In This Guide
- What you need
- Instructions
- Tips and common mistakes
- Wrapping up and next steps
What you need
- ● Seed potatoes: 1–3 lbs (depending on container size; choose certified disease-free "seed" potatoes, not grocery-store spuds).
- ● Containers: 5–10 gallon pots (or larger) with drainage holes (minimum 12" deep for full-sized potatoes).
- ○ Optional: Fabric grow bags or half-barrels for a rustic look.
- ● Potting mix: Lightweight, well-draining blend (avoid garden soil). Aim for 10–15 gallons per container.
- ● Drainage material: Gravel, pebbles, or broken pottery (1–2 inches at the bottom of containers).
- ● Compost or fertilizer: Balanced organic fertilizer (5-10-10) or worm castings.
- ● Watering can or hose with gentle nozzle: Containers dry out fast!
- ○ Garden twine or stakes: For trellising if growing "potato towers" (optional but fun!).
- ● Sunlight: 6+ hours of direct sun daily (south-facing spot is ideal).
- ○ Chitting (optional but helpful): Place seed potatoes in a bright, cool spot (50–60°F) 2–4 weeks before planting to sprout "eyes."
- ● Spray bottle: For misting sprouted potatoes to prevent drying.
- ● Gloves: Protect your hands from potato skin irritants.
Step-by-step instructions for planting seed potatoes in containers
Here’s how to grow a full potato harvest in just a few square feet—no yard needed.
🌱 Step 1: Chit Your Seed Potatoes Before Planting
Start by placing your seed potatoes in a bright, cool spot (around 50-60°F) for 4-6 weeks before planting. This encourages "chitting"—the growth of tiny sprouts (called "eyes") that will become your potato plants. I like to set them on a windowsill where they get indirect light.
Once the sprouts reach about ½ inch long, they’re ready to plant. The chitted potatoes will establish faster and produce more tubers. If you forget to chit, no worries—just plant them directly, but expect a slightly later harvest.
🪴 Step 2: Choose and Prepare Your Containers
Use containers that are at least 12 inches deep to accommodate the potato plants’ growth. I prefer fabric grow bags or large pots with drainage holes because they allow roots to breathe and prevent waterlogging. For four plants, a 5-gallon container works well.
Fill the bottom third with a layer of garden compost or well-rotted manure to provide nutrients. This mimics the rich soil potatoes love in traditional gardens. Avoid garden soil—it compacts too easily in containers and can harbor diseases.
☀️ Step 3: Plant the Chitted Potatoes
Place one chitted potato in each container, positioning the sprouts upward. Cover them with 3-4 inches of soil, leaving the top of the potato exposed. This ensures the plant has a starting point above ground. Water gently but thoroughly to settle the soil around the potato.
Once the sprouts reach 4-6 inches tall, add more soil to cover the lower half of the stem. Repeat this "earthing up" process every 2-3 weeks as the plant grows. This encourages more tuber formation and prevents the potatoes from turning green and bitter in sunlight.
💧 Step 4: Water and Feed for Maximum Yield
Keep the soil consistently moist but never soggy—potatoes hate sitting in water. Water when the top 1-2 inches of soil feel dry to the touch. I use a watering can with a narrow spout to avoid disturbing the soil around the plants.
After the plants flower (usually 6-8 weeks after planting), feed them with a balanced fertilizer (like 10-10-10) every 4 weeks to boost tuber production. Stop fertilizing once the plants start to yellow, signaling the end of the growing season.
⏰ Step 5: Harvest and Store Your Potatoes
When the foliage turns yellow and dies back (about 10-12 weeks after planting), it’s time to harvest. Gently empty the container and sift through the soil to find the potatoes. Wear gloves—some varieties can stain your hands!
Allow the potatoes to cure in a dark, cool (45-50°F) place for 1-2 weeks before storing. This toughens their skins and improves storage life. Store them in a paper bag or mesh bag in a dark, dry spot where they’ll keep for months.
Tips & tricks for planting seed potatoes in containers
Here's what I've learned after growing potatoes in small spaces for years—these tricks make all the difference.
Temperature Matters: For the 4-6 week chitting process, I've found that maintaining a consistent 50-60°F temperature is crucial. Use a thermometer to monitor your spot—windowsills can get too warm in direct sunlight. If your home stays warmer than 60°F, place the potatoes in a cooler basement area or use a small fan to create airflow. The goal is to encourage slow, steady sprout growth without stressing the potatoes.
Container Selection Tip: When choosing containers, prioritize materials that allow airflow to the roots. Fabric grow bags are my top recommendation because they prevent root circling and allow excess moisture to evaporate. If using plastic pots, make sure they have drainage holes—potatoes will rot if their roots sit in water. For four plants, a 5-gallon container works perfectly, but you can also use multiple smaller pots if you have limited space.
Earthing Up Technique: The earthing up process in Step 3 is where many beginners go wrong. When your sprouts reach 4-6 inches, mound soil up the stems to cover half their height. I like to do this every 2-3 weeks using a small shovel or my hands. This creates more tuber formation points and prevents the potatoes from turning green and bitter from sunlight exposure. Think of it like giving your plants a little "burrito wrap" to encourage growth!
Harvesting Wisdom: When harvesting at 10-12 weeks, be gentle with the plants. The foliage will die back naturally, but you can give it a final watering 2-3 days before harvest to help loosen the soil. Wear gloves—some potato varieties like Purple Majesty can stain your hands purple! After harvesting, let the potatoes cure in a dark, cool 45-50°F spot for 1-2 weeks before storing to develop thicker skins and longer shelf life.
Pro Tips for Planting Seed Potatoes In Containers
- Here's what I've learned after growing potatoes in small spaces for years—these tricks make all the difference.
- Temperature Matters: For the 4-6 week chitting process, I've found that maintaining a consistent 50-60°F temperature ...
- Container Selection Tip: When choosing containers, prioritize materials that allow airflow to the roots. Fabric grow ...
Frequently asked questions
Got questions about growing seed potatoes in containers? You’re not alone! Here are answers to the most common queries to help you get started with confidence.
What’s the best container size for planting seed potatoes?
Use containers at least 10–12 inches deep and 12+ inches wide per potato. For multiple tubers, opt for larger bins (like 5-gallon buckets or half-barrels) to allow roots to spread. Smaller pots may limit growth, while deeper containers encourage bigger harvests.
When is the ideal time to plant seed potatoes in containers?
Plant 2–4 weeks before your last frost date (spring) for early harvests. In warm climates, you can plant in fall or winter for a delayed harvest. Seed potatoes need chilling (40–50°F) for 4–6 weeks before planting to break dormancy—skip this if using store-bought potatoes (they’re treated to prevent sprouting).
Can I use regular grocery store potatoes as seed potatoes?
Technically yes, but certified seed potatoes are safer—they’re disease-free and bred for germination. If using grocery potatoes, chit them (sprout in light) for 4–6 weeks and avoid varieties treated to prevent sprouting (like Russets). Organic or heirloom potatoes from garden centers are great alternatives!
How do I prevent pests or diseases in container-grown potatoes?
Start with sterile potting mix and avoid overwatering (containers drain faster but can still harbor fungus). Use row covers for early blight or neem oil for pests like Colorado potato beetles. Elevate containers to improve airflow, and rotate crops yearly if reusing containers.
What can I plant with potatoes in containers to save space?
Pair potatoes with companion plants like:
- Bush beans (fix nitrogen in the soil)
- Spinach or lettuce (shade-tolerant, early harvest)
- Thyme or marigolds (repel pests naturally)
Wrapping up and next steps
Growing seed potatoes in containers is a rewarding way to enjoy a bountiful harvest—even in the smallest of spaces! 🌱 With the right containers, soil, and care, you’ll have homegrown spuds in no time.
Whether you’re a beginner or a seasoned gardener, this method proves that big yields don’t need big yards.
Now that you’re ready to plant, take the next step by marking your calendar for harvest time (typically 3–5 months later) and prepping your containers for future crops. Happy growing—your future meals (and neighbors) will thank you!