
Lawn
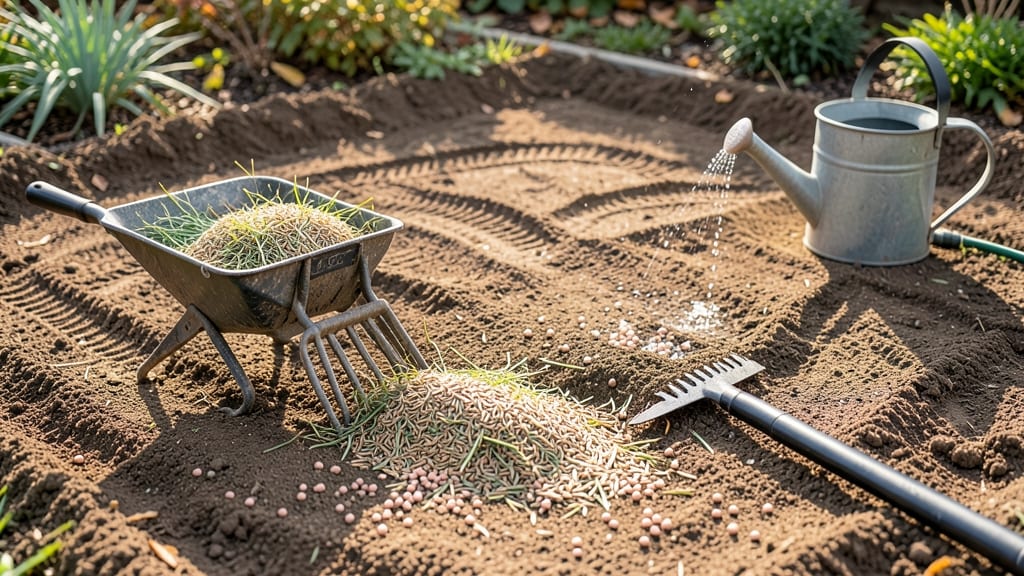
Putting grass seed down the right way means the difference between a patchy lawn and a lush carpet of green. ✨ I’ve spent years perfecting my technique after my first attempt left bald spots and uneven growth—now I share the foolproof method that works every time, from soil prep to final watering.
The secret starts with prepping the soil—remove debris, loosen the top 2 inches, and rake smooth. Then, use a broadcast spreader (or a handheld one for small areas) to distribute seed evenly, walking in opposite directions for full coverage.
Most beginners over-seed or miss spots—this method guarantees an even, professional finish.
After sowing, lightly rake again to press seed into soil without burying it, then water gently but deeply to keep soil consistently moist (not soggy). Within 7–14 days, you’ll see sprouts—thin them later to avoid overcrowding.
The result? A lawn so even and thick, neighbors will ask for your secret.
This works for new lawns, patch repairs, or overseeding—just adjust seed type to your climate. Avoid common pitfalls like skipping soil tests or watering inconsistently. With these steps, you’ll have a lawn that’s the envy of the block by summer.
📚 In This Guide
- What you need
- Instructions
- Tips and common mistakes
- Wrapping up and next steps
What you need
- ● Grass seed: Choose a high-quality seed blend tailored to your climate and lawn use (e.g., tall fescue for shade, Bermuda for heat). Aim for 5–10 lbs per 500 sq ft, depending on coverage needs.
- ● Rake: A bow rake (for leveling soil) and a stiff-bristle garden rake (for spreading seed). Opt for 18–24" width for efficiency.
- ● Lawn spreader: A broadcast spreader (for even distribution) or a drop spreader (for precision). Calibrate it to your seed’s application rate.
- ● Soil amendment: Compost (1–2 inches) or peat moss (for sandy soil) to improve seed-to-soil contact.
- ● Water source: A hose with a gentle spray nozzle or a watering wand (avoid pressure washers—they’ll blow seed away!).
- ○ Straw or erosion control blanket: Straw mulch (½–1 inch thick) or biodegradable blankets to protect seeds from wind/erosion (optional but recommended for bare spots).
- ● Soil test kit: To check pH and nutrient levels (ideal range: 6.0–7.0). Adjust with lime or fertilizer if needed.
- ● Seed starter fertilizer: A low-nitrogen (5-10-10 ratio) blend to kickstart germination.
- ● Knee pads: Because crawling on rough soil is no fun!
- ● Garden twine: To mark seeded areas if you’re working in stages.
Step-by-Step guide to achieving perfect grass seed coverage
Here's how to spread seed evenly for strong, uniform germination—no clumps or bare spots.
🌱 Step 1: Prepare the Soil Surface for Optimal Seed Contact
Rake the prepared soil until it's smooth and free of debris, creating a fine, crumbly texture. You want the surface to feel like a freshly tilled garden bed—no rocks, clumps, or uneven areas. A stiff-bristle rake works best for breaking up any remaining soil crust without disturbing the seedbed too deeply. Pay special attention to edges and corners where soil often compacts differently.
Lightly drag a leveling board or straight piece of wood across the surface to eliminate any remaining low spots. This ensures seeds will settle at the same depth across the entire area. If you notice pockets of loose soil, firm them down gently with the back of your rake—seeds need good soil-to-seed contact to germinate properly. The goal is a perfectly even canvas where every seed has equal opportunity to establish.
💧 Step 2: Use the Right Technique for Even Seed Distribution
For small areas under 50 square feet, use a broadcast spreader set to the manufacturer's recommended setting for your seed type. Walk slowly in overlapping passes—think of it like mowing a lawn in parallel lines about 12 inches apart. This prevents thick bands of seed while ensuring complete coverage. I always test my spreader first by catching a handful of seed in my palm to verify the flow rate matches the package instructions.
For larger areas, switch to a drop or slit seeder for precision. These machines plant seeds at specific depths and spacings, eliminating the guesswork of broadcast methods. If you're seeding by hand, use a mechanical spreader or even a simple kitchen measuring spoon to dispense seed in small, controlled amounts. Never toss seed from your hand—you'll create uneven patterns and waste seed. The key is patience; take your time to ensure every square inch receives the same amount.
☀️ Step 3: Lightly Cover Seed for Moisture and Protection
Use a fine-grade compost or 1/4-inch layer of topsoil to cover the seeds after spreading. This protects them from drying out and being washed away while still allowing sunlight to reach them. I prefer a stiff-bristle rake with the teeth slightly bent to create a fine, even layer. Drag it lightly in one direction only—cross-hatching will bury seeds too deeply and delay germination.
For delicate seeds like fine fescue, use a thin layer of peat moss or coconut coir instead of soil. These materials hold moisture better while still allowing light penetration. Avoid pressing down too firmly—you want the covering to feel like a whisper of soil, not a blanket. The goal is to create a micro-environment where seeds stay moist but aren't suffocated. After covering, give the area a very gentle misting with water to settle everything in place.
⏰ Step 4: Water Immediately and Maintain Consistent Moisture
Set up a gentle watering system immediately after seeding—either a soaker hose or fine misting nozzle. Water until the soil is 1-2 inches deep feels uniformly moist, but not soggy. I test this by pushing a screwdriver into the soil; it should go in easily but not with resistance. The first watering is critical because it helps seeds make contact with soil particles and begins the germination process.
Keep the soil consistently moist for the first 2-3 weeks—this is when most grass seeds germinate. The surface should never dry out completely, but it shouldn't be waterlogged either. I set a reminder to check daily, especially in hot weather. The key is to water lightly but frequently rather than giving heavy soakings. You'll know you're doing it right when the soil surface stays dark and damp-looking without forming puddles or crusting over.
🌿 Step 5: Monitor and Maintain Until Germination Completes
Watch for the first signs of germination, which typically appear in 7-14 days depending on the grass type and weather. You'll see tiny green shoots emerge first in the most favorable spots—these are your "pioneer plants" that will help stabilize the soil for others. When you see 50% germination, it's time to reduce watering slightly but maintain consistent moisture for the remaining seeds.
Once the new grass reaches about 2-3 inches tall, it's time to mow for the first time. Set your mower blade to 3 inches and never remove more than one-third of the blade height at a time. This prevents scalping and helps roots establish deeply. The most critical period is the first 6-8 weeks—this is when you'll see whether your careful seeding paid off with a thick, uniform stand or patchy, weak growth.
Tips & tricks for perfect grass seed coverage
These pro-level insights will help you achieve that flawless, even lawn you've been dreaming of—no more patchy spots or wasted seed.
Soil Prep Secret: After raking in Step 1, run your hands over the surface to check for any lingering rocks or debris. I've found that a quick magnet sweep (using a strong magnet on a stick) removes hidden metal fragments that can damage your spreader later. Also, if your soil is particularly dry, lightly mist it before seeding—this helps seeds make immediate contact with moisture during that critical first watering.
Spread Pattern Strategy: For the 12-inch overlapping passes in Step 2, I mark the starting line with a hose or string to maintain perfect spacing. This visual guide prevents the "zigzag drift" that creates thick bands of seed. For hand-seeding, use a measuring spoon to dispense seed in small, controlled piles—think of it like creating a grid of tiny seed "islands" that will blend beautifully when covered.
Covering Technique: When applying that 1/4-inch topsoil layer in Step 3, work with the wind—not against it. Drag your rake in the same direction the wind naturally blows to prevent seeds from being uncovered. For delicate seeds, I've found that a thin layer of coconut coir holds moisture better than peat moss while still allowing light penetration. The key is to create that "whisper of soil" texture—press just enough to settle seeds but not enough to bury them too deeply.
Watering Wisdom: During the 2-3 week moisture phase in Step 4, I set up a simple DIY watering timer using a plastic bottle with holes poked in the cap. This creates a gentle, even mist that mimics natural rainfall. The screwdriver test is brilliant—if it goes in easily but meets slight resistance at 1-2 inches, you've got the perfect moisture balance. Avoid watering in direct sunlight to prevent evaporation, and always water in the early morning to let foliage dry before evening.
Pro Tips for Best Way To Put Grass Seed Down
- These pro-level insights will help you achieve that flawless, even lawn you've been dreaming of—no more patchy spots ...
- Soil Prep Secret: After raking in Step 1, run your hands over the surface to check for any lingering rocks or debris....
- Spread Pattern Strategy: For the 12-inch overlapping passes in Step 2, I mark the starting line with a hose or string...
Frequently asked questions
Got questions about seeding your lawn? You’re not alone! Here are answers to the most common concerns—so you can tackle your project with confidence.
What’s the best time of year to plant grass seed?
The ideal window is early fall (September–October) or late spring (April–May) in most regions. Cool, moist soil helps seeds germinate faster, while summer heat or winter frost can stunt growth. Check your seed packet for region-specific advice!
How long does it take for grass seed to sprout?
Germination time varies by grass type:
- Cool-season grasses (fescue, ryegrass): 7–21 days
- Warm-season grasses (Bermuda, Zoysia): 10–30 days
Do I need to water right after seeding?
Yes!
Water lightly but frequently—aim for ¼ inch of moisture daily (or every other day if rain helps). Use a gentle sprinkler to avoid washing seeds away. Once sprouts reach 2–3 inches, gradually reduce watering to deeper, less frequent sessions.
Can I overseed an existing lawn?
Overseeding thickens thin areas and improves grass health. Mow short (1–1.5 inches), remove debris, and loosen soil slightly with a rake. Spread seed evenly, then water as usual. Pro tip: Use a starter fertilizer to boost early growth.
Will my pets or wildlife eat the new grass?
New grass is tempting to critters! Keep pets off for 4–6 weeks or use temporary fencing. For wildlife, scatter seeds in small patches instead of large areas to reduce attraction. Once established (3+ inches tall), your lawn will be tougher to nibble.
What if my seeds aren’t germinating?
Check these fixes:
- Soil temp: Too hot/cold? Wait for ideal conditions (60–75°F for most seeds).
- Moisture: Dry soil? Water deeply and check for drainage issues.
- Sunlight: Shady spots? Choose shade-tolerant seed varieties.
- Seed viability: Old seeds (<2 years) may fail—test a small patch.
Wrapping up and next steps
You’ve got everything you need to transform your lawn into a lush, green paradise! 🌱 The best way to put grass seed down boils down to proper prep, even distribution, and patience—just like nurturing a new plant.
With the right techniques, you’ll soon enjoy a thick, vibrant lawn that’s the envy of the neighborhood.
Ready to take the next step? Grab your tools, mark your calendar for follow-up watering, and watch your hard work bloom! Happy seeding!