
Lawn
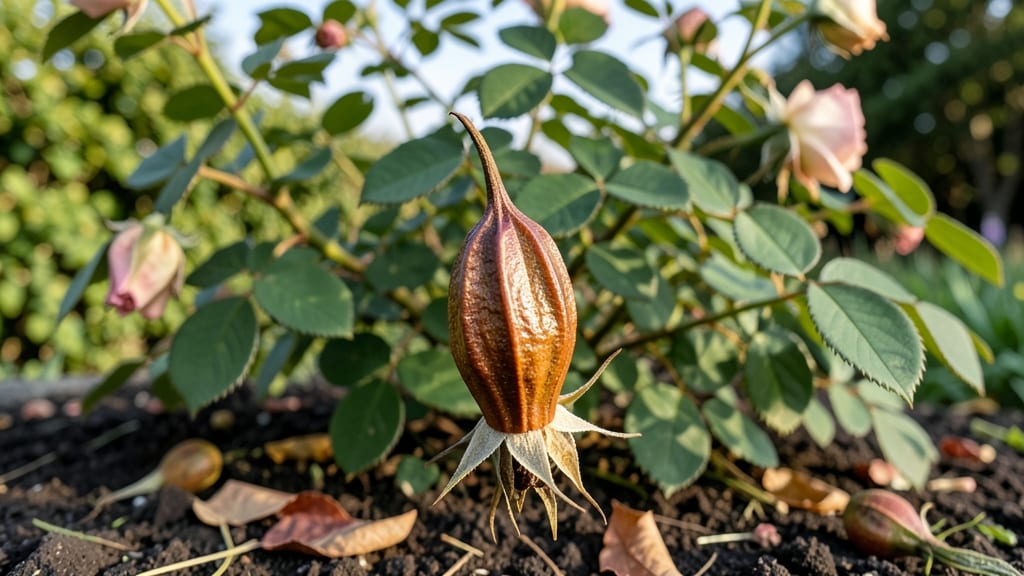
Harvesting rose seed pods lets you grow your own fragrant roses from scratch—no nursery needed. 🌹 The key is timing: wait until the pods turn brown and papery, then collect them before they burst open.
I’ve grown dozens of roses this way, and the secret lies in proper drying and storage to break dormancy naturally.
You’ll need just a few simple supplies: scissors, paper bags for drying, a cool dark spot, and patience. The process mimics nature—rose hips ripen, seeds mature, and with the right care, you’ll watch tiny seedlings emerge in 4-8 weeks.
Most people rush germination, but slow and steady yields the best results.
Once sprouted, your seedlings will need bright light and gentle care to avoid leggy growth. By next spring, you could have sturdy young plants ready for transplanting. The payoff? Roses that carry your garden’s unique scent and character, grown entirely from your own saved seeds.
This method works for climber roses, shrubs, and even hybrid teas—just adjust drying times for your climate. Let’s turn those seed pods into next year’s showstopper blooms.
📚 In This Guide
- What you need
- Instructions
- Tips and common mistakes
- Wrapping up and next steps
What you need
- ● Mature rose seed pods: Collect 5–10 fully dried, brown seed pods from healthy roses (ensure they’re disease-free).
- ● Scissors or pruning shears: For harvesting pods and trimming stems.
- ● Paper towels or coffee filters: 2–3 sheets to line a container for seed extraction.
- ● Small container (e.g., plastic bag or bowl): To hold seeds and pods during drying.
- ● Spray bottle with water: For gentle moisture control.
- ● Seed-starting mix: 1–2 cups of sterile, well-draining potting soil (or coconut coir).
- ● Small pots or seed trays: 3–4 shallow containers (3–4 inches deep) with drainage holes.
- ● Plastic wrap or clear lid: To create a mini greenhouse effect.
- ● Grow lights or sunny windowsill: For 6–8 hours of light daily.
- ● Label markers: To tag pots with rose varieties.
- ○ Heat mat (optional): Speeds up germination (70–75°F ideal).
- ● Fungicide (diluted): Prevents mold during stratification.
- ● Humidity dome: Retains moisture for tender seedlings.
- ● Garden journal: Track pod sources and germination progress!
Step-by-step guide to harvesting, drying, and storing rose seed pods
Here's how to turn this season's rose blooms into next year's fragrant plants—naturally and efficiently.
🌿 Step 1: Identify and Harvest Mature Rose Seed Pods
Wait until rose hips turn a deep red or orange—this signals full maturity and seed readiness. I like to harvest on a dry morning when dew has evaporated, as moisture can encourage mold. Use clean pruning shears to snip the entire hip off the stem, leaving about ½ inch of stem attached.
Don't rush—immature hips won't produce viable seeds. You'll know they're ready when they feel firm to the touch and the outer skin develops a slight papery texture. Collect pods from multiple roses to ensure genetic diversity in your future plants.
💧 Step 2: Clean and Prepare Pods for Drying
Rinse harvested hips under cool water to remove dirt and debris, then pat them dry with a clean towel or paper towels. This prevents fungal growth during drying. I spread them out on a single layer of paper towels or a mesh screen in a well-ventilated area.
Keep pods in a spot with indirect sunlight and 60-70°F temperatures for 2-3 weeks. You'll see the pods split open naturally when fully dry—the seeds inside will look dark brown and wrinkled. Avoid direct sunlight, which can scorch the pods and damage seeds.
⏰ Step 3: Extract Seeds and Stratify for Germination
Once pods are completely dry, gently squeeze them to release seeds. I place the pods between two sheets of paper towel and press lightly—seeds will spill out cleanly. Remove any remaining pod fragments and discard them. Store seeds in a labeled envelope or small paper bag.
Here's the key step: stratification. Place seeds in a sealed container with slightly damp (not wet) sand or peat moss. Store in your refrigerator's crisper drawer for 6-8 weeks. This mimics winter conditions and breaks seed dormancy. Check periodically—seeds should feel moist but not soggy.
☀️ Step 4: Sow Stratified Seeds for Spring Planting
After stratification, fill small seed trays with sterile seed-starting mix and plant seeds ¼ inch deep. Space them 1 inch apart to prevent crowding. Water gently with a spray bottle until the soil surface looks evenly moist. Place trays in a warm, bright spot with 65-75°F temperatures.
Keep soil consistently moist (not wet) and expect germination in 4-8 weeks. Seedlings will be delicate—watch for leggy growth, which means they need more light. Once first true leaves appear, provide 14-16 hours of light daily using a grow light if needed.
Tips & tricks for perfect rose seed pod preservation
These simple strategies will help you maximize your seed yield and ensure healthy germination for next season's roses.
Harvesting Precision: I've found that harvesting rose hips in the morning gives you the best results—they're dry from overnight dew evaporation and less likely to develop mold. If you must harvest later in the day, wait until the pods have fully dried from any morning moisture. The ½ inch stem attachment is crucial too; it helps prevent the pods from splitting prematurely during drying.
Drying Conditions: The 2-3 week drying period at 60-70°F is non-negotiable for seed viability. I place my drying trays on a windowsill with sheer curtains to filter indirect sunlight. Too much direct light can scorch the pods, while too little light slows the drying process. Watch for the pods to split open naturally—they'll look like little brown jack-o'-lanterns when ready!
Stratification Success: The 6-8 week cold treatment is where many gardeners go wrong. Don't skip this step—it mimics winter conditions and breaks seed dormancy. I use a simple plastic container with damp (not wet) sand and store it in my fridge's crisper drawer. Check periodically by squeezing a handful of sand—it should feel like a damp sponge, not a dripping washcloth.
Pro Tips for Rose Seed Pod
- These simple strategies will help you maximize your seed yield and ensure healthy germination for next season's roses.
- Harvesting Precision: I've found that harvesting rose hips in the morning gives you the best results—they're dry from...
- Drying Conditions: The 2-3 week drying period at 60-70°F is non-negotiable for seed viability. I place my drying tray...
Frequently asked questions
Got questions about harvesting, storing, or growing roses from seed pods? You’re not alone! Here are answers to the most common queries to help you succeed with your fragrant future blooms.
When is the best time to collect rose seed pods?
Harvest rose seed pods in late fall or early winter after they’ve dried on the plant but before they split open naturally. Look for pods that are brown, papery, and rattling when shaken—this means they’re ready! Avoid collecting them too early, as immature pods won’t store well.
How long can I store rose seed pods before planting?
Properly dried and stored rose seed pods can last 1–2 years in a cool, dark place (like a sealed container in the fridge). For best results, plant them as soon as possible after collecting, as germination rates drop over time. Pro tip: Label pods with the rose variety and harvest date to track freshness!
What if my seed pods won’t open naturally? Can I force them?
If pods stay stubbornly closed, place them in a paper bag and store them in a warm, dry spot for a few days. The gentle heat and humidity often encourage them to crack open. Avoid moisture—wet pods risk mold. Once open, remove the seeds and let them dry completely before storing.
Can I grow roses from seed pods if I don’t have a garden?
Rose seeds thrive in containers (6+ inches deep) with well-draining soil. Use pots with drainage holes and place them in a sunny spot (or under grow lights). Just be patient—growing from seed takes 1–3 years to bloom, but the reward of fragrant, unique roses is worth it!
Why aren’t my rose seeds germinating? Troubleshooting tips.
Common issues include:
- Cold stratification: Some rose seeds need 60–90 days in the fridge (moist paper towel method) to break dormancy.
- Old seeds: Seeds older than 2 years may lose viability.
- Poor soil: Use a sterile, well-draining mix (like 50% perlite + 50% potting soil).
- Light needs: Seeds need bright, indirect light to sprout—direct sun can overheat them.
If all else fails, try scarification (lightly sanding the seed coat) to help water penetrate.
Wrapping up and next steps
Growing roses from seed pods is a rewarding journey that connects you to nature’s cycles—and you’ve got all the tools to succeed! 🌱 Whether you’re drying pods for storage, nurturing seedlings, or troubleshooting challenges, each step brings you closer to fragrant blooms next season. Now’s the time to take that first pod, follow your green thumb’s instincts, and watch your garden flourish with heirloom beauty.
Ready to dive deeper? Explore local rose varieties or join gardening forums to swap tips with fellow enthusiasts. Your future roses are waiting—let’s grow them together! 🌸