
Lawn
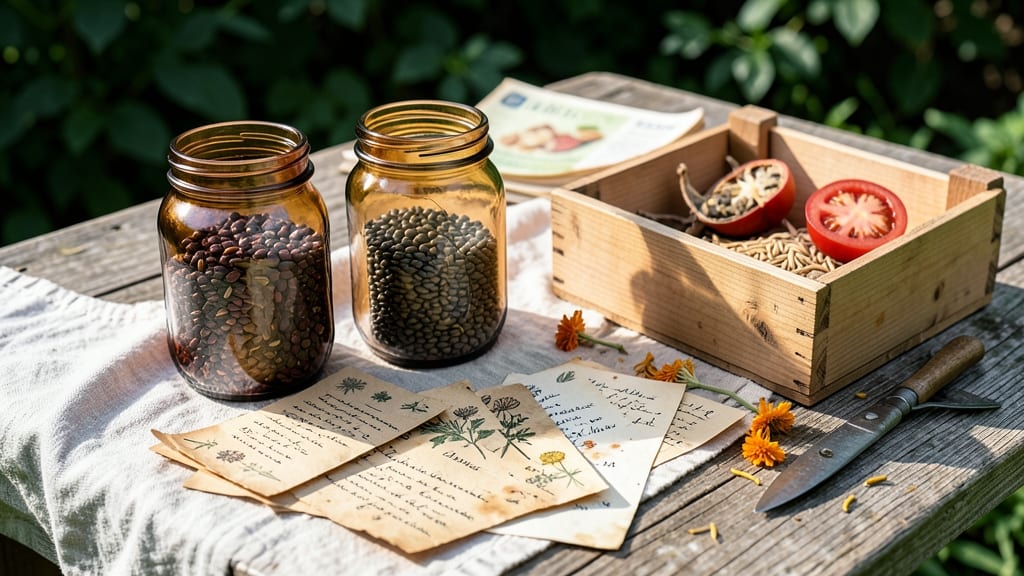
Saving seeds from your garden isn’t just about replanting—it’s about keeping heirloom treasures alive. 🌱 The Seed Savers Exchange proves that preserving heirloom varieties is simpler than you think, and every saved seed is a vote for biodiversity.
I started with just a few tomatoes and now have a collection of beans, peas, and flowers that thrive year after year.
You’ll need just a few basics: ripe produce, paper bags for drying, and a cool, dry place to store them. The key is timing—harvest seeds when they’re fully mature but before they scatter or rot.
For tomatoes, that’s when the fruit softens and turns color; for beans, it’s when pods dry on the vine. A small notebook helps track varieties and their best traits.
Once dried, store seeds in airtight containers in a dark, cool spot. Properly saved seeds stay viable for years, letting you grow the same flavors and characteristics season after season. Imagine biting into a tomato that tastes exactly like your grandmother’s—now you can grow it forever.
The process gets easier with practice, and soon you’ll be sharing seeds with neighbors or even selling them.
This isn’t just for experts—even beginners can master seed saving with a little patience. Start with easy crops like beans, peas, or lettuce, and soon you’ll be preserving heirlooms that might otherwise disappear. Every seed saved is a small rebellion against homogenization in our gardens. Ready to join the movement?
📚 In This Guide
- What you need
- Instructions
- Tips and common mistakes
- Wrapping up and next steps
What you need
- ● Heirloom Seeds: Start with open-pollinated or heirloom varieties (avoid hybrids like F1 seeds). Quantity: 1–2 packets per plant type (e.g., tomatoes, beans, lettuce).
- ● Seed Envelopes or Paper Bags: Acid-free, breathable storage (e.g., blank">AeroSeal or blank">Seed Savers Exchange envelopes). Quantity: 10–20+ (label clearly!).
- ● Permanent Markers or Labels: For seed variety, date, and location (e.g., blank">Sharpie or waterproof ink pens).
- ● Pruning Shears or Scissors: For harvesting seed pods (e.g., tomato, pepper, or bean seeds). Spec: Clean, sharp blades to avoid contamination.
- ● Drying Rack or Screen: A mesh tray or wooden rack (e.g., blank">collapsible drying screen) to air-dry seeds. Size: At least 12"x12".
- ● Fine-Mesh Sieve or Strainer: For winnowing seeds (removing chaff). Spec: 1–2mm holes.
- ● Glass Jars or Airtight Containers: For long-term seed storage (e.g., blank">mason jars with silica gel packets). Quantity: 5–10 jars.
- ● Notebook or Spreadsheet: To track seed viability, germination rates, and growing conditions.
- ● Humidity Packets: Silica gel or blank">Drierite to absorb moisture in storage containers.
- ● Seed Catalog or App: For cross-referencing varieties (e.g., blank">Seed Savers Exchange Catalog or blank">Burpee Seed App).
- ● Garden Journal: Sketch plant traits (e.g., leaf shape, flower color) to identify future generations.
- ● Hand Lens or Magnifier: For inspecting seed purity and spotting pests.
- ● Compost Bin: For safely disposing of diseased or hybrid plant debris.
Instructions: how to preserve heirloom seeds like a pro
Saving seeds from heirloom varieties is simpler than you think—and these steps make it foolproof.
🌱 Step 1: Select the Right Plants to Save
Start with open-pollinated heirloom varieties, not hybrids. Look for plants that produce seeds naturally—think tomatoes, beans, peppers, and herbs. Avoid F1 hybrids (they won’t breed true). I always pick the healthiest, most productive plants in my garden because their seeds will carry the best traits.
Wait until the plants are fully mature before harvesting seeds. For tomatoes, let them stay on the vine until they’re soft and wrinkled. For beans, allow pods to dry completely on the plant. You’ll know they’re ready when you can easily crush the pod between your fingers—this means the seeds inside are fully mature and dry.
💧 Step 2: Harvest and Dry the Seeds Properly
Once seeds are mature, gently remove them from the plant. For tomatoes, slice open the fruit and scoop out the gel and seeds, then place them in a jar of water. Let them ferment for 3-5 days—this removes the sticky coating that can prevent germination. Stir the mixture daily to keep mold from forming.
For beans, peppers, and other dry seeds, simply remove them from the pods and spread them out on a paper towel or mesh screen in a warm, dry place. Avoid direct sunlight—it can overheat and damage the seeds. You’ll know they’re dry enough when they’re hard to bend and feel light in your hand, usually after 1-2 weeks.
☀️ Step 3: Store Seeds in Cool, Dark Conditions
Once fully dry, transfer seeds into airtight containers like glass jars or envelopes. Label each container with the plant variety, harvest date, and any special notes (like color or flavor). I use small glass vials with rubber seals—they keep moisture out and last for years.
Store seeds in a cool, dark place, like a pantry or refrigerator. The ideal temperature is 40-50°F—this slows down seed aging and preserves viability. Check on them once a year to ensure the containers are still sealed and the seeds aren’t absorbing moisture. Properly stored, heirloom seeds can stay viable for 5-10 years or even longer!
⏰ Step 4: Test Seed Viability Before Planting
Before you plant your saved seeds, test their viability to avoid disappointment. Place 10 seeds between two damp paper towels in a sealed plastic bag. Keep them in a warm spot (70-80°F) for 5-7 days. Check daily—if 50% or more sprout, your seeds are good to go!
If fewer than half sprout, you can still plant them, but expect lower germination rates. I’ve had seeds from 20 years ago still sprout, but most heirlooms stay strong for 3-5 years if stored correctly. This test gives you peace of mind before committing to a full planting.
Tips & tricks for perfect heirloom seed preservation
Here's what nobody tells you about making seed saving effortless—and how to avoid common pitfalls along the way.
Plant Selection: Focus on the healthiest, most vigorous plants in your garden for seed saving. These will produce the strongest, most viable seeds. I've learned the hard way that saving seeds from struggling plants can lead to weaker offspring. Look for plants with strong stems, abundant flowers, and no signs of disease—these traits carry through to the next generation.
Fermentation Timing: During the 3-5 day fermentation step for tomato seeds, keep a close eye on your jar. Stirring daily prevents mold growth, but don't let the mixture sit too long—after 5 days, the seeds should be clean and free of gel. If you notice any fuzzy growth, discard that batch immediately and start fresh with clean water and seeds.
Drying Conditions: When drying seeds on paper towels or mesh screens, avoid direct sunlight—it can overheat and damage the seeds. Instead, place them in a warm, dry spot with good air circulation, like a sunny windowsill with a sheer curtain. The seeds are ready when they're hard to bend and feel light in your hand, typically after 1-2 weeks. Patience here pays off with longer seed viability.
Storage Wisdom: The 40-50°F storage temperature is crucial for long-term seed viability. If your pantry or refrigerator runs warmer, consider using a small refrigerator or a cool basement. I've found that even a 10°F warmer environment can reduce seed life by half. Check your seeds annually—properly sealed containers should prevent moisture absorption, but it's always worth verifying.
Pro Tips for The Seed Savers
- Here's what nobody tells you about making seed saving effortless—and how to avoid common pitfalls along the way.
- Plant Selection: Focus on the healthiest, most vigorous plants in your garden for seed saving. These will produce the...
- Fermentation Timing: During the 3-5 day fermentation step for tomato seeds, keep a close eye on your jar. Stirring da...
Frequently asked questions
Got questions about seed saving?
You’re not alone! Whether you’re a beginner gardener or a seasoned green thumb, these common FAQs will help you navigate the world of heirloom seed preservation with confidence.
What’s the best time to harvest seeds from my plants?
Timing is key! For most vegetables, harvest seeds when the pods or flowers dry naturally on the plant. For example, tomatoes should turn yellow and wrinkled, while beans are ready when pods turn brown and crispy. Pro tip: Save seeds from healthy, disease-free plants for the best results.
Can I save seeds from hybrid plants, or do they lose quality?
Hybrid seeds (like those from grocery store plants) often won’t grow true to type—meaning the next generation may not look or taste the same. Stick to heirloom or open-pollinated varieties for reliable, high-quality seeds year after year.
How do I store seeds properly to keep them viable?
Seeds need cool, dry, and dark conditions to last. Use airtight containers (like glass jars or envelopes) with a desiccant packet to absorb moisture. Label with the variety and date—most seeds stay viable for 1–5 years, depending on the type.
What if my seeds don’t germinate? How do I troubleshoot?
Try these fixes:
- Check moisture: Too dry or soggy soil can kill seeds. Aim for consistent dampness (not soaked).
- Test viability: Soak seeds in water—if they sink, they’re likely good. Floaters may be old or dead.
- Adjust light/temp: Some seeds need warmth or darkness to sprout. Follow variety-specific guidelines!
Are there alternatives to saving seeds at home?
If seed saving feels overwhelming, try:
- Seed banks: Organizations like Seed Savers Exchange offer heirloom seeds for purchase or trade.
- Local swaps: Join gardening groups or farmers’ markets for seed exchanges with fellow enthusiasts.
- Online stores: Specialty nurseries sell certified organic or rare varieties.
Wrapping up and next steps
Preserving heirloom seeds isn’t just about saving the past—it’s about shaping a resilient, sustainable future for your garden and the planet. 🌱 By joining The Seed Savers Exchange, you’re connecting with a community that values biodiversity, creativity, and self-sufficiency.
Whether you’re a seasoned gardener or just starting, every seed you save or share makes a difference.
Ready to take the next step? Start small—try saving seeds from one of your favorite heirloom plants this season, then share your harvest with fellow seed savers. Your garden could be the seed of change for generations to come!