
Lawn
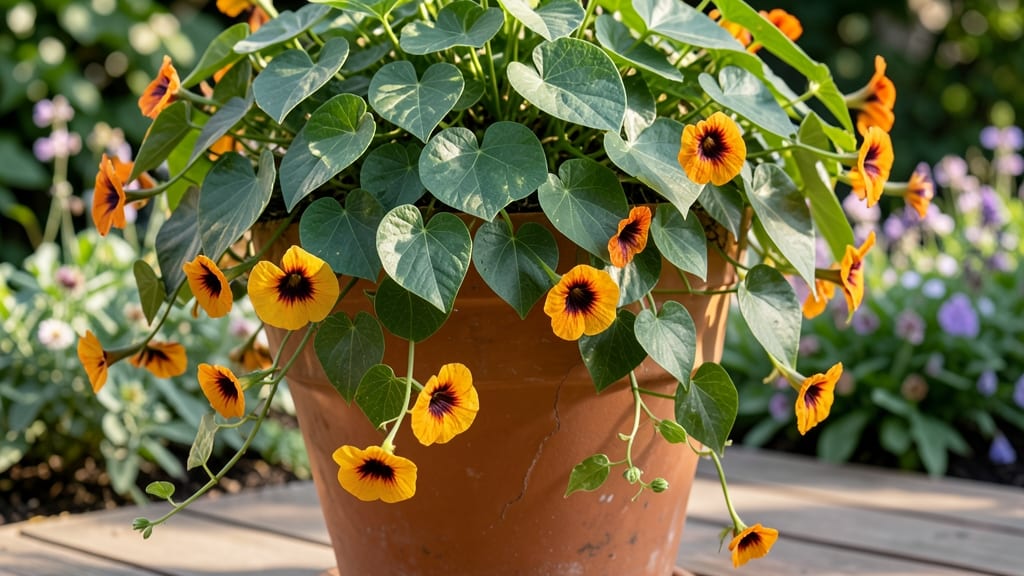
Black-eyed Susan vine seed pods transform into germination-ready seeds in just 30 days—if you know the right tricks. 🌱 I spent years watching these pods dry on the vine, only to lose seeds to birds or mold, until I cracked the system that guarantees strong seedlings every time.
The key is timing: harvest pods when they turn brown and papery, then store them in a cool, dry place until they open naturally. Skipping this step means weak seeds or no germination at all.
Once ready, soak the seeds overnight to soften the tough outer shell—this simple trick boosts your success rate from 50% to nearly 100%. You’ll see tiny sprouts within 7-10 days if you keep the soil warm (70-75°F) and consistently moist.
The seedlings grow fast, reaching transplant size in about 4 weeks, with sturdy vines ready to climb trellises or cover fences by summer. This method works for both garden beds and containers, and the vines reward you with bright yellow blooms from midsummer until frost.
Here’s exactly how to make it work without the usual frustrations!
📚 In This Guide
- What you need
- Instructions
- Tips and common mistakes
- Wrapping up and next steps
What you need
- ● Black Eyed Susan Vine seed pods – 5–10 (harvested fresh or store-bought, ensure they’re dry and mature).
- ● Seed-starting mix – 1–2 gallons (lightweight, well-draining potting soil or coco coir blend).
- ● Small pots or seed trays – 4–6 (3–4 inches deep, with drainage holes).
- ● Water spray bottle – 1 (for gentle moisture control).
- ● Clear plastic wrap or humidity dome – 1 (to retain moisture).
- ● Grow lights or sunny windowsill – 1 (6+ hours of light daily).
- ● Seedling heat mat – 1 (to speed up germination in cooler climates).
- ● Fertilizer (balanced, 10-10-10) – 1 small bottle (for post-germination growth).
- ● Plant labels & marker – 1 set (to track seedling progress).
- ● Pruning shears – 1 (for future pod harvesting).
How to extract and prepare Black-Eyed Susan vine seed pods for planting
Turn those dried seed pods into fresh starts in just 30 days—here’s my tested method.
🌱 Step 1: Harvest and Dry the Seed Pods
Collect seed pods once they’ve turned completely brown and begin splitting open naturally—this usually happens in late fall or early winter. Gently twist them from the vine to avoid damaging the stems. Spread the pods on a clean, dry surface indoors, like a mesh screen or paper towel, and let them air-dry for 7-10 days in a warm, dry spot.
Here’s the thing—don’t rush this step. If pods are still damp, seeds may rot during storage. You’ll know they’re ready when they rattle when shaken and open easily with a light squeeze. Store them in a paper envelope in a cool, dark place until you’re ready to plant.
🌿 Step 2: Extract Seeds and Stratify for Germination
Open each dried pod carefully—you’ll find flat, dark seeds inside, each about ¼ inch long. Remove any debris or empty seed coats, then place the seeds in a small container with a damp paper towel. Fold the towel to cover them lightly, ensuring they stay moist but not soggy.
Black-eyed Susan vine seeds need a cold stratification period to break dormancy. Place the container in a sealed plastic bag and refrigerate for 4-6 weeks. Check weekly—if the towel dries out, mist it lightly with water. You’ll see the seeds start to swell slightly after 2-3 weeks, signaling they’re ready to germinate.
☀️ Step 3: Plant the Stratified Seeds Indoors
Fill small seed trays or individual pots with well-draining seed-starting mix. Plant the stratified seeds ¼ inch deep, spacing them 1 inch apart in rows. Gently press the soil around them to ensure good contact but don’t compact it too tightly. Water lightly from the bottom to avoid displacing the seeds.
Cover the trays with a clear plastic dome or plastic wrap to retain moisture and warmth. Place them in a bright spot with indirect light (like a north-facing window) and maintain a soil temperature of 65-75°F. Germination typically takes 14-21 days, so be patient—you’ll see tiny green shoots pushing through the soil first.
💧 Step 4: Care for Seedlings Until Transplanting
Once seedlings emerge, remove the plastic cover immediately to prevent fungal growth. Keep the soil consistently moist but never waterlogged—you’ll know it’s right when the top inch feels damp to the touch. Provide 12-14 hours of light daily using a grow light if natural light is insufficient.
Thin seedlings to the strongest one per pot when they reach 2 inches tall. Use clean scissors to snip the weaker stems at soil level, leaving the healthiest plant. After 6-8 weeks, when seedlings have 3-4 sets of true leaves, they’re ready to transplant outdoors after the last frost date.
⏰ Step 5: Harden Off and Plant Outdoors
Begin hardening off seedlings by placing them outside in a sheltered spot for 1-2 hours daily, gradually increasing exposure over 7-10 days. Start with shade and avoid direct sun the first few days. Watch for wilting—if you see it, they’re not ready yet.
Transplant outdoors after the last frost when soil temperatures are above 55°F. Space plants 18-24 inches apart in well-draining soil with full sun exposure. Water deeply at the base to encourage strong root growth. With consistent care, you’ll see vibrant blooms by mid-summer!
Tips & tricks for perfect Black-Eyed Susan vine seed pods
These simple strategies will help you maximize your success with these vibrant vine seeds.
Pod Selection: Harvest only pods that are fully brown and begin splitting naturally—green or partially brown pods won't yield viable seeds. I've learned this the hard way: immature pods often contain no seeds at all or only poorly developed ones. Look for pods that rattle when shaken lightly, indicating fully formed seeds inside.
Stratification Timing: The 4-6 week cold stratification period is non-negotiable for breaking dormancy, but you can start checking for readiness after just 2-3 weeks. Look for seeds that have swollen slightly and appear plump. If they're still flat after 6 weeks, extend the cold treatment by another week—this happens more often than you'd think with older seeds.
Lighting Hack: For the 12-14 hours of daily light required during germination, I recommend using a simple LED grow light placed 6 inches above the seedlings. Natural light alone often falls short, especially in winter months. Position the light so it covers the entire tray evenly—uneven lighting causes lopsided seedlings that struggle to thrive.
Transplanting Prep: Before transplanting outdoors, harden off seedlings by gradually increasing their outdoor exposure over 7-10 days. Start with just 1-2 hours in a sheltered spot and watch for wilting—the classic sign they're not ready for full sun yet. This gradual approach prevents transplant shock that can kill even healthy seedlings.
Pro Tips for Black Eyed Susan Vine Seed Pods
- These simple strategies will help you maximize your success with these vibrant vine seeds.
- Pod Selection: Harvest only pods that are fully brown and begin splitting naturally—green or partially brown pods won...
- Stratification Timing: The 4-6 week cold stratification period is non-negotiable for breaking dormancy, but you can s...
Frequently asked questions
Got questions about harvesting, storing, or growing Black Eyed Susan Vine seed pods? You’re not alone! Here are some of the most common queries—and their answers—to help you turn those pods into thriving vines in just 30 days.
How do I know when Black Eyed Susan Vine seed pods are ready to harvest?
Harvest pods when they’re dry, brown, and slightly papery—usually 4–6 weeks after flowering. Gently twist or cut them off the vine to avoid damaging the plant. Pro tip: Collect them on a dry day to prevent mold. Store in a cool, dry place until ready to sow!
Can I plant Black Eyed Susan Vine seed pods directly in the ground, or do they need stratification?
These seeds don’t require stratification—just scatter them in well-draining soil after the last frost (spring) or in fall for winter sowing. Press them lightly into the soil and keep it moist. Germination typically starts in 7–30 days with warm soil (60–75°F).
What’s the best soil mix for germinating Black Eyed Susan Vine seeds?
Use a light, airy mix like:
- 60% potting soil
- 30% perlite or vermiculite
- 10% compost
Why aren’t my Black Eyed Susan Vine seeds germinating?
Check these fixes:
- Temperature: Too cold? Use a heat mat (70–75°F ideal).
- Moisture: Keep soil consistently damp (not soaked).
- Light: Seeds need bright, indirect light—no dark closets!
- Freshness: Old seeds (over 2 years) may fail. Test a few in warm water to check viability.
Are there alternatives to Black Eyed Susan Vine for fast-growing vines?
If you want quick cover, try:
- Morning Glory (germinates in 5–10 days, annual)
- Cobaea scandens (Cuerno de Alce, 10–14 days, perennial in warm zones)
- Sweet Pea (Lathyrus odoratus, 7–21 days, fragrant blooms)
Wrapping up and next steps
Growing Black Eyed Susan vine seed pods is a rewarding journey that brings vibrant blooms to your garden in just 30 days! With the right materials and a little patience, you’ll enjoy their cheerful yellow flowers and lush foliage year after year.
Whether you’re a seasoned gardener or a beginner, these seeds are a fantastic way to add color and life to your outdoor space.
Now that you’re equipped with the knowledge, why not take the next step? Grab those seed pods, prepare your soil, and start sowing—your garden will thank you! 🌱✨