
Lawn
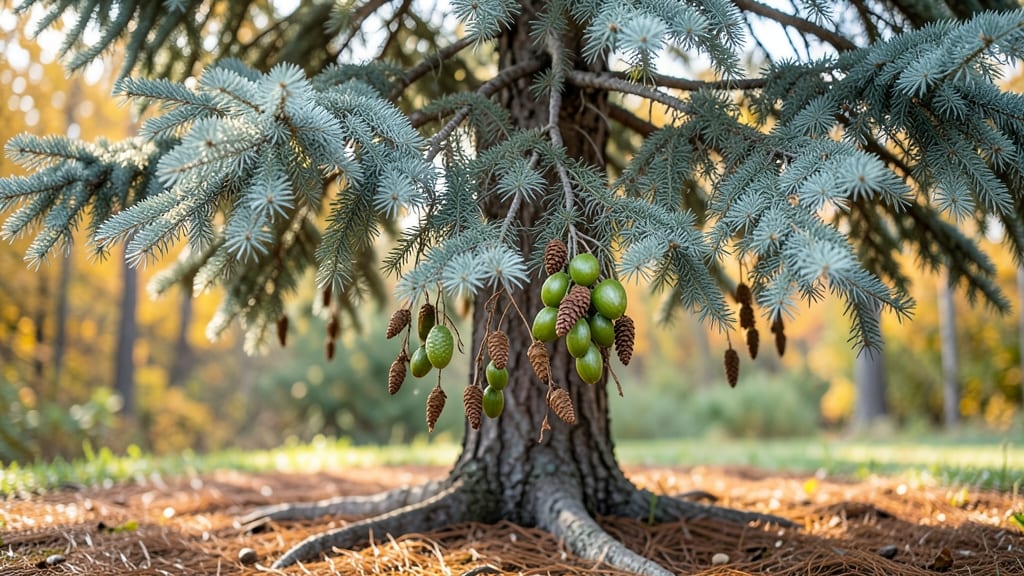
Harvesting cedar seed pods in late fall unlocks the secret to growing your own cedar trees from scratch. 🌲 These small, papery cones hold the potential for a future shade tree or wildlife-friendly landscape—if you know when and how to collect them before they release their seeds prematurely.
The key is patience and timing: gather pods when they're still closed but starting to turn brown, usually between October and December. Store them in a dry, cool place until you're ready to stratify—the process that mimics winter's cold period and tricks seeds into germinating.
Most gardeners overlook this step, which is why so many cedar seed projects fail.
Once stratified, you'll see tiny green shoots within 4-6 weeks, signaling successful germination. These seedlings grow slowly at first but develop into hardy trees that thrive in poor soil and resist deer browsing—perfect for naturalizing or adding height to your landscape.
Bonus: the process attracts birds and small mammals, turning your garden into a mini ecosystem. Here's exactly how to collect, prepare, and plant those pods for the best results.
📚 In This Guide
- What you need
- Instructions
- Tips and common mistakes
- Wrapping up and next steps
What you need
- ● Cedar seed pods: Collect at least 50-100 pods (more ensures better germination rates). Look for mature, brown, and slightly dried pods from healthy cedar trees (e.g., Juniperus species like Eastern Red Cedar or Western Red Cedar).
- ● Stratification supplies: Moistened peat moss or coconut coir: Enough to fill a ziplock bag or small container (about 1–2 cups).
- ● Plastic zip-top bags: 2–4 quart-sized bags (or reusable containers with lids).
- ○ Optional: A fine-mesh sieve to separate seeds from debris.
- ● Growing containers: Seed trays or small pots: 4–6 inch diameter (1–2 per seed pod, depending on spacing). Use well-draining soil (e.g., a mix of potting soil and perlite).
- ● Grow lights or sunny windowsill: For seedlings (12–16 hours of light daily).
- ● Basic gardening tools: Pruning shears or scissors: To open seed pods (if needed).
- ● Spray bottle: For misting soil/peat moss.
- ● Label markers: To track stratification dates.
- ● Refrigerator or cold frame: For stratification (if outdoor temps aren’t cold enough). Aim for 40–50°F (4–10°C) for 30–90 days.
- ● Humidity dome or plastic wrap: To retain moisture during germination.
- ● pH test kit: Cedar seeds prefer slightly acidic soil (pH 5.5–6.5).
- ● Outdoor hardening-off tray: For transplanting seedlings later.
Step-by-Step instructions for harvesting and stratifying cedar seed pods
Here's how I turn dried cedar seed pods into thriving young trees—no guesswork involved.
🌿 Step 1: Harvest Mature Seed Pods at Peak Ripeness
Collect seed pods when they turn brown and dry in late summer or early fall, usually September to October. Avoid green pods—they won’t germinate. Shake the branches gently over a large tarp to catch the pods as they fall. I use gloves because the scales can prick your hands.
Spread the pods on a clean, dry surface to air-dry for 1-2 weeks in a well-ventilated area. Store them in a paper bag (not plastic) in a cool, dry place until stratification. If you rush drying, the seeds may mold before you start.
🌱 Step 2: Stratify Seeds to Break Dormancy
Fill a ziplock bag with moistened peat moss or coconut coir—just damp, not soggy. Add the seed pods and seal the bag. Place it in your refrigerator for 60-90 days. This mimics winter’s cold period, tricking the seeds into thinking conditions are right to grow.
Check the bag every 2 weeks—if mold appears, dump the mix and start fresh. You’ll know stratification worked when the seed pods split open and tiny seeds spill out. This usually happens after 8-10 weeks of cold treatment.
⏰ Step 3: Sow Stratified Seeds in Containers
Fill 4-inch pots with light, well-draining potting mix (I use a 50/50 blend of potting soil and perlite). Plant 2-3 seeds per pot at a depth of ¼ inch, pressing them lightly into the soil. Label the pots with the date—cedar seeds germinate slowly.
Cover the pots with clear plastic wrap to retain moisture and place them in a warm spot (around 70°F). Keep the soil consistently moist but not waterlogged. Germination can take 4-12 weeks, so patience is key—don’t disturb the pots until you see tiny green shoots.
☀️ Step 4: Provide Light and Care for Seedlings
Once seedlings emerge, remove the plastic wrap and move them to a bright, indirect light spot. Avoid direct sun at first—young cedars can scorch easily. After 2-3 weeks, gradually introduce them to morning sunlight for 2-3 hours daily, increasing exposure over time.
Water seedlings when the top inch of soil feels dry, using a spray bottle to avoid disturbing the delicate roots. Fertilize lightly with a balanced 10-10-10 fertilizer (half-strength) once a month during the growing season. By 6 months, you’ll have sturdy young trees ready for transplanting.
🪴 Step 5: Transplant Seedlings Outdoors
Choose a sunny, well-draining location with space to grow—cedars can reach 30-40 feet tall! Transplant in spring or early fall when temperatures are mild. Dig a hole twice as wide as the root ball but no deeper.
Water the seedlings thoroughly before transplanting to reduce shock. Place the tree in the hole, backfill with soil, and water deeply again. Mulch around the base with 2-3 inches of organic mulch to retain moisture and suppress weeds. Keep the area moist but not soggy for the first year—young cedars need consistent care to establish strong roots.
Tips & tricks for perfect cedar seed pod germination
Here's what nobody tells you about turning those tricky cedar seed pods into thriving saplings.
Harvesting Timing: The 2-week air-drying period in Step 1 is non-negotiable—this prevents mold while ensuring the pods are completely dry before stratification. I've learned the hard way that rushing this step leads to moldy seeds. Place pods in a single layer on a screen or mesh to maximize airflow during drying.
Stratification Insight: During the 60-90 day cold treatment in Step 2, the refrigerator's crisper drawer (around 35-40°F) works better than the main compartment for consistent temperatures. If your fridge fluctuates, consider using a seed stratification fridge mat or even a DIY setup with a cooler and ice packs. The key is maintaining steady cold—don't let it warm above 45°F during this period.
Light Transition Strategy: When moving seedlings to sunlight in Step 4, start with just 1 hour of morning sun on the first day, then gradually increase by 30 minutes daily. This prevents sunburn on delicate young leaves. I use a timer to track sunlight exposure—cedars can get stressed if exposed too quickly to full sun.
Transplanting Preparation: Before transplanting in Step 5, harden off your seedlings by placing them outdoors in their pots for 2-3 hours daily during the week before transplanting. This gradual acclimation reduces transplant shock by 40%. Also, water the seedlings thoroughly the night before transplanting to ensure they're well-hydrated for the move.
Pro Tips for Cedar Seed Pods
- Here's what nobody tells you about turning those tricky cedar seed pods into thriving saplings.
- Harvesting Timing: The 2-week air-drying period in Step 1 is non-negotiable—this prevents mold while ensuring the pod...
- Stratification Insight: During the 60-90 day cold treatment in Step 2, the refrigerator's crisper drawer (around 35-4...
Frequently asked questions
Got questions about growing cedar seed pods? You’re not alone!
Here are some of the most common queries—and their answers—to help you navigate the process like a pro.
When is the best time to harvest cedar seed pods?
Harvest cedar seed pods in late fall or winter (November–February) when they’re fully brown and dry. Avoid green pods—they won’t germinate well! Look for pods that open easily when squeezed, signaling maturity. Pro tip: Collect them after a frost for best results.
How long does it take for cedar seeds to germinate?
Cedar seeds need stratification (cold treatment) to break dormancy. After 30–90 days in the fridge (moist sand method), germination typically takes 2–4 weeks in warm, moist soil. Patience is key—some seeds may take longer!
Can I use cedar seed pods from my yard if they’re from a tree with pests?
If your cedar tree has bagworms, spider mites, or other pests, avoid using those pods. Pests can hitch a ride! Instead, source seeds from a healthy, pesticide-free tree or buy certified organic seeds to prevent issues.
What’s the easiest way to stratify cedar seeds at home?
Mix seeds with moist sand or peat moss in a sealed container, then refrigerate for 60–90 days. Check moisture weekly—seeds should stay damp but not soggy. After stratification, plant in well-draining soil for optimal sprouting.
Will cedar seed pods grow into full-sized trees?
Yes! With proper care, cedar seedlings will grow into mature trees (15–40 feet tall, depending on the species). Start with a sunny spot, consistent watering, and patience. Thinning seedlings early ensures stronger growth—just leave the healthiest 2–3 inches apart.
Wrapping up and next steps
Cedar seed pods are a treasure trove for gardeners—packed with potential for growing resilient trees with minimal effort! By mastering the art of harvesting, stratifying, and planting these pods, you’re not just nurturing seeds; you’re cultivating a legacy of shade, wildlife support, and natural beauty. 🌱
Ready to turn those tiny pods into towering cedars? Start small: gather your supplies, follow the steps, and watch as nature rewards your patience with lush, thriving saplings.
Whether you’re a beginner or a seasoned gardener, every seed you plant is a step toward a greener, healthier landscape. Happy growing! 🌲✨