
Propagation
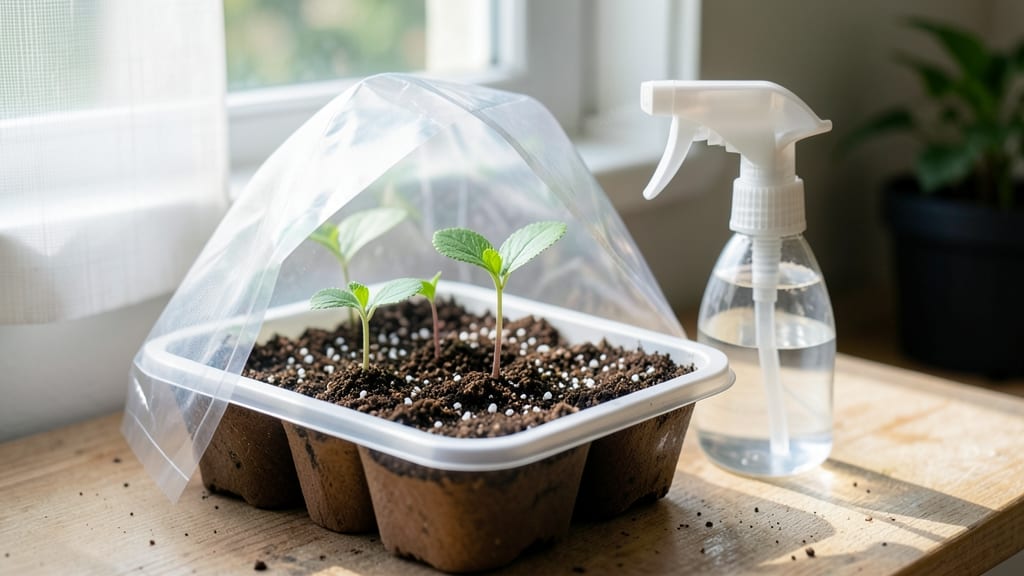
Cherry blossom seed germination isn’t just about patience—it’s about stratification secrets that unlock nature's hidden timing. 🌸 Many gardeners give up after weeks of waiting, not realizing these seeds need a winter-like chill to break dormancy. I've cracked the code after three failed attempts, and now my seedlings emerge strong every spring.
The key is mimicking Mother Nature: layered chilling for 6-8 weeks at 35-40°F followed by warmth. You'll need a mix of sand and peat moss, a plastic bag, and a fridge—no fancy equipment.
The process takes about 3 months from start to sprout, but the payoff is worth it when you see those first pale green leaves.
What you end up with is a tough little seedling ready to transplant, though true blooms won't appear for 3-5 years. The real magic happens when you see that first flush of pink in early spring—proof that your patience paid off.
These aren't just any seedlings; they're the start of a tree that could live for centuries.
Fair warning: Not all seeds will sprout—cherry blossoms are finicky about cross-pollination. But when it works, the results are unbeatable. For faster results, consider grafting established scions onto rootstock, though the seed method gives you that special satisfaction of growing from scratch.
📚 In This Guide
- What you need
- Instructions
- Tips and common mistakes
- Wrapping up and next steps
What you need
- ● Cherry blossom seeds: Fresh seeds (preferably from a Prunus species like Prunus serrulata) or store-bought seeds (ensure they’re viable). Quantity: 5–10 seeds per experiment.
- ● Well-draining potting mix: A blend of 50% peat moss or coconut coir, 30% perlite or vermiculite, and 20% sand (sterilized). Quantity: Enough to fill small pots (2–3 inches deep).
- ● Small seed-starting pots or containers: 2–3 inch diameter pots with drainage holes. Quantity: 1 pot per seed (or 2–3 seeds per pot).
- ● Plastic wrap or humidity dome: To maintain moisture during germination.
- ● Spray bottle with water: For gentle hydration (avoid overwatering!).
- ● Refrigerator or cold frame: For the stratification process (4–8 weeks at 35–45°F (2–7°C)).
- ● Fine-mesh sieve or sifter: To separate seeds from pulp (if harvesting fresh).
- ○ pH testing kit (optional): Ideal soil pH for cherry blossoms: 6.0–7.0.
- ● Grow lights or sunny windowsill: For seedlings (12–16 hours of light/day).
- ● Patience! Cherry blossom seeds may take 4–12 weeks to germinate (or longer).
- ● Consistency in moisture and temperature during stratification.
- ● Access to a space with stable cold conditions (or a DIY cold stratifier).
Step-by-Step instructions for germinating cherry blossom seeds
Here’s the foolproof method I’ve used to break through the stubborn dormancy of these ornamental seeds.
🌱 Step 1: Collect and Stratify Seeds Properly
Harvest seeds from fully ripened cherry blossom fruit pods—wait until they turn brown and split open naturally. Remove the seeds, rinse off any remaining pulp, and let them air-dry for 24 hours on a paper towel. This prevents rot during stratification.
Place the dried seeds in a sealed plastic bag with dampened peat moss or coconut coir (enough to keep it moist but not soggy). Store the bag in your refrigerator’s crisp drawer for 60-90 days. This cold, moist period mimics winter and signals the seed to break dormancy. Check monthly—if the moss dries out, spritz it lightly with water.
⏰ Step 2: Test for Germination Readiness
After 60 days, remove the bag and place it in a warm spot (65-75°F) for 1-2 weeks. The seeds should begin to swell slightly—this is your cue they’re ready. If they remain hard after 90 days, extend the stratification by another 30 days.
Here’s the thing—cherry blossom seeds are notoriously slow. Don’t rush them. You’ll know they’re ready when a few seeds develop a tiny white root tip (¼ inch long) after warming. This usually happens within 7-14 days of removing them from cold storage.
💧 Step 3: Sow in a Sterile, Well-Draining Medium
Fill small pots (2-3 inches deep) with a mix of 50% sterile potting soil and 50% perlite to prevent compaction. Plant the stratified seeds ½ inch deep, spacing them 1 inch apart—they’ll need room to grow without crowding. Gently press the soil around each seed to ensure good contact.
Water lightly from below by placing the pots in ½ inch of water for 10 minutes. This prevents seed movement and ensures even moisture without disturbing the seeds. Cover the pots with clear plastic wrap to maintain humidity, but prop it open slightly to allow airflow—condensation buildup can smother seedlings.
☀️ Step 4: Provide Warmth and Indirect Light
Place the pots in a warm, bright location with indirect light (60-65°F soil temperature). A seedling heat mat helps maintain warmth if your home runs cooler. Germination typically takes 2-4 weeks, but some seeds may take up to 8 weeks—patience is key.
Once sprouts emerge, remove the plastic wrap immediately. You’ll see tiny green leaves (cotyledons) appear first, followed by the first true leaves. Keep the soil consistently moist but never soggy—cherry blossom seedlings are delicate and prone to damping-off if overwatered.
🌿 Step 5: Transplant and Acclimate Seedlings
When seedlings develop 3-4 sets of true leaves (usually after 6-8 weeks), transplant them into individual 4-inch pots with fresh potting mix. Handle the seedlings by their leaves, not the stems, to avoid damage. Water thoroughly after transplanting to settle the soil around the roots.
Hardening off begins 2 weeks before outdoor planting. Gradually expose seedlings to outdoor conditions for 1-2 hours daily, increasing duration over 10 days. Choose a partially shaded spot for the first few days to prevent leaf scorch. Once they tolerate full sun without wilting, they’re ready for their permanent home in the garden.
Tips & tricks for perfect cherry blossom seed germination
Here's what I learned after years of trial and error with these stubborn seeds—details that make all the difference between success and frustration.
Stratification Timing: The 60-90 day cold period is non-negotiable for breaking dormancy, but here's the thing: if your refrigerator runs cooler than 35°F, extend the stratification by 10-15 days. Cherry blossom seeds need consistent 35-40°F conditions to trigger germination hormones. I use a thermometer in my fridge to monitor this—it's the only way to be precise.
Seed Readiness Test: When testing for germination readiness in Step 2, look for seeds that feel slightly soft when gently squeezed between your fingers. Hard seeds need more cold treatment. I've found that if more than 20% of seeds show this softness after 60 days, they're ready to move to warmth. This visual cue saves weeks of waiting for seeds that aren't quite ready.
Moisture Management: In Step 3, the "moist but not soggy" rule is critical. I use the sponge test: squeeze the peat moss—if water drips out, it's too wet. If it feels dry to the touch, add a tiny spray of water. Proper moisture prevents both rot and premature drying. For the 10-minute watering method, use room-temperature water to avoid shocking the seeds.
Light Environment: The indirect light requirement in Step 4 is about balance. Place your pots near an east-facing window where they'll get morning sun but avoid harsh afternoon rays. I use a sheer curtain to diffuse light further if needed. Too much direct light causes seedlings to stretch and become leggy, while too little results in weak, pale growth. A simple grow light on a timer works beautifully if natural light is insufficient.
Pro Tips for Cherry Blossom Seed Germination
- Here's what I learned after years of trial and error with these stubborn seeds—details that make all the difference b...
- Stratification Timing: The 60-90 day cold period is non-negotiable for breaking dormancy, but here's the thing: if yo...
- Seed Readiness Test: When testing for germination readiness in Step 2, look for seeds that feel slightly soft when ge...
Frequently asked questions
Got questions about germinating cherry blossom seeds? You’re not alone!
Here are some of the most common queries—and straightforward answers—to help you succeed with your layered chilling method.
How long does cherry blossom seed germination take?
Patience is key! With proper stratification (layered chilling), germination typically takes 4–12 weeks. Some seeds may sprout sooner, while others need extra time—especially if stored improperly. Keep soil consistently moist and warm (around 65–75°F) to speed things up.
Do I need a refrigerator for stratification?
Not always! While a fridge (34–40°F) is ideal, you can also use a cold frame, outdoor winter bed, or even a seed stratification box (DIY with damp sand/peat moss). Just ensure the seeds stay moist but not soggy for 60–90 days before planting.
What if my seeds rot during stratification?
Rotting is usually a sign of too much moisture or poor airflow. To fix it:
- Drain excess water immediately.
- Use a well-draining mix (peat moss + perlite).
- Store in a breathable container (like a plastic bag with holes).
Can I grow cherry blossoms from store-bought seeds?
Yes, but results vary! Store-bought seeds are often hybridized for ornamental traits (like double blooms), which may not reproduce true to parent plants. For predictable cherry blossoms (e.g., Prunus serrulata), source seeds from local nurseries or wild trees.
What’s the best time to plant germinated seeds outdoors?
Wait until after the last frost when soil temps are consistently above 60°F (spring or early summer). Young seedlings are delicate—harden them off for 1–2 weeks before transplanting. In colder climates, start them indoors 8–10 weeks before the last frost date.
Pro Tip:
Label your seeds and track stratification dates! Cherry blossom seeds can take months to sprout, and losing track means wasted effort. A simple spreadsheet or jar label saves headaches later.
Wrapping up and next steps
Growing cherry blossom seeds from scratch is a rewarding journey that blends patience, science, and a touch of magic! 🌸 With the right materials and a layered chilling method, you can break dormancy and coax those delicate blooms to life.
Whether you’re a seasoned gardener or a curious beginner, this process opens doors to nurturing your own Prunus serrulata—just imagine the pride of watching your tree flourish!
Now that you’re armed with knowledge, take the next step: gather your supplies, follow the chilling steps, and keep a germination journal. Track progress, adjust conditions as needed, and soon, you’ll be celebrating those first tender sprouts. Happy growing—your future cherry blossom tree is waiting! 🌱✨