
Lawn
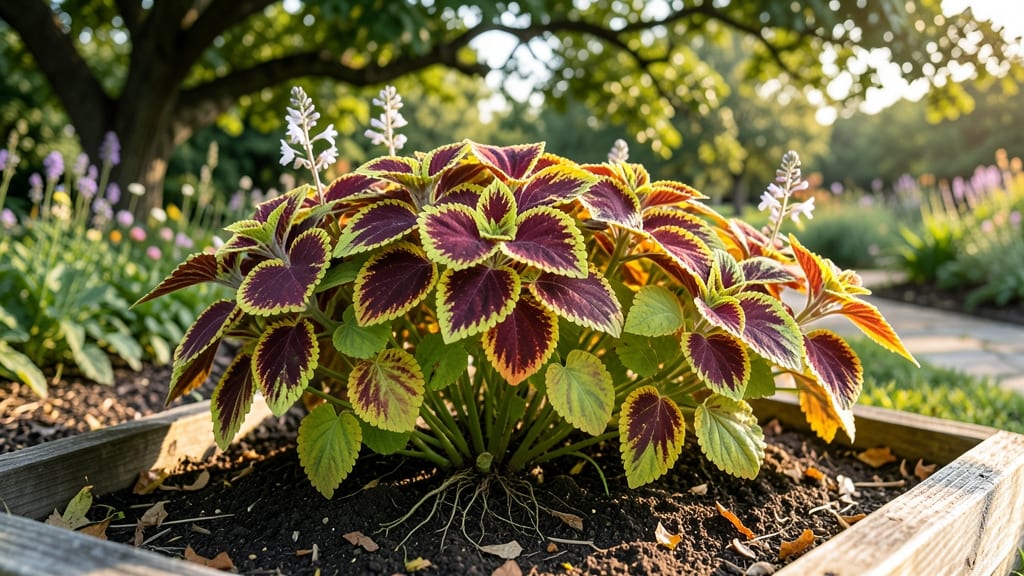
Coleus seed collection saves you from buying new plants every year—and the twist test is the secret to knowing which seeds will actually grow. 🌿 I’ve learned that not all seed pods contain viable seeds, but with the right timing and a little pressure, you can predict which ones will sprout next spring. The process starts when those papery pods turn brown and crispy, signaling it’s time to harvest.
You’ll need just a few simple tools: sharp scissors or pruners, a small paper bag for collecting, and a dry, cool place for storage. The twist test itself is quick—gently squeeze a seed pod between your fingers.
If it feels hollow, it’s empty; if it resists slightly, there’s a good chance seeds inside are ready for saving. This method cuts down on wasted effort and ensures you only store seeds with potential.
Once you’ve gathered your seeds, store them in an airtight container with a desiccant packet to keep moisture out. Label everything with the variety name and date—coleus seeds stay viable for about 2-3 years if stored properly.
When spring rolls around, you’ll have a head start on vibrant foliage that’s uniquely yours, without the cost or hassle of buying new plants.
This method works for both beginners and seasoned gardeners, though experienced hands might experiment with stratification for extra reliability. The key is patience: let nature do the work, and you’ll reward yourself with next year’s lush, twist-tested varieties growing strong from seeds you collected yourself.
📚 In This Guide
- What you need
- Instructions
- Tips and common mistakes
- Wrapping up and next steps
What you need
- ● Mature coleus plants: Choose healthy, thriving plants with vibrant foliage (at least 6–12 inches tall). Pro tip: 💡 Pick varieties known for seed production (e.g., 'Black Dragon' or 'Wine & Roses').
- ● Scissors or pruning shears: Sharp, clean tools to snip seed heads without damaging the plant.
- ● Brown paper bags (2–3): Labeled with plant names and collection dates (use 12x15-inch size for easy handling).
- ● Twist ties or rubber bands: To seal bags securely once seeds are collected.
- ● Permanent marker: For labeling bags with details like variety and harvest date.
- ● Magnifying glass: To inspect seed heads for maturity (seeds should be dry and hard).
- ● Fine mesh strainer: For separating seeds from chaff if you prefer hand-sorting.
- ● Seed drying tray or screen: To spread seeds thinly for even drying (avoid humidity!).
- ● Humidity pack (silica gel): Place a small packet in the bag to absorb excess moisture during storage.
- ● Notebook or app: To track seed viability tests (e.g., twist tests) for future reference.
- ● Patience: Coleus seeds take 6–8 weeks to mature after flowering—wait until seed pods turn brown and crispy!
- ● Sunlight: Ensure plants receive 4–6 hours of direct light daily to encourage flowering.
- ● Warmth: Ideal temperatures for seed production: 70–80°F (21–27°C).
- ● Space: Allow plants to grow undisturbed until seeds are ready (avoid heavy pruning).
Step-by-step guide to collecting and testing coleus seeds
Here's how I ensure my favorite coleus varieties come back stronger every season.
🌿 Step 1: Select Healthy Plants for Seed Collection
Choose the most vibrant, disease-free coleus plants in your collection. Look for plants with bold, healthy foliage and no signs of pests or fungal spots. I always pick the varieties with the most striking colors—those are the ones I want to propagate next year. Avoid plants that have been heavily pruned or stressed, as their seeds may not be viable.
Harvest seeds from plants that have already produced flowers and seed pods. Coleus flowers are small and often overlooked, but they develop into green, papery seed pods that eventually turn brown. Wait until these pods are fully mature and starting to split open naturally before collecting. This usually happens in late summer to early fall, depending on your climate.
⏰ Step 2: Harvest and Dry the Seed Pods
Gently twist open the dried seed pods to release the tiny, flat, oval seeds inside. I like to do this over a clean piece of paper or a small tray to catch any seeds that might fall. Avoid shaking the pods too hard—coleus seeds are delicate and can be easily damaged. If some seeds stick to the pod, use a fine-toothed comb or your fingers to gently scrape them off.
Spread the collected seeds in a single layer on a piece of paper or a mesh screen in a warm, dry place. Keep them out of direct sunlight but in a spot with good airflow, like a windowsill or a small fan on low. Let them dry for 3-5 days until they feel crisp and light to the touch. Proper drying prevents mold and ensures better germination rates.
💧 Step 3: Test Seed Viability with the Twist Test
This is the fun part—testing which seeds will actually grow! Take a small handful of dried seeds and pinch them gently between your thumb and forefinger. A viable coleus seed will feel firm but slightly pliable, almost like a tiny bean. If a seed feels hollow or crumbles easily, it’s not worth planting. I usually test 10-20 seeds from each variety to get a good sense of viability.
For a more precise test, soak a few seeds in warm water for 10-15 minutes. Viable seeds will sink to the bottom of the glass, while empty or non-viable ones will float. This method is especially useful if you’re unsure about the quality of your dried seeds. Once you’ve identified the good ones, store them in a paper envelope in a cool, dry place until planting time.
🪴 Step 4: Store Seeds Properly for Next Season
Label each envelope with the coleus variety and the year collected. I also jot down a few notes about the plant’s performance—like how vibrant the foliage was or any unique traits—so I can track which varieties do best over time. Store the envelopes in a sealed container with a silica gel packet or a few grains of uncooked rice to absorb excess moisture.
Coleus seeds can stay viable for 1-2 years if stored properly in a cool, dark place, like a refrigerator or a basement. Check on them occasionally to make sure no mold has developed. When it’s time to plant, sow the seeds in well-draining potting mix and keep them warm and moist until germination, which usually takes 10-14 days.
☀️ Step 5: Prepare for Next Year’s Planting
In early spring, fill small pots with sterile seed-starting mix and plant the seeds ¼ inch deep. Coleus seeds germinate best in warmth (70-75°F), so I use a seedling heat mat to keep the soil cozy. Keep the soil moist but not soggy—coleus seedlings are sensitive to overwatering, which can cause damping-off.
Once the seedlings have 2-3 sets of true leaves, you can transplant them into larger pots or directly into the garden after the last frost. Thin out weaker seedlings to give the strongest ones plenty of room to grow. With a little care, you’ll have a fresh batch of lush, colorful coleus plants ready to brighten up your garden by midsummer.
Tips & tricks for perfect coleus seed collection
Don't let those tiny seeds fool you—these tricks will help you maximize your coleus seed collection every year.
Timing is Everything: I can't stress enough how important it is to wait for those seed pods to fully mature and start splitting naturally. If you harvest too early, the seeds inside won't be fully developed. Look for pods that have turned completely brown and are beginning to crack open—this usually happens in late summer to early fall. If you're unsure, wait a few extra days rather than harvesting too soon. The extra patience pays off with better germination rates.
Harvest Technique Matters: When collecting seeds, be gentle! I've learned the hard way that shaking those pods too vigorously can damage the delicate seeds inside. Instead, twist them open carefully over a clean surface. For stubborn seeds that stick to the pod, a fine-toothed comb or your fingers work better than shaking. This careful approach gives you the best chance of collecting intact, viable seeds ready for testing.
Viability Testing: The twist test is my go-to method for quickly assessing seed quality. After drying, pinch a few seeds between your thumb and forefinger—viable ones should feel firm but slightly pliable, like tiny beans. For extra accuracy, soak a few seeds in warm water for exactly 10-15 minutes (as mentioned in Step 3). The ones that sink are your winners! This simple test saves you from planting seeds that won't grow, ensuring you only use the best ones for next season.
Pro Tips for Coleus Seed Collection
- Don't let those tiny seeds fool you—these tricks will help you maximize your coleus seed collection every year.
- Timing is Everything: I can't stress enough how important it is to wait for those seed pods to fully mature and start...
- Harvest Technique Matters: When collecting seeds, be gentle! I've learned the hard way that shaking those pods too vi...
Frequently asked questions
Got questions about saving coleus seeds for next season? You’re not alone! Here are some of the most common queries—plus straightforward answers to help you master the process.
How do I know when coleus flowers are ready for seed collection?
Look for brown, papery seed pods that split open naturally—this usually happens 4–6 weeks after flowering. Avoid harvesting green pods, as seeds inside won’t be mature. Wait until pods crack on their own for the best viability.
Why aren’t my coleus seeds germinating after collection?
Coleus seeds are fickle—they often need stratification (a cold treatment) or freshness. Try these fixes:
- Store seeds in a paper envelope in the fridge for 4–6 weeks before planting.
- Check for moisture during germination (keep soil damp, not soggy).
- Use seed-starting mix, not garden soil, for better results.
Can I collect seeds from store-bought coleus plants?
Yes, but with a caveat—many hybrid varieties (like colorful foliage types) produce unpredictable offspring. If you want true-to-type plants, opt for heirloom or open-pollinated coleus. For fun, try it anyway—you might discover a wild new variety!
What’s the best time of year to collect coleus seeds?
Timing is key! Collect seeds in late summer to early fall (August–September in most climates) when pods are dry and ready. If you miss the window, deadhead spent flowers early to redirect energy to foliage—saving seeds for next year is a bonus, not a priority.
Do I need to dry coleus seeds before storing them?
Spread seeds on paper towels in a warm, dry spot for 3–5 days to prevent mold. Once fully dry (they’ll rattle in the pod), store them in a cool, dark place (like a sealed jar in the fridge) for up to 2 years. Pro tip: Label them with the variety and date!
Wrapping up and next steps
Collecting coleus seeds is a rewarding way to preserve your favorite varieties and ensure a vibrant garden next season! 🌱 By mastering the twist-test for viability and following proper drying and storage techniques, you’ll set yourself up for success.
Whether you’re a seasoned gardener or a beginner, this process opens the door to experimenting with new colors and patterns—so grab those seeds and get growing!
Ready to take the next step? Start small—try collecting seeds from just a few plants this year, then expand as you gain confidence. Happy gardening! 🌿