
Lawn
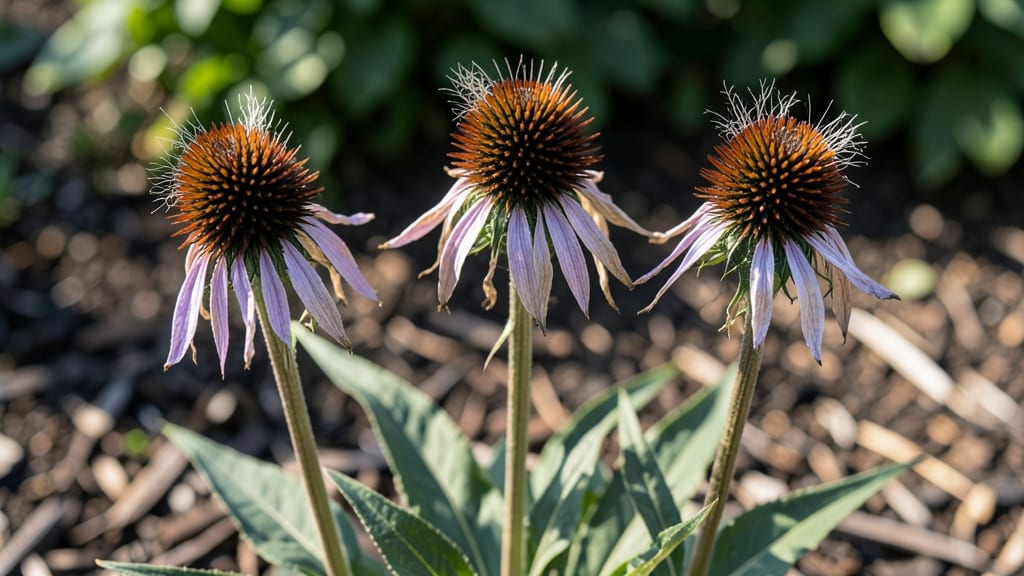
Harvesting coneflower seed heads the right way keeps your garden blooming for years—and saves you from the frustration of dried, brittle stems that snap mid-twist. 🌻 I’ve learned that patience and timing are everything, because those fluffy pink-and-brown seed heads hold the key to next season’s vibrant blooms and a buffet for hungry birds.
The secret starts in late summer when the seed heads turn from green to tan but are still firm to the touch.
Snip them cleanly with pruners, leaving a short stem, then bundle them upside-down in a paper bag for 2-3 weeks—this mimics nature’s drying process without losing a single seed. No more wrestling with stubborn stems or watching seeds scatter in the wind.
Once fully dry, you’ll have two options: store the seeds in an airtight container for spring planting, or leave some seed heads on the stems to feed goldfinches and chickadees through winter.
The dried blooms also add rustic charm to dried arrangements, so you’re not just preserving seeds—you’re extending the plant’s beauty and its ecological value.
For best results, harvest on a dry morning when humidity is low, and avoid storing seeds in damp areas. If you’re new to this, start with just a few seed heads—once you see how easy (and rewarding) it is, you’ll be saving seeds from every coneflower in your garden.
📚 In This Guide
- What you need
- Instructions
- Tips and common mistakes
- Wrapping up and next steps
What you need
- ● Mature coneflower plants: Choose healthy, fully bloomed Echinacea plants with dried seed heads (late summer/fall).
- ● Pruning shears or sharp scissors: Sterilized tools to avoid spreading disease.
- ● Brown paper bags or breathable mesh sacks: 1 per 10–15 seed heads (e.g., 5–10 bags for a small harvest).
- ○ Newspaper or cardboard: For drying seed heads indoors (optional but helpful).
- ● Small wooden sticks or toothpicks: To prop open seed heads for faster drying.
- ● Air-tight storage containers: Glass jars, plastic bins, or resealable bags with silica gel packets (for long-term storage).
- ● Gloves: To protect hands from prickly seed heads.
- ● Fan or dehumidifier: For faster drying in humid climates.
- ● Labeling tags & permanent marker: To track seed varieties and harvest dates.
- ● Seed tray or flat surface: For organizing seed heads before storage.
Step-by-step guide to harvesting and storing coneflower seed heads
Here's how I preserve coneflower seeds without the frustrating twists and turns—keeping them viable for next year's garden.
🌿 Step 1: Identify Mature Seed Heads
Wait until the coneflower blooms fade and the central cone turns from green to tan or brown. This signals seed maturity. Gently squeeze the dried cone—if seeds rattle inside, they're ready. Harvest too early, and seeds won't fully develop; wait too long, and they'll scatter on their own.
I like to harvest on a dry morning after dew has evaporated. This prevents moisture from sticking to the seed heads, which can encourage mold. Cut stems 4-6 inches below the seed head using clean pruners or shears—this leaves enough stem to handle without breaking.
🌱 Step 2: Dry Seed Heads Properly
Bundle the harvested seed heads together and hang them upside down in a well-ventilated, dry space>. A garage, shed, or even a kitchen cabinet works as long as it's 60-70°F and free from humidity. This mimics their natural drying process and prevents premature seed release.
Check them weekly—if seeds start falling out, they're ready. If not, give them another 1-2 weeks of drying time. The goal is to dry them completely so the seeds stay viable for planting next season. I usually see seeds fully mature in 2-4 weeks, depending on your climate.
✂️ Step 3: Extract Seeds Without Twisting
Once the seed heads are bone-dry, place one on a clean sheet of paper or a tray. Gently rub the cone between your fingers or use a fork to scrape out the seeds. Avoid shaking or twisting—the delicate seed heads can shatter, wasting your harvest. If you're impatient, place the dried cone in a paper bag and shake it gently over the tray to catch falling seeds.
I like to spread the seeds on the tray to air-dry for an extra 24 hours. This final step ensures any lingering moisture evaporates, keeping seeds from spoiling in storage. Remove any chaff or debris with a small sieve or by blowing gently—clean seeds store better and germinate more reliably.
🪴 Step 4: Store Seeds for Long-Term Viability
Transfer the dried seeds into a paper envelope or airtight container>. Label it with the coneflower variety and the harvest date—seeds lose viability over time, and freshness matters. Store in a cool, dark place>, like a refrigerator or seed vault, where temperatures stay 35-45°F.
Coneflower seeds remain viable for 2-3 years> when stored properly. Check them annually—if they smell musty or develop mold, discard them. For best results, plant seeds within 1 year> of harvest to ensure strong germination. I always plant a few fresh seeds each spring to test viability before using older stock.
⏰ Step 5: Prepare for Next Season's Planting
In early spring, fill small seed-starting trays with well-draining potting mix>. Plant seeds ¼ inch deep>, spacing them ½ inch apart> to avoid overcrowding. Keep the soil moist but not soggy> until germination, which typically takes 10-20 days> in optimal conditions.
Once seedlings develop 2-3 sets of true leaves>, transplant them into individual pots or directly into the garden. Coneflowers thrive in full sun> and well-drained soil>, so choose a spot with at least 6 hours of sunlight daily>. With proper care, your stored seeds will yield beautiful blooms just like the original plant.
Tips & tricks for perfect coneflower seed collection
These little tricks will help you avoid common pitfalls and maximize your coneflower seed harvest every season.
Timing is Everything: The 24-hour air-drying period after seed extraction is your secret weapon against spoilage. I spread seeds on a tray and let them dry completely before storage—this extra step prevents mold and extends viability. If you're short on time, a small fan on low setting can speed up drying while maintaining quality.
Harvesting Technique: In Step 1, when cutting those stems 4-6 inches below the seed head, make clean cuts with sharp pruners. Ragged cuts can introduce bacteria, and longer stems make handling messy. I always clean my tools with rubbing alcohol between batches to prevent cross-contamination.
Storage Wisdom: The 35-45°F storage temperature range might seem strict, but it's worth it. I keep my seed envelopes in the back of my refrigerator where it stays consistently cool. For larger quantities, a seed vault or even a basement with good airflow works beautifully—just avoid attics or garages that get too warm or humid.
Seed Viability Check: Before planting older seeds, do this quick test: place 10 seeds between damp paper towels in a sealed bag. Check for sprouts in 7-10 days. If 50% or more sprout, they're still good to plant. This simple test saves you from wasting seeds that might not germinate.
Pro Tips for Coneflower Seed Heads
- These little tricks will help you avoid common pitfalls and maximize your coneflower seed harvest every season.
- Timing is Everything: The 24-hour air-drying period after seed extraction is your secret weapon against spoilage.
- Harvesting Technique: In Step 1, when cutting those stems 4-6 inches below the seed head, make clean cuts with sharp pruners.
Frequently asked questions
Got questions about harvesting, storing, or using coneflower seed heads?
Here are answers to the most common ones—so you can make the most of these drought-tolerant beauties year-round!
When is the best time to harvest coneflower seed heads?
Harvest seed heads once they turn tan or brown (usually late summer to early fall). Wait until the center cones dry out but before they shatter—ideally when about 70% of the seeds are mature. Morning harvests prevent humidity buildup, ensuring longer storage life.
How long can I store harvested coneflower seeds?
Store seeds in a cool, dry place (like a paper envelope or breathable bag) for 1–2 years. For longer viability, refrigerate or freeze them in sealed containers. Pro tip: Label with the harvest date—fresh seeds sprout faster!
Can I replant coneflower seeds from store-bought flowers?
Yes! Many garden centers sell coneflowers with viable seeds. Just twist off the dried seed heads, separate the seeds from chaff, and plant them in well-draining soil. Note: Seed-grown plants may not match hybrid colors exactly, but they’ll thrive with minimal care.
Why are my seed heads attracting pests like bees or rodents?
Dried seed heads are a natural food source for wildlife. To deter pests, harvest seeds promptly or shake heads over a tarp to collect seeds before they become a buffet. For heavy infestations, use fine mesh bags during storage.
What’s the easiest way to clean coneflower seeds?
Rub dried seed heads over a white towel or screen to separate seeds from chaff. For stubborn debris, use a fan to blow lighter chaff away. Bonus: Save the chaff for mulch—it’s nutrient-rich!
Wrapping up and next steps
Coneflower seed heads are a gardener’s hidden treasure—packed with beauty, resilience, and year-round potential! Whether you’re saving seeds for next season, crafting dried arrangements, or feeding wildlife, mastering twist-free harvesting ensures success.
Now that you’re equipped with the right tools and techniques, there’s no limit to what you can create—so grab those pruners, head outdoors, and let your creativity (and coneflowers!) bloom.
🌱 Next step: Start small—try harvesting a few seed heads this week and experiment with storage or crafting. Share your progress (or blooms!) with fellow gardeners for extra inspiration!