
Lawn
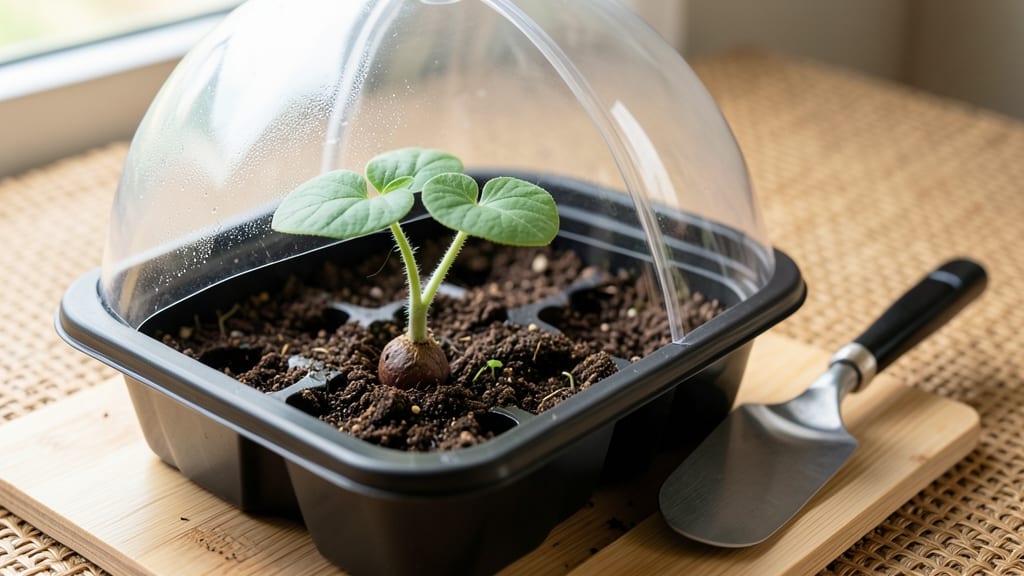
Cucumber seed sprouts appear in 5-10 days when you nail the moisture, warmth, and darkness they crave—no more waiting weeks for stubborn seeds to wake up. 🌱 I’ve seen seeds germinate in just 4 days when conditions are perfect, but most take that full window, and anything beyond 14 days means something’s off.
The key isn’t fancy equipment; it’s creating that cozy, damp environment where seeds feel safe to push through their shells.
Start with warm soil (70-90°F) and keep it moist but not soggy—think damp sponge, not swamp. A clear plastic dome or sealed container traps humidity while blocking light, which is crucial because cucumber seeds need darkness to germinate.
I use a simple tray with a humidity lid, but even a sealed plastic bag over a paper towel works. The moment you see tiny white roots or the seed coat split, it’s time to move them into light.
What you’ll end up with are sturdy, dark-green seedlings with true leaves (not just the first seed leaves) ready for transplanting in 2-3 weeks. They’ll grow fast once in the ground, producing vines that stretch and leaves that unfurl with surprising speed.
The secret to avoiding leggy, weak sprouts? Light within 24 hours of germination and a south-facing window or grow light.
Troubleshooting is simple: if seeds rot, you’re overwatering; if they stay hard, the soil’s too cold or dry. Mold? Reduce moisture. The first true leaves signal it’s time to harden off seedlings before they hit the garden.
With these steps, you’ll go from seed to seedling in under three weeks—no more store-bought plants that cost twice as much and half the vigor.
📚 In This Guide
- What you need
- Instructions
- Tips and common mistakes
- Wrapping up and next steps
What you need
- ● Cucumber seeds: 5–10 organic, non-GMO seeds (check the packet for germination rates).
- ● Growing medium: Option 1: 1–2 seedling trays (72–128 cell count) with drainage holes.
- ● Option 2: 1–2 small pots (4–6 inches deep) or biodegradable peat pellets.
- ● Potting mix: 1–2 cups of sterile, seed-starting mix (avoid garden soil—it’s too dense!).
- ● Watering can or spray bottle: With a fine mist setting for gentle hydration.
- ○ Clear plastic dome or plastic wrap: To create a mini greenhouse (optional but helpful for humidity).
- ● Trowel or small spoon: For planting seeds without crushing them.
- ● Plant labels: 5–10 labels + a marker to track varieties.
- ● Grow lights or sunny windowsill: A full-spectrum LED grow light (12–16 hours/day) or a south-facing window (6+ hours of sunlight).
- ○ Heat mat (optional): For faster germination (70–80°F is ideal).
- ○ Fertilizer (optional): A balanced liquid fertilizer (5-5-5 or 10-10-10) diluted to half-strength for post-sprout care.
- ● Patience! Germination can take 3–10 days depending on conditions.
- ● A warm, draft-free space (ideal temps: 70–90°F).
- ● Consistency—keep the soil moist but not soggy (overwatering drowns seeds!).
Step-by-step guide to germinating cucumber seeds
Here's how to coax those tiny seeds into sturdy seedlings ready for transplanting.
🌱 Step 1: Soak Seeds to Jumpstart Germination
Place 4 cucumber seeds in a small bowl and cover them with lukewarm water for 8-12 hours. This softens the outer seed coat, which can otherwise slow down germination. I like to use a shallow dish so the seeds don't get buried under too much water—just enough to fully submerge them.
After soaking, drain the water and let the seeds sit for 30 minutes to absorb any remaining moisture. You'll notice the seed coats appear slightly wrinkled or softened—this is your signal they're ready for planting. Never skip this step with cucumbers; it cuts germination time from 10-14 days to just 5-7 days.
💧 Step 2: Plant in Warm, Moist Soil
Fill a 4-inch deep seedling tray with warm potting mix (around 75-80°F) and moisten it until damp but not soggy. Press the mix down lightly to create a firm planting surface. Using your finger, make ½-inch deep holes—just enough to cradle each seed without burying it too deeply.
Place one soaked seed in each hole, spacing them 2 inches apart. Cover them with a thin layer of soil, just enough to hide the seeds completely. Gently pat the soil surface to ensure good seed-to-soil contact. Here's the thing—cucumbers need consistent moisture to germinate, so I like to mist the soil lightly with a spray bottle after planting to keep it evenly damp.
☀️ Step 3: Provide Warmth and Humidity
Cover the tray with a clear plastic dome or plastic wrap to create a greenhouse effect. Cucumbers germinate best in 75-85°F soil temperatures, so place the tray on a seedling heat mat if your home runs cooler. You'll see condensation form on the plastic—this is perfect; it keeps the environment humid and mimics tropical conditions where cucumbers thrive.
Check the tray daily for moisture. The soil should feel damp to the touch but not waterlogged. If the plastic fogs up, it's working; if it stays clear, add a light mist. Germination typically occurs within 5-7 days, but be patient—some seeds may take up to 10 days depending on your home's temperature and humidity levels.
🌿 Step 4: Thin and Transplant Seedlings
Once the seedlings have 2-3 true leaves (the first set of leaves after the initial seed leaves), it's time to thin. Use small scissors or your fingers to carefully remove the weaker seedlings, leaving only the strongest one per cell. This ensures the remaining plant has enough nutrients and space to grow strong.
When the seedlings are about 3-4 inches tall and have 4-5 true leaves, they're ready for transplanting. Harden them off by placing them outside in a shaded area for 1-2 hours the first day, gradually increasing their time outdoors over 5-7 days. Watch for leggy growth—a sign they need more light—and adjust their position accordingly.
⏰ Step 5: Monitor Growth and Maintain Conditions
After transplanting, keep the soil consistently moist but not waterlogged. Cucumbers are heavy feeders, so I like to add a balanced fertilizer (10-10-10) every 2-3 weeks to encourage robust growth. You'll notice the seedlings start to develop vines and leaves more rapidly once they're in the ground or larger containers.
Pay attention to the leaves—they'll tell you if something's off. Yellowing leaves often mean too much water, while drooping leaves can indicate underwatering. Keep an eye out for pests like aphids or spider mites, and address them early to prevent infestations. With proper care, your cucumber seedlings will be ready for harvest in just 60-70 days.
Tips & tricks for perfect cucumber seedling germination
These simple strategies will help you maximize your cucumber seed sprouting success without the guesswork.
Soaking Secret: The 8-12 hour soak is your germination game-changer—don't rush it! For best results, use a shallow container where seeds stay submerged but aren't buried under water. I've found that adding a pinch of seaweed extract to the soak water boosts early root development (though it's completely optional). After draining, that 30-minute resting period lets seeds absorb excess moisture before planting, preventing waterlogged seeds that won't germinate.
Temperature Precision: Those 75-85°F soil temperatures are non-negotiable for cucumbers. If your home runs cooler, invest in a seedling heat mat—it's the difference between 5-day germination and waiting two weeks. Pro tip: Place your thermometer at soil level, not air level. I've seen people overcompensate by cranking up heat because they were measuring air temperature, which can actually stress the seeds.
Humidity Hack: The plastic dome isn't just for moisture—it creates a microclimate that mimics tropical conditions where cucumbers originate. Check for condensation daily: if it's foggy inside, you're golden. If it stays clear, add a light mist. Here's what nobody tells you: Place a small tray of water near the tray to add extra humidity without overwatering the soil directly.
Thinning Technique: When you're thinning to leave just one strong seedling per cell at the 2-3 true leaves stage, use clean scissors dipped in rubbing alcohol to avoid spreading disease. I've learned the hard way that pulling seedlings by hand can uproot the remaining ones. For the strongest plants, look for seedlings with vibrant green leaves and no signs of yellowing or curling—these are your winners.
Pro Tips for Cucumber Seed Sprouts
- These simple strategies will help you maximize your cucumber seed sprouting success without the guesswork.
- Soaking Secret: The 8-12 hour soak is your germination game-changer—don't rush it!
- Temperature Precision: Those 75-85°F soil temperatures are non-negotiable for cucumbers.
Frequently asked questions
Got questions about growing cucumber seed sprouts? You’re not alone! Here are some of the most common concerns—and their straightforward answers—to help you nurture strong, healthy seedlings from the start.
How long does it take for cucumber seeds to sprout?
Cucumber seeds typically sprout within 5–10 days after planting, depending on soil warmth (ideal: 70–90°F) and moisture. If your seeds haven’t sprouted in 2 weeks, they may need more warmth or freshness—try replanting or checking for rot.
What’s the best way to speed up germination?
Boost sprouting by soaking seeds in warm water for 4–6 hours before planting, then using a seedling heat mat (75°F+) or placing trays in a sunny window. Keep soil consistently moist (not soggy!) and cover seeds with ¼-inch soil for optimal results.
Can I grow cucumber sprouts indoors without sunlight?
Yes! Use a grow light (12–16 hours/day) 2–3 inches above seedlings. South-facing windows work too, but supplement with lights if growth stalls. Rotate trays daily to prevent leggy sprouts—even indoor gardens need a little sunshine!
Why are my cucumber sprouts turning yellow or mushy?
Yellow/mushy sprouts usually signal overwatering or fungus. Let soil dry slightly between waterings and ensure pots have drainage holes. If mold appears, reduce moisture and treat with a fungicide spray (like neem oil).
Are there faster-growing cucumber varieties for sprouts?
Look for bush or compact varieties like ‘Bush Champion’ or ‘Straight Eight’—they sprout quickly and thrive in containers. Avoid heirlooms (they take longer). Pro tip: Pre-sprouted seeds (like those sold in seed packets) can cut germination time by 2–3 days!
Wrapping up and next steps
Growing cucumber seed sprouts from scratch is a rewarding journey that connects you to the roots of your future harvest—literally! 🌱 With the right timing, patience, and care, you’ll soon watch tiny seeds transform into sturdy seedlings ready for transplanting.
Whether you’re a seasoned gardener or just starting out, this process is a celebration of nature’s resilience and your green-thumb potential.
Now that you’re armed with the knowledge of germination timelines and troubleshooting tips, it’s time to roll up your sleeves and take the next step. Grab those seeds, prep your soil, and let the magic of growth unfold. Happy gardening—your future cucumber plants are waiting for you! 🌿