
Lawn
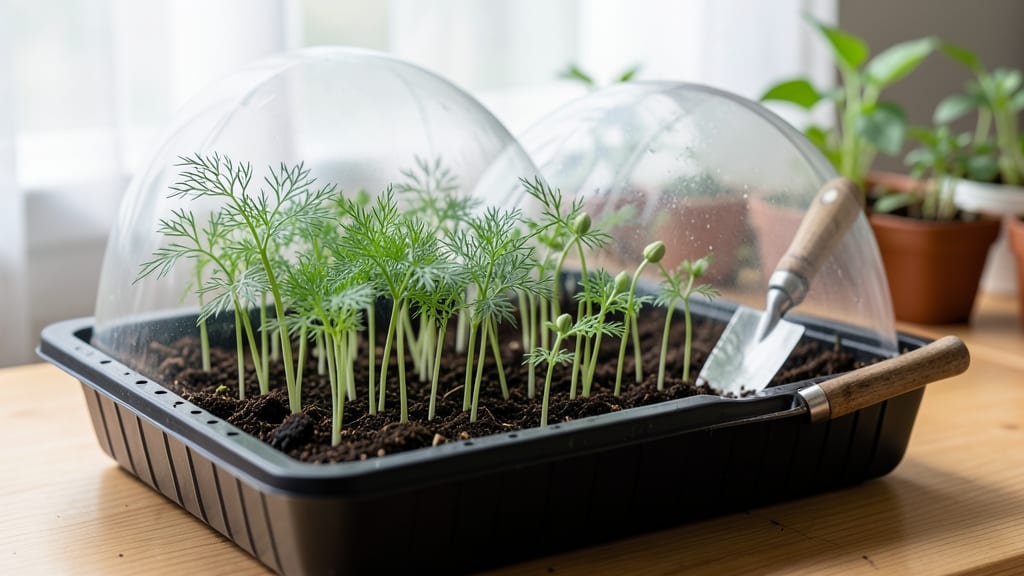
Dill seed sprouts pop up in just 4-7 days—the fastest way to get feathery, fragrant herbs on your windowsill or patio. 🌱 I’ve learned that the secret isn’t fancy equipment but keeping soil warm and moist, which tricks those tiny seeds into waking up faster than anything else in my garden.
Start with a shallow tray, 1/4-inch-deep planting, and a mix of potting soil and compost—dill hates soggy roots but needs steady moisture. Place it in a spot where temps stay 65-75°F, like a sunny windowsill or under grow lights.
The key? A spray bottle for gentle watering—no drowning, no letting it dry out.
Within a week, you’ll see those first pale green shoots, and by week two, they’ll be 3-4 inches tall and ready to transplant. The trick to avoiding mold?
Good airflow—cover the tray with plastic for warmth, but remove it once sprouts appear. No more waiting for store-bought herbs that wilt by lunch.
This method works for indoor windowsills, balcony pots, or even a sunny kitchen counter. Once established, dill grows fast—just keep it well-watered and watch it transform from tiny sprouts into the lush, flavorful stalks you’ll snip for soups, salads, and pickles all season.
📚 In This Guide
- What you need
- Instructions
- Tips and common mistakes
- Wrapping up and next steps
What you need
- ● Dill seeds: 1–2 tablespoons (about 15–30g) of organic, non-GMO dill seeds (preferably from a trusted source for best germination).
- ● Growing container: A shallow tray (8x12 inches or larger) or a mason jar with a sprouting lid.
- ○ Optional: A fine-mesh sprouting bag or a clean kitchen towel for small batches.
- ● Water: Room-temperature, filtered water (chlorine can inhibit germination).
- ● Fine-mesh strainer or colander: For rinsing (if not using a jar with a lid).
- ● Paper towels or sprouting cloth: 2–3 sheets of unbleached, food-grade paper towels or a sprouting cloth.
- ● Spray bottle: For gentle rinsing (helps avoid seed displacement).
- ● Small bowl or plate: To hold seeds while soaking (if not using a jar).
- ● Rubber band or hair tie: To secure paper towels in a jar (if using the jar method).
- ● Sunlight or grow light: A sunny windowsill or a LED grow light (12+ hours/day for optimal growth).
- ○ Thermometer (optional): To monitor temperature (ideal range: 65–75°F).
- ● About 10–15 minutes for initial soaking.
- ● Daily 2–3 rinses (morning and evening) for the first 3–5 days.
- ● Patience! Sprouts typically emerge in 3–5 days and are ready to harvest in 7–10 days.
Step-by-step guide to germinating dill seeds quickly
Here's how to coax those feathery dill plants from tiny seeds in just days.
🌱 Step 1: Prep Seeds for Faster Germination
Dill seeds have a hard outer shell that slows sprouting. To speed things up, soak them overnight in lukewarm water—this softens the coating and kickstarts germination. Place seeds in a small bowl, cover with water, and let them sit for 12 hours. You'll see them plump up slightly, which means they're ready to go.
After soaking, drain the seeds but don't rinse them. The moisture on their surface is exactly what they need to start growing. I like to lay them on a paper towel to dry slightly before planting—this prevents them from sticking together in clumps. If you skip this step, germination might take 2-3 weeks instead of just days.
🪴 Step 2: Choose the Right Container and Soil
Use a shallow container with drainage holes—dill hates soggy roots. A 4-inch deep tray or small pots work perfectly. Fill it with a lightweight seed-starting mix, not garden soil, because it drains better and won't compact around delicate sprouts. Moisten the soil until it's damp but not dripping.
Press the soil down lightly with your fingers to create a firm surface. This helps the tiny seeds stay in place instead of washing away when you water. I like to make small furrows about ¼ inch deep—just enough to nestle the seeds without burying them too deeply. Space them ½ inch apart so they have room to grow without crowding.
💧 Step 3: Plant and Maintain Ideal Moisture
Place the soaked seeds in the furrows, spacing them evenly. Cover them lightly with a sprinkle of soil—just enough to hide them but not smother them. Water gently with a spray bottle until the soil looks evenly moist. The key here is consistency: keep the soil damp but never waterlogged, or the seeds will rot before they sprout.
Place the container in a warm spot—dill seeds germinate best at 70-75°F. A sunny windowsill or under a grow light works well. You should see tiny green sprouts in just 5-7 days. If the soil dries out during this time, mist it lightly again. Overwatering now is worse than underwatering—you'll know moisture is right when the soil feels damp but not soggy to the touch.
☀️ Step 4: Provide Light and Prevent Leggy Growth
Once the seedlings emerge, move them to a spot with bright, indirect light for the first few days. Direct sun can scorch their tender leaves. After a week, gradually introduce more sunlight—dill thrives in full sun once established. If you're using a grow light, position it 2-3 inches above the seedlings and keep it on for 14-16 hours daily.
Watch for leggy growth—those long, pale stems mean the seedlings aren't getting enough light. If this happens, lower the light closer or move the container to a sunnier spot. Strong seedlings have short, sturdy stems and deep green leaves. Thin them to the strongest 2-3 plants per pot if they're crowded, snipping at soil level with clean scissors.
⏰ Step 5: Transplant When Ready for the Garden
After 3-4 weeks, when seedlings have 2-3 sets of true leaves, they're ready to transplant. Harden them off first by placing them outside in a sheltered spot for 1 hour the first day, gradually increasing time over 5-7 days. This helps them adjust to outdoor conditions without shock.
Choose a spot with full sun and well-draining soil. Dig holes slightly deeper than the pots and space them 12-18 inches apart—dill grows tall and needs room to spread. Water deeply after transplanting to help the roots settle in. You'll see new growth within a week, and those familiar feathery leaves will appear in just a few more weeks.
Tips & tricks for perfect dill seed germination
Here's what nobody tells you about pushing those dill seeds to sprout faster than ever.
Soaking Secret: The 12-hour soak isn't just about hydration—it's about breaking dormancy. Use lukewarm water (around 90°F) rather than hot water, which can damage the delicate seed structure. After soaking, I find placing seeds on a paper towel in a single layer helps prevent clumping. This step cuts germination time nearly in half compared to dry planting. The seeds should look slightly swollen when ready to plant.
Container Strategy: That 4-inch depth recommendation isn't arbitrary—dill roots need room to establish but won't tolerate deep planting. For maximum airflow, I use seedling trays with drainage holes and add a layer of perlite to the seed-starting mix. This prevents compaction while maintaining moisture. The ¼-inch furrow depth is perfect for keeping seeds covered but not buried too deeply.
Lighting Hack: When you're setting up your grow light for those 14-16 hours daily, position it just 2 inches above the seedlings—not 3. Dill seedlings are sensitive to light distance, and closer placement prevents leggy growth. I've found that supplementing with a small LED grow bulb (around 10 watts) during cloudy days makes a noticeable difference in early growth.
Transplant Timing: The 3-4 week window for transplanting is flexible based on your climate. In cooler spring conditions, I often extend this to 5 weeks—just watch for those 2-3 sets of true leaves as your indicator. When hardening off, I increase exposure time by 30 minutes each day rather than the full hour to avoid shocking the plants. This gradual approach prevents transplant shock that can delay growth.
Pro Tips for Dill Seed Sprouts
- Here's what nobody tells you about pushing those dill seeds to sprout faster than ever.
- Soaking Secret: The 12-hour soak isn't just about hydration—it's about breaking dormancy.
- Container Strategy: That 4-inch depth recommendation isn't arbitrary—dill roots need room to establish but won't tolerate deep planting.
Frequently asked questions
Got questions about growing dill seed sprouts?
Here are the answers to the most common ones—so you can sprout like a pro!
How long does it take for dill seeds to sprout?
Dill seeds are slow starters! Expect germination to take 7–14 days in warm, moist conditions (70–75°F). Soak seeds overnight first to speed things up. Patience is key—don’t give up if nothing appears in the first week! Pro tip: Use a heat mat if your space is chilly.
Do I need to soak dill seeds before sprouting?
Yes! Soaking for 6–12 hours softens the hard seed coat, helping them sprout faster. Place seeds in a jar with water, drain, and rinse 2–3 times daily to prevent mold. Skipping this step can delay germination by days. Bonus: Warm water (not boiling) works best!
Can I grow dill sprouts indoors without sunlight?
Use a grow light 4–6 inches above your sprouts for 12–16 hours daily. A sunny windowsill works too, but rotate the jar every few hours for even growth. Without light, sprouts will grow leggy and weak. Alternative: A simple LED bulb on a timer does the trick!
Why are my dill sprouts turning yellow or moldy?
Yellowing or mold (fuzzy spots) usually means overwatering or poor airflow. Rinse sprouts thoroughly, spread them on a clean towel to dry, and ensure your jar has ventilation (like a mesh lid). Discard any moldy batches immediately—safety first! Fix: Reduce rinsing to 1–2 times daily if humidity is high.
What can I substitute if I can’t find dill seeds?
If dill seeds are unavailable, try fennel seeds (similar flavor) or caraway seeds for a spicy kick. For sprouts, radish or broccoli seeds are great alternatives. Just adjust soaking times—fennel needs 4–6 hours, while radish sprouts in 3–5 days. Note: Flavor won’t be identical, but it’s a tasty workaround!
Wrapping up and next steps
Growing dill seed sprouts is a rewarding journey that brings fresh, vibrant herbs right to your kitchen—fast! With just a few simple supplies and a little patience, you’ll enjoy homegrown dill in no time.
Whether you’re a seasoned gardener or a curious beginner, these sprouts are a game-changer for adding flavor and nutrition to your meals.
Ready to dive in? Start by gathering your materials, follow the easy steps, and soon you’ll be harvesting crisp, aromatic dill for salads, soups, and more. Your green thumb is just a sprout away! 🌱