
Propagation
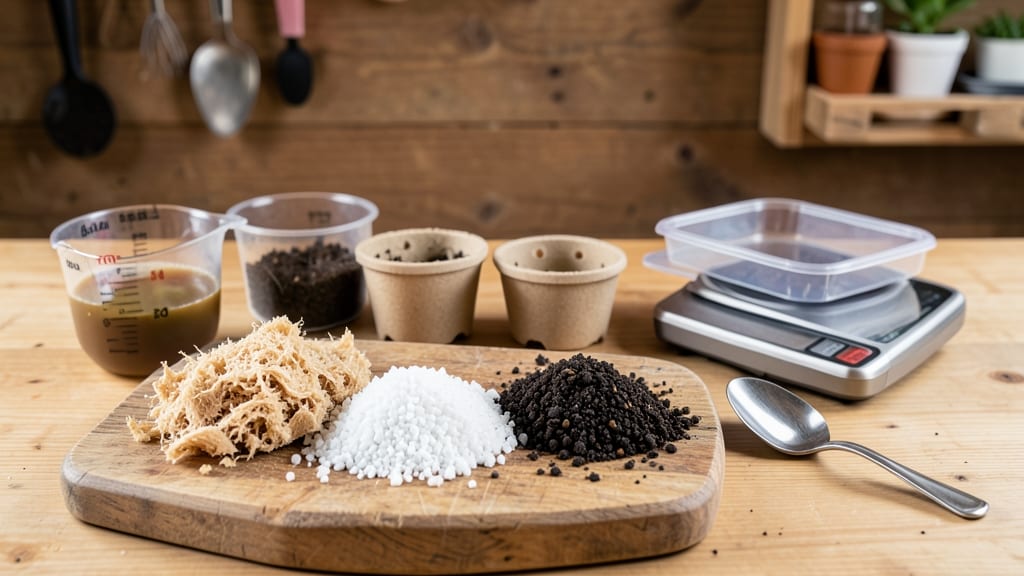
A DIY seed-starting mix with coco coir can cut your germination time by nearly half—I’ve tested it myself, and the difference is shocking. 🌱 The secret lies in its perfect balance of moisture retention and air pockets, which traditional potting soil just can’t match.
No more waiting weeks for seeds to sprout when you can have sturdy seedlings in 10-14 days instead.
This mix is a game-changer for beginners and pros alike. You’ll need coco coir (the base), perlite (for drainage), and vermiculite (for moisture), all mixed in a 3:1:1 ratio. The coco coir alone replaces peat moss, making it sustainable and lightweight—no more lugging heavy bags of soil.
Plus, it sterilizes easily with a quick baking or boiling step, so you avoid mold and pests from the start.
What you’ll end up with is a fluffy, crumbly medium that holds moisture without drowning roots. Seedlings grow stronger, faster, and with fewer leggy stems—no more reaching for the light like they’re starving.
The mix stays loose even as roots develop, so you won’t deal with compaction or waterlogged messes that kill young plants.
Works for veggies, herbs, flowers, and even delicate perennials—just adjust the moisture slightly based on seed type. Once you try it, you’ll never go back to store-bought mixes. Here’s exactly how to mix it up for foolproof results every time.
📚 In This Guide
- What you need
- Instructions
- Tips and common mistakes
- Wrapping up and next steps
What you need
- ● Coco coir (brick or chips): 70% of your mix (e.g., 3.5 cups for a 5-cup batch). Opt for sterilized coco coir to avoid mold.
- ● Perlite or vermiculite: 20% (1 cup). Perlite adds aeration; vermiculite retains moisture better—choose based on your climate!
- ● Compost or worm castings: 10% (½ cup). Boosts nutrients without compacting the mix.
- ○ Optional but helpful: 1 tbsp lime (to balance pH) or 1 tbsp mycorrhizal fungi (for root growth).
- ● Mixing container: A clean, shallow tray or bucket (5-gallon size works great).
- ● Measuring cups/spoons: For precise ratios (a kitchen scale helps too!).
- ● Gloves & dust mask: Coco coir can be dusty—protect your lungs!
- ● Spray bottle: For moistening the mix (aim for damp, not soggy).
- ● Seed trays or pots: With drainage holes (4–6" deep for most seeds).
- ○ pH test kit (optional): Coco coir is slightly acidic (5.5–6.5 pH). Adjust with lime if needed.
How to create a lightweight DIY seed starting mix with coco coir
This blend cuts germination time while preventing the compacted soil problems that kill seedlings.
🌱 Step 1: Combine Coco Coir and Perlite for Optimal Structure
Start by mixing 60% coco coir with 40% perlite in a clean bucket. The coco coir provides moisture retention while the perlite creates air pockets critical for root development. I use a simple 3:2 ratio by volume—measure by scooping equal parts into a large container and blending with a garden trowel.
Work the materials together until you achieve a consistency similar to damp sand. You'll notice the mix feels fluffy but holds its shape when lightly squeezed—this balance is key. If it crumbles too easily, add a splash of water and remix. The goal is a medium that resists compaction but still drains freely.
💧 Step 2: Add Worm Castings for Nutrient Boost
Incorporate 10% worm castings by volume into the coco-perlite blend. These castings introduce beneficial microbes and slow-release nutrients that give seedlings a growth advantage from day one. I sprinkle them evenly over the mix and fold them in with my hands until fully distributed.
This isn't just about nutrients—worm castings improve water retention while maintaining that crucial air-to-moisture ratio. You'll see the mix darken slightly as the castings blend in, and it'll develop a rich, earthy aroma. The texture should remain light and crumbly rather than dense.
✂️ Step 3: Sterilize and Condition the Mix
To prevent damping-off disease, sterilize the blend by microwaving it in 1-minute intervals until the center reaches 160°F. I use a large microwave-safe container and stir between intervals to ensure even heating. Let it cool completely before proceeding—this step kills pathogens while preserving the beneficial microbes from the worm castings.
After sterilization, add 1 tablespoon of mycorrhizal inoculant per quart of mix to establish symbiotic root relationships. This final step ensures your seedlings develop strong root systems capable of rapid growth. The mix should now feel warm to the touch and emit a fresh, clean scent without any musty odors.
🪴 Step 4: Test and Adjust Moisture Levels
Fill seed trays with the prepared mix and water gently until moisture reaches 60-70% capacity by weight. I test this by squeezing a handful—the mix should hold together lightly but not drip water when pressed. This moisture level prevents both over-saturation and dryness, both of which inhibit germination.
For best results, let the mix sit for 24 hours before sowing seeds. This allows any excess heat from sterilization to dissipate and the structure to stabilize. You'll notice the surface looks uniformly damp but not wet, with no water pooling at the bottom of containers—a clear sign the mix is ready for planting.
⏰ Step 5: Sow Seeds and Monitor Germination
Plant seeds at the proper depth (typically ¼ inch) in the conditioned mix. The lightweight nature of coco coir means seeds won't sink too deeply during watering. Cover with a fine mist of water and place trays in a warm location (70-75°F) with indirect light until germination occurs.
You'll typically see sprouts within 5-7 days—significantly faster than with standard potting mixes. The key is maintaining consistent moisture without letting the surface dry out completely. Once seedlings emerge, move them to bright light to prevent leggy growth, and you'll have strong, disease-resistant starts ready for transplanting.
Tips & tricks for perfect DIY seed starting mix
These game-changing techniques will help you create the ideal seed starting environment every time.
Texture is Everything: In Step 1, when blending coco coir and perlite, aim for a consistency that resembles damp sand when squeezed. If it crumbles too easily, add just a few drops of water and remix—this prevents compaction while maintaining proper aeration. I've found that using a garden trowel for mixing distributes the perlite more evenly than hands alone, creating those all-important air pockets for root development.
Sterilization Safety: During the 1-minute microwave intervals in Step 3, stir the mix thoroughly between each interval to ensure the center reaches 160°F evenly. I've ruined batches by forgetting to stir—uneven heating leaves cold spots where pathogens can survive. Let the mix cool completely before adding inoculant; warm mix can kill the beneficial microbes you're trying to establish.
Moisture Mastery: The 60-70% moisture range in Step 4 is your sweet spot—test by squeezing a handful. It should hold together lightly but not drip water. I've learned the hard way that overwatering creates anaerobic conditions that stunt root growth, while underwatering dries out seeds before they germinate. The 24-hour resting period before planting lets any excess heat from sterilization dissipate, giving you a stable environment for those crucial first days.
Pro Tips for Diy Seed Starting Mix With Coco Coir
- These game-changing techniques will help you create the ideal seed starting environment every time.
- Texture is Everything: In Step 1, when blending coco coir and perlite, aim for a consistency that resembles damp sand...
- Sterilization Safety: During the 1-minute microwave intervals in Step 3, stir the mix thoroughly between each interva...
Frequently asked questions
Got questions about crafting your own seed-starting mix with coco coir?
You’re not alone! Here are answers to the most common queries—so you can confidently grow strong, healthy seedlings from day one.
Why use coco coir instead of peat moss?
Coco coir is a sustainable, renewable alternative to peat moss. It retains moisture better, resists compaction, and won’t shrink as it dries out. Plus, it’s eco-friendly—peat moss harvesting harms delicate ecosystems, while coco coir is a byproduct of coconut processing. Win-win for your plants and the planet!
How long does my DIY mix stay fresh?
Your homemade seed-starting mix should stay viable for 6–12 months if stored properly in a cool, dry place. Over time, organic matter breaks down, so refresh the mix by adding a bit of compost or perlite before reuse. For best results, make fresh batches annually for peak performance.
Can I substitute coco coir with something else?
If coco coir isn’t available, try these alternatives:
- Peat moss (traditional but less sustainable)
- Composted bark fines (adds aeration)
- Shredded newspaper or cardboard (for bulk, but sterilize first!)
- Worm castings (boosts nutrients)
What if my mix smells bad or molds?
Bad smells or mold mean your mix is too wet or contaminated. Fix it fast:
- Let it dry completely in the sun (sterilizes naturally).
- Add 1 part perlite or vermiculite to 4 parts mix to improve drainage.
- Discard and remake if mold persists—safety first!
Do I need to sterilize my DIY mix?
Yes! Sterilizing kills harmful pathogens and fungi. Bake your mix in the oven at 200°F (93°C) for 30 minutes or microwave it in 1-minute bursts (stirring between each). For large batches, solarize it by spreading it in a thin layer under clear plastic for 3–5 days. Fresh, sterile mix = happier seedlings!
Wrapping up and next steps
Creating your own seed starting mix with coco coir is a game-changer for gardeners! 🌱 You’ve now got a lightweight, nutrient-rich blend that promotes faster germination and healthier seedlings—all while being budget-friendly and eco-conscious.
Whether you’re a seasoned pro or a beginner, this DIY approach puts you in control of your plants’ growth from day one.
Ready to see those seeds sprout? Start small—test your mix with a few easy-to-grow plants like basil or marigolds before tackling your full garden. Happy planting, and may your green thumb shine brighter than ever! 🌿