
Propagation
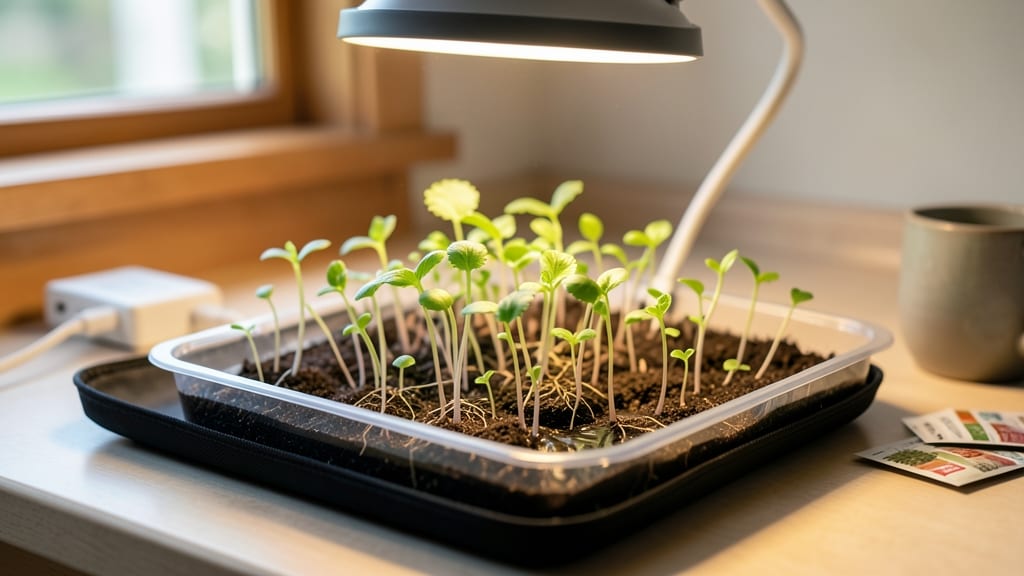
Electric seed germination cuts your wait time in half—fast sprouts mean stronger seedlings and fewer failed batches. I’ve used these systems for years, and the difference between damp paper towels and controlled moisture is night and day.
Your seeds stay perfectly hydrated without the risk of overwatering or mold, and the built-in warmth speeds up germination for even the trickiest varieties.
You’ll need just a few things: an electric germination mat or chamber, seed-starting trays, a spray bottle, and your chosen seeds. The setup takes 10 minutes, and most systems plug into a standard outlet.
For best results, maintain 75-85°F temperatures and keep the growing medium consistently moist—not soggy. This method works especially well for slow starters like peppers, tomatoes, and herbs, which often struggle with traditional germination techniques.
The payoff is lush, uniform seedlings that outpace anything grown on a windowsill. You’ll notice roots developing within 3-5 days for fast germinators, and the whole process feels almost foolproof. No more guessing about soil moisture or worrying about uneven sprouting—just consistent, reliable results every time.
Plus, the enclosed environment keeps pests and drafts at bay, so your early growth stays protected.
Whether you’re a seasoned gardener or a beginner, this method adapts to almost any space—from a sunny kitchen counter to a basement setup. The only downside? You’ll want to keep using it after your first success. Here’s how to get started without the common pitfalls.
📚 In This Guide
- What you need
- Instructions
- Tips and common mistakes
- Wrapping up and next steps
What you need
- ● Electric germination tray or propagator (with built-in moisture control sensors, e.g., Growneer Smart Germination Box or DIY Arduino-based setup).
- ● Seeds (fast-germinating varieties like radish, chives, or basil recommended for testing).
- ● Seed-starting mix (sterilized, peat-free blend or coconut coir). Quantity: Enough to fill your tray (typically 2–4 inches deep).
- ● Distilled or dechlorinated water (to avoid chemical interference). Quantity: ~1–2 cups per tray.
- ● Power source (USB adapter or AC power for electric trays; 9V battery for DIY Arduino setups).
- ● Small spray bottle (for gentle moisture adjustments).
- ● pH meter (to test water/soil pH, ideal range: 5.8–6.2).
- ● Humidity dome or plastic wrap (for non-electric setups).
- ● Thermometer/hygrometer (to monitor 70–85°F and 85–95% humidity).
- ● LED grow light (12–16 hours/day for post-germination growth).
- ● Timer or smart plug (to automate power cycles for electric trays).
- ● Notebook or app (to track germination progress and adjust settings).
Step-by-step instructions for electric seed germination
Here’s how to use electric germination systems for consistent, rapid sprouts—no guesswork involved.
Prepare Your Seeds and Germination Tray
Start by soaking seeds overnight in lukewarm water to soften the outer coating and kickstart hydration. I use a small bowl with just enough water to cover them completely—this ensures even moisture without over-saturating. After 8-12 hours, drain the water and gently blot the seeds dry with a paper towel to remove excess moisture. This prevents mold while keeping them hydrated.
Next, arrange the seeds in your electric germination tray according to the manufacturer’s layout. Most trays have designated wells or compartments—place 1-2 seeds per well for optimal spacing. If using a mesh insert, spread seeds evenly so they don’t overlap. The goal is to maximize airflow while maintaining contact with the moisture-controlled surface. Avoid crowding, as this can lead to uneven germination or fungal issues.
Set Up the Electric Germination System
Fill the water reservoir of your electric germination system with filtered or distilled water to the recommended level—usually marked on the unit. Tap water may contain chlorine or minerals that can inhibit germination, so stick to pure water for best results. Plug in the unit and set the moisture level to the manufacturer’s suggested setting for your seed type. Most systems offer a range of 60-90% humidity, with 75-85% being ideal for most seeds.
Place the tray with your seeds on the system’s heating pad or moisture plate. The unit will automatically maintain the set humidity and temperature, typically between 70-85°F. This controlled environment eliminates the need for manual watering and ensures consistent conditions. I like to place the unit in a dark, warm spot—like a closet or under a counter—since seeds don’t need light at this stage. Light exposure can trigger premature sprouting or weak stems.
Monitor and Maintain Germination Conditions
Check the tray daily to ensure seeds remain evenly moist but not soggy. The electric system will handle most of the work, but condensation can sometimes build up on the lid or seeds. Gently lift the lid or tray to allow excess moisture to escape if you notice droplets forming. You’ll typically see the first signs of germination—tiny white roots or cracked seed coats—in 3-7 days, depending on the seed type. Fast germinators like radishes or beans may sprout in as little as 2-3 days, while slower seeds like tomatoes or peppers can take up to 10 days.
Once seeds begin to sprout, reduce the humidity setting slightly to 65-75% to prevent damping-off disease, which causes seedlings to rot at the base. Keep the system running until the seedlings develop 1-2 true leaves—this usually takes another 3-5 days. At this stage, they’re ready to be transplanted into soil or a seedling tray. Avoid disturbing them too early, as young roots are delicate and can break easily.
Transition Seedlings to Soil
When seedlings have 1-2 true leaves and a small root system, carefully transfer them to a seedling tray filled with sterile potting mix. Use a small spoon or your fingers to lift each seedling by its leaves, not the stem, and place it gently into the soil. Press the soil lightly around the base to secure the seedling without compacting it. Water lightly with a spray bottle to settle the soil and provide initial hydration.
Place the seedling tray in a warm, bright location—like a south-facing windowsill or under grow lights—for 14-16 hours of light daily. The transition from high humidity to drier air can be a shock, so monitor the seedlings closely for the first 24-48 hours. If leaves appear wilted or yellow, increase humidity slightly or water gently. Within a week, you’ll see stronger, more resilient seedlings ready for further growth.
Tips & tricks for perfect electric seed germination
Precision moisture control transforms ordinary seeds into vigorous sprouts—here's how to maximize your electric germination system's potential.
Seed Selection: Not all seeds germinate equally in electric systems. Fast germinators like radishes (2-3 days) and beans (3-5 days) thrive best, while slower seeds like tomatoes or peppers may need the full 10-day window. Check your system's manufacturer guidelines for seed-specific recommendations—some systems handle delicate seeds better than others. I've found that larger seeds (like beans) often germinate more consistently than tiny seeds (like lettuce) in these controlled environments.
Humidity Calibration: The 75-85% humidity range is ideal, but every system varies. If you notice condensation dripping onto seeds in Step 2, reduce humidity by 5-10% points immediately. Too much moisture creates anaerobic conditions that promote mold. For the first 3-7 days of germination, maintain the higher end of the range, then drop to 65-75% once sprouts appear to prevent damping-off. A hygrometer placed near the unit helps monitor real-time conditions.
Light Exposure Timing: The instructions mention keeping seeds in darkness until transplant, but here's the subtle detail: 24-48 hours before transplanting, introduce 4-6 hours of indirect light daily. This gradual acclimation prevents shock when seedlings reach their final growing environment. I use a simple LED grow light on a timer for this pre-transplant hardening phase—it makes all the difference in seedling resilience.
System Maintenance: Clean your germination tray and moisture plate weekly with a 10% vinegar solution to prevent bacterial buildup. Mineral deposits from water can accumulate on heating elements, reducing efficiency. After cleaning, rinse thoroughly and let air-dry completely before reuse. This simple step extends your system's lifespan and maintains consistent germination rates across multiple batches.
Pro Tips for Electric Seed Germination
- Precision moisture control transforms ordinary seeds into vigorous sprouts—here's how to maximize your electric germination system's potential.
- Seed Selection: Not all seeds germinate equally in electric systems.
- Humidity Calibration: The 75-85% humidity range is ideal, but every system varies.
Frequently asked questions
Got questions about electric seed germination? You’re not alone! Here are some of the most common queries—and their straightforward answers—to help you get started with confidence.
What’s the best seed-to-water ratio for electric germination?
Most electric seed starters use a 1:10 ratio (1 part seed to 10 parts water) for optimal moisture. Check your device’s manual for specifics—some systems have built-in sensors to adjust humidity automatically. Overwatering can drown seeds, while too little moisture stalls germination. Pro tip: Use room-temperature water to avoid shocking seeds!
How long does electric germination take compared to traditional methods?
Electric germination can cut sprouting time by 30-50%—often just 3-7 days for fast growers (like beans or peas) versus 7-14 days with paper towels or soil. Slower seeds (e.g., tomatoes) may still need 10-20 days. Consistency is key: electric systems maintain ideal conditions 24/7, speeding up the process naturally.
Can I use any seeds with an electric germinator?
Most non-woody seeds work well—think herbs, leafy greens, beans, and even some flowers. Avoid large seeds (like squash or melons) or those with hard coats (e.g., peanuts), as they may need scarification or longer soaking. Always research your seed type or test a few first!
What do I do if my seeds aren’t sprouting?
First, check for moisture (seeds should feel damp, not soggy) and temperature (ideally 65–85°F). If using an electric tray, ensure it’s not overheating—some models lack ventilation. Try soaking seeds overnight before restarting, or test a few in warm water to rule out viability. Dead seeds? Try fresh ones!
Are there eco-friendly alternatives to electric germination?
Yes! For a low-tech approach, use paper towels (folded with seeds between damp layers) or a mason jar method (seeds + water + dark closet). Compostable peat pellets also work well. Electric germination saves space and energy but isn’t mandatory—choose what fits your sustainability goals!
Wrapping up and next steps
Electric seed germination isn’t just a trend—it’s a game-changer for gardeners who want consistent, faster, and healthier sprouts. By harnessing precision moisture control, you eliminate guesswork, reduce waste, and give your seeds the ideal conditions to thrive.
Whether you’re a seasoned grower or just starting, this method opens doors to bigger yields and stronger plants—all with minimal effort!
Ready to take the next step? Start small—try a single tray of your favorite seeds, experiment with settings, and watch your confidence (and sprouts!) grow. Your future harvests will thank you! 🌱⚡