
Lawn
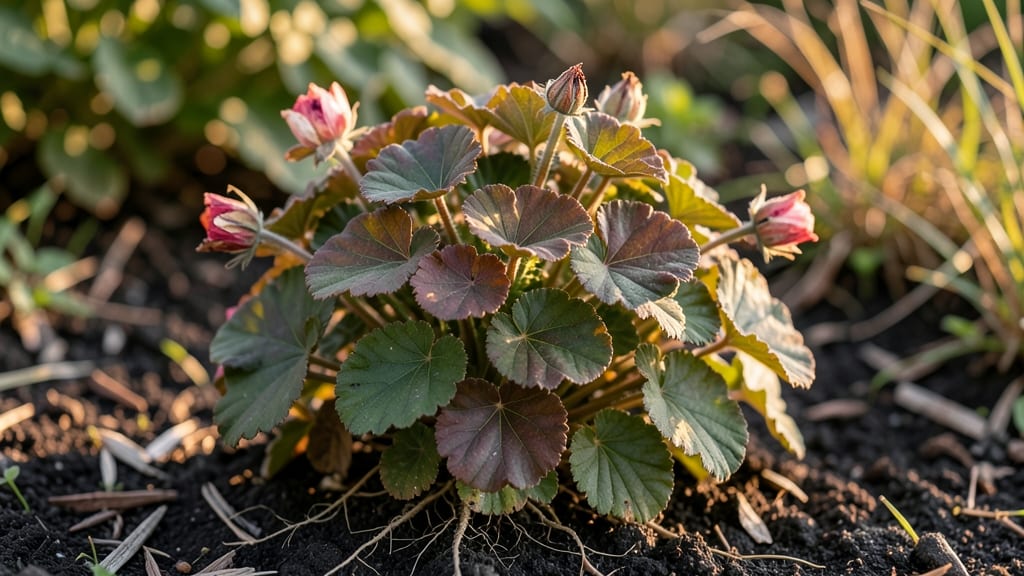
Cold-stratifying geranium seed pods cuts germination time from months to weeks. 🌱 I learned this trick after struggling with slow, uneven sprouts—now my seed-starting season begins a full month earlier, and the blooms arrive faster than store-bought plants.
True geraniums (Geranium spp.) and pelargoniums (the "geraniums" sold as houseplants) behave differently: true geraniums need cold treatment, while pelargoniums don’t. The key is harvesting pods when they’re brown and papery but before they split open—usually late summer or early fall.
Store the pods in a paper bag in the fridge for 4-6 weeks, then sow them in moist, sterile seed-starting mix. Within 10-14 days, you’ll see tiny green leaves pushing through the soil, ready to outpace any nursery plant.
This method works for hardy geraniums like Geranium macrorrhizum (creeping Charlie) and Geranium sanguineum (blood-red geranium). Skip the cold treatment for pelargoniums—they germinate quickly at room temperature.
📚 In This Guide
- What you need
- Instructions
- Tips and common mistakes
- Wrapping up and next steps
What you need
- ● Geranium seed pods: 1–5 pods (depending on desired quantity; fresh or dried works, but fresh is ideal).
- ● Cold-stratification method: Option 1: A sealed plastic bag with a damp paper towel (for small batches).
- ● Option 2: A refrigerator with a humidity tray or dampened sphagnum moss (for larger batches).
- ● Planting containers: Small pots (3–4 inches deep) with drainage holes, or
- ● A seed-starting tray with individual cells.
- ● Potting mix: 1 bag (2–3 quarts) of seed-starting mix (lightweight, sterile, and well-draining).
- ● Spray bottle: For gentle moisture application (avoid overwatering!).
- ● Clear plastic wrap or humidity dome: To retain moisture during stratification.
- ● Plant labels & marker: To track varieties and planting dates.
- ● Grow lights or sunny windowsill: For post-stratification seedling care (6+ hours of light/day).
- ● Humidity tray: DIY with a shallow tray + pebbles + water (keeps moisture consistent).
- ● Seedling heat mat: Speeds up germination if your space is chilly (70–75°F ideal).
- ● Fungicide (like hydrogen peroxide or cinnamon): Prevents damping-off in damp conditions.
- ● Notebook: To log stratification dates, germination progress, and transplant timelines.
How to cold-stratify geranium seed pods for reliable germination
Cold-stratification mimics winter's natural process, breaking dormancy and ensuring your geraniums sprout strong and fast.
🌱 Step 1: Harvest and Prepare Mature Seed Pods
Collect fully mature geranium seed pods when they turn brown and begin splitting open—this usually happens in late summer or early fall. Gently twist or cut them from the stem and place them in a paper bag to dry indoors for 3-5 days. The pods should rattle when shaken, signaling seeds are ready for processing.
Open the dried pods carefully over a clean surface. You'll find tiny, dark seeds inside. I like to spread them on a sheet of paper to air-dry for another 24 hours—this prevents mold during stratification. Avoid using plastic bags, as trapped moisture can cause rot.
❄️ Step 2: Mix Seeds with Moist Stratification Medium
Fill a quart-sized resealable plastic bag with 2 inches of moistened perlite or sand—these materials provide the perfect balance of aeration and moisture retention. Sprinkle the geranium seeds evenly over the medium, ensuring they're not crowded. I aim for about 50-60 seeds per bag for this size container.
Seal the bag loosely—leave a small gap for airflow, or poke a few holes with a needle if using a fully sealed bag. Place the bag in a refrigerator set to 35-40°F, where it will stay for 4-6 weeks. This cold treatment mimics winter's chill period, breaking seed dormancy and preparing them for germination.
🌱 Step 3: Plant Stratified Seeds in Germination Mix
After 4-6 weeks of cold stratification, remove the bag and gently sift the seeds from the perlite or sand. Fill 2-inch deep seed trays with a sterile seed-starting mix—geraniums dislike heavy soil, so avoid garden soil or compost blends. Moisten the mix until it holds together when squeezed but doesn't drip.
Scatter the seeds lightly on the surface—geranium seeds need light to germinate, so don't cover them with soil. Instead, press them very gently into the mix to ensure contact. Mist the tray with water until the surface is damp but not soggy. Place the tray in a warm, bright spot (around 65-70°F) and cover it with a clear plastic dome to retain humidity.
☀️ Step 4: Provide Warmth and Light for Sprouting
Keep the soil consistently moist but never waterlogged—geranium seedlings rot quickly if overwatered. You'll see tiny green sprouts in 10-21 days, though some varieties may take longer. Once seedlings emerge, remove the dome immediately to prevent fungal issues. Place the tray under grow lights or in a south-facing window for 12-14 hours of light daily.
Watch for first true leaves (the second set after the initial cotyledons)—this is your signal to begin thinning seedlings. Use small scissors to snip excess plants at soil level, leaving the strongest, most vibrant seedlings spaced 2 inches apart. This prevents overcrowding and ensures robust growth.
🪴 Step 5: Harden Off and Transplant Young Plants
After 4-6 weeks of growth, when seedlings have 3-4 sets of true leaves, begin hardening them off. Move the tray to a shaded outdoor spot for 1-2 hours the first day, gradually increasing exposure over 7-10 days. This acclimates them to outdoor conditions before transplanting.
Choose a sunny, well-draining location for your geraniums, as they thrive in full sun and hate soggy roots. Transplant seedlings 12 inches apart in individual pots or directly into the garden. Water deeply at the base to settle the soil and encourage root establishment. Mulch lightly with 1 inch of organic matter to retain moisture and suppress weeds.
Tips & tricks for perfect geranium seed germination
Cold-stratification can feel like a delicate dance with nature, but these insider tips will help you master the process with confidence.
Timing Secret: The 3-5 days of indoor drying for seed pods is non-negotiable—this critical step prevents mold during stratification. If your kitchen is particularly humid, consider placing the paper bag with pods in a dehumidifier-safe container with a silica gel packet to absorb excess moisture. I've learned this the hard way after watching mold creep in during damp autumns.
Medium Matters: While both perlite and sand work well, I've found that coarse vermiculite offers an even better moisture balance for geranium seeds. It holds just enough water to keep seeds hydrated without suffocating them. If using sand, rinse it thoroughly first to remove any fine particles that could clog the seeds. The goal is consistent moisture without sogginess during the 4-6 week cold period.
Visual Cues for Stratification: After placing your sealed bag in the refrigerator at 35-40°F, check the condensation on the bag weekly. If you see significant ice formation, your refrigerator's coldest zone might be too extreme. Move the bag to a slightly warmer area (like the middle shelf) where it stays consistently cold but not freezing. Proper condensation should appear as light frost—not thick ice crystals—that melts within 24 hours of removing the bag.
Lighting Strategy: Once your seeds are planted in Step 3, the 12-14 hours of daily light becomes your most critical factor. If using a south-facing window, rotate the tray every 2-3 days to prevent uneven growth toward the light. For grow lights, position them 2-3 inches above the seedlings—closer than this can scorch delicate sprouts, while farther away may result in leggy, weak plants. I've found that a simple LED grow light bulb in a desk lamp works surprisingly well for this purpose.
Pro Tips for Geranium Seed Pods
- Cold-stratification can feel like a delicate dance with nature, but these insider tips will help you master the proce...
- Timing Secret: The 3-5 days of indoor drying for seed pods is non-negotiable—this critical step prevents mold during ...
- Medium Matters: While both perlite and sand work well, I've found that coarse vermiculite offers an even better moist...
Frequently asked questions
Got questions about geranium seed pods and cold stratification? You’re not alone! Here are some of the most common queries—and their answers—to help you grow those vibrant blooms with confidence.
Why do geranium seeds need cold stratification?
Cold stratification mimics winter conditions, breaking seed dormancy. Geranium seeds often won’t germinate well without it—this process softens the hard seed coat, allowing moisture and warmth to trigger growth. Think of it as a natural "wake-up call" for your seeds!
How long should I cold-stratify geranium seeds?
Most geranium seeds need 4–8 weeks in the fridge (34–40°F). Place them in a sealed bag with damp paper towels, then store them in the veggie drawer. Patience pays off—over-stratifying won’t hurt, but under-stratifying may delay (or prevent) germination.
Can I skip cold stratification and still grow geraniums?
You can, but results may be spotty. Without stratification, seeds might germinate slowly or unevenly. For faster, more reliable blooms, embrace the chill! If you’re in a hurry, try soaking seeds in warm water for 24 hours first—it can help soften the coat slightly.
What if my geranium seed pods rot during stratification?
Rotting usually means too much moisture. Use damp (not soggy) paper towels—squeeze out excess water before sealing the bag. Also, check for mold weekly. If you spot fuzz, air them out for a day or two. A little mold? No big deal—just toss the affected seeds.
How do I know when geranium seeds are ready to plant?
Once stratified, plant seeds as soon as they look wrinkled or slightly swollen (not moldy!). For best results, sow them ¼-inch deep in warm soil (70–75°F). Germination typically takes 2–4 weeks. Keep soil moist but not waterlogged—consistency is key!
Wrapping up and next steps
Geranium seed pods hold the secret to unlocking vibrant blooms with ease—thanks to cold stratification! By mimicking winter’s natural chilling process, you’ll dramatically boost germination rates and enjoy faster, healthier growth. Whether you’re a seasoned gardener or just starting, this simple technique transforms tricky seeds into thriving plants.
Ready to grow like a pro? Grab your geranium seeds, follow the steps, and watch your garden burst with color! Next, experiment with different geranium varieties or share your newfound skills with fellow plant enthusiasts—your green thumb will thank you! 🌱✨