
Propagation
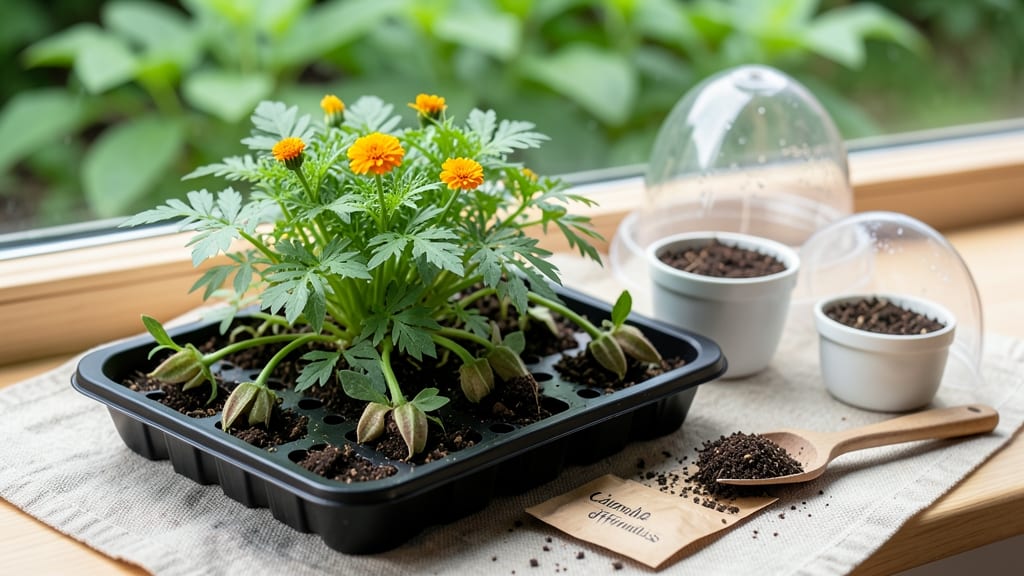
Growing calendula from seed in pots delivers sunny, cheerful blooms in just 6 weeks—no transplanting required. 🌻 I’ve grown calendula in containers for years, and this hardy annual thrives when given the right balance of light, soil, and space.
The secret? Starting seeds directly in pots with proper drainage and consistent moisture. You’ll need 4-6 inch pots, well-draining potting mix, and a sunny windowsill or grow light. Plant seeds ¼ inch deep, space them 1 inch apart, and keep the soil lightly moist.
Within 7-10 days, you’ll see those first bright green sprouts pushing through the soil. By week 6, you’ll be pinching back leggy seedlings and enjoying vibrant orange, yellow, or cream blooms that last all summer.
Calendula’s edible petals make it perfect for garnishes, salves, or simply brightening up patios and windowsills. This method works for balconies, decks, or kitchen windows—no garden needed. Once you try it, you’ll never buy transplants again!
📚 In This Guide
- What you need
- Instructions
- Tips and common mistakes
- Wrapping up and next steps
What you need
- ● Calendula seeds: 1–2 packets (50–100 seeds per packet). Choose heirloom or organic seeds for best results.
- ● Containers: 4–6" diameter pots (minimum 1 pot per seedling) with drainage holes. Pro tip: Use biodegradable pots if you plan to transplant later!
- ● Potting mix: 1–2 bags of high-quality, well-draining seed-starting mix (avoid garden soil—it’s too dense!).
- ● Watering can or spray bottle: For gentle hydration without disturbing seeds.
- ● Grow lights or sunny windowsill: 6+ hours of sunlight daily (south-facing window or LED grow lights work best).
- ○ Plant labels: Small markers to track varieties (optional but helpful!).
- ● Seedling heat mat: Speeds up germination in cooler climates.
- ● Fertilizer: Balanced liquid fertilizer (5-5-5 or 10-10-10) for post-germination growth.
- ● Humidity dome or plastic wrap: Keeps moisture in during germination (remove once sprouts appear!).
- ● Twine or stakes: Supports taller varieties as they mature.
Step-by-step instructions for growing calendula in pots
Here’s how to coax vibrant calendula blooms straight from seed without ever transplanting.
🌱 Step 1: Select and Prepare Your Pots
Choose 4-inch diameter pots with drainage holes—calendula roots need airflow to prevent rot. I prefer terracotta because it wicks away excess moisture naturally. Fill each pot with 1 inch of high-quality potting mix, pressing it down lightly to remove air pockets. The goal is a firm but not compacted base for stability.
If your pots lack drainage, drill 2-3 holes in the bottom. Line the holes with a small piece of mesh to keep soil in place. Calendula hates soggy feet, and proper drainage is the first line of defense against damping-off, a fungal disease that can wipe out seedlings overnight.
🌱 Step 2: Sow Seeds at the Right Depth and Spacing
Place 2-3 seeds per pot, spacing them ½ inch apart in the center. Calendula seeds are tiny, so I use a toothpick to position them precisely. Press them into the soil just ¼ inch deep—any deeper and they’ll struggle to surface. Cover lightly with a sprinkle of additional potting mix, but don’t bury them too deeply.
Mist the soil surface with a spray bottle until evenly damp. Avoid heavy watering, which can dislodge seeds or create a muddy crust. Once sown, place the pots in a warm, bright spot (around 70°F)—a seedling heat mat helps if your home runs cooler. Germination typically takes 7-14 days, but patience is key here.
☀️ Step 3: Provide Light and Monitor Moisture
As soon as the first true leaves appear (not the initial seed leaves), move pots to a south-facing window or under grow lights for 12-14 hours of light daily. Calendula seedlings stretch toward light like sunflowers, so keep the light source 2-3 inches above the plants and adjust as they grow. You’ll know they’re getting enough light when the stems stay thick and upright, not leggy.
Water when the top inch of soil feels dry—this usually means every 2-3 days, but adjust based on your home’s humidity. Overwatering is the fastest way to kill seedlings, so I use a moisture meter to double-check. Once seedlings reach 2 inches tall, thin to the strongest plant per pot by snipping the extras at the base.
✂️ Step 4: Encourage Bushy Growth and Blooms
When plants hit 4-6 inches tall, pinch off the top set of leaves just above a pair of lower leaves. This trick forces the plant to branch out, creating a bushier habit with more blooms. Calendula thrives on this pruning—it’s how you get those classic daisy-like flowers instead of a single tall stem.
Continue deadheading spent blooms to encourage continuous flowering. The more you remove faded flowers, the more energy the plant puts into producing new ones. Fertilize lightly every 4-6 weeks with a balanced, water-soluble fertilizer (like 10-10-10) to support steady growth. Avoid over-fertilizing—calendula prefers lean soil and blooms best when slightly hungry.
🪴 Step 5: Maintain Pots Through the Season
Calendula in pots needs regular watering—about 1 inch per week during active growth—but never let the soil stay soggy. In hot weather, check soil moisture daily, as pots dry out faster than in-ground plantings. If you notice leaves curling or wilting, it’s a sign to water immediately, but don’t drown them afterward.
Rotate pots quarter-turn weekly to ensure even growth toward the light. By mid-summer, your calendula should be a vibrant, blooming centerpiece, attracting pollinators and adding cheerful color to your space. With proper care, these pots will keep producing flowers until the first frost—no transplanting required.
Tips & tricks for growing calendula in pots
These practical insights will help you nurture thriving calendula plants from seed to vibrant blooms—without the transplanting hassle.
Pot Selection Wisdom: While 4-inch pots work perfectly, consider using slightly larger containers (5-6 inches) if you want to extend the blooming season. Larger pots provide more root space, which means your calendula will stay vibrant longer. I've found that terracotta pots are ideal because they wick away excess moisture naturally, but any pot with proper drainage will do. If you're using decorative pots without drainage, place them in saucers filled with gravel to prevent root rot.
Germination Boost: The 7-14 day germination window can feel like an eternity, but there are ways to encourage faster sprouting. After sowing your seeds at the recommended ¼-inch depth, cover the pots with clear plastic wrap to create a mini greenhouse effect. This traps moisture and warmth, which can speed up germination by 2-3 days. Just remember to remove the plastic as soon as you see the first signs of sprouts to prevent mold.
Lighting Strategy: That 12-14 hours of daily light requirement is crucial for preventing leggy seedlings. If your south-facing window doesn't provide enough light, supplement with a simple LED grow light placed just 2-3 inches above the plants. I've noticed that using a timer for your grow lights ensures consistent light exposure—calendula plants thrive on routine. Rotate your pots quarter-turn weekly to prevent them from growing toward one light source, which keeps stems sturdy and upright.
Watering Technique: The "top inch of soil feels dry" guideline is perfect, but here's how to put it into practice: Use your finger to check moisture—if it feels dry just below your first knuckle, it's time to water. For the first 2-3 weeks, I water from the bottom by placing pots in shallow trays of water for 10-15 minutes. This encourages strong root development from the start. Once seedlings are established, water at the base of the plant rather than overhead to prevent fungal diseases.
Pro Tips for Growing Calendula From Seed In Pots
- These practical insights will help you nurture thriving calendula plants from seed to vibrant blooms—without the tran...
- Pot Selection Wisdom: While 4-inch pots work perfectly, consider using slightly larger containers (5-6 inches) if you...
- Germination Boost: The 7-14 day germination window can feel like an eternity, but there are ways to encourage faster ...
Frequently asked questions
Got questions about growing calendula from seed in pots? You’re not alone—here are some of the most common ones, answered for stress-free gardening!
How deep should I plant calendula seeds in pots?
Calendula seeds are tiny but mighty! Plant them just 1/8-inch deep in well-draining potting mix. A light sprinkle of soil over them is all you need—no need to bury them deep. Keep the soil moist (not soggy) until germination, which usually takes 7–14 days.
Can I grow calendula indoors year-round in pots?
Calendula thrives indoors as long as it gets 6–8 hours of bright, direct sunlight daily (a south-facing window or grow lights work). Just ensure your pots have drainage holes and use a light, airy potting mix. In winter, supplement with a grow light if natural light is scarce.
Why aren’t my calendula seeds germinating?
Patience is key—calendula seeds need warmth (70–75°F) and moisture to sprout. If they’re slow to germinate, try these fixes:
- Heat them up: Place pots in a seedling heat mat or on top of your fridge.
- Cover them: Use a clear plastic wrap to trap humidity (remove once sprouts appear).
- Check moisture: Keep soil damp but not waterlogged—overwatering can drown seeds.
Do I need to thin calendula seedlings, and how?
Yes! Once seedlings have 2–3 true leaves, thin them to 12–18 inches apart to prevent overcrowding. Use clean scissors to snip unwanted seedlings at soil level—this reduces stress on the roots. Pro tip: Transplant thinned seedlings to separate pots if you want more blooms!
Can I grow calendula from seed in small pots (like 4-inch containers)?
Yes, but with a twist! Calendula is adaptable, but small pots may limit root growth and reduce flowering. If using 4-inch pots:
- Plant 1–2 seeds per pot (thin to the strongest seedling).
- Use a high-quality potting mix with perlite for drainage.
- Fertilize lightly with diluted fish emulsion every 4–6 weeks.
Wrapping up and next steps
Growing calendula from seed in pots is a rewarding journey—one that brings vibrant blooms to your space without the fuss of transplanting! With just a few supplies, patience, and a sunny spot, you’ve got everything you need to nurture these cheerful flowers. 🌼
Now that you’re armed with tips and tricks, why not expand your garden? Try experimenting with different pot sizes, companion plants, or even harvesting petals for homemade remedies. Every little step keeps your green thumb growing!