
Propagation
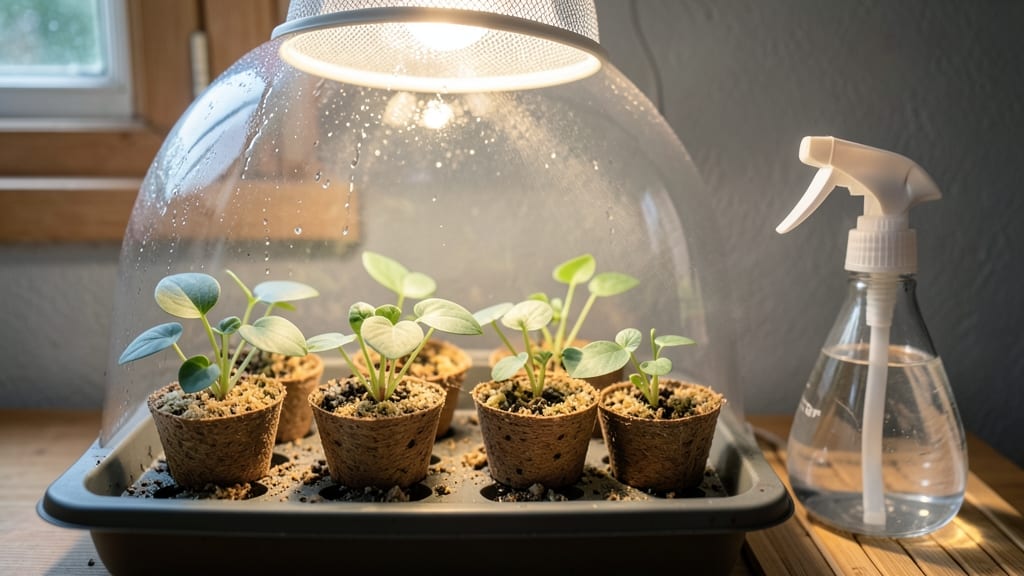
Hosta seed germination isn’t the fastest route to new plants—but when you nail the warmth and moisture, those tiny sprouts emerge like little green miracles. 🌱 Most gardeners prefer divisions because hostas grow slowly from seed, but there’s something special about watching that first leaf unfurl from a seed you planted yourself. The secret lies in creating the perfect cozy, damp environment that mimics their natural woodland habitat.
You’ll need a shallow tray, a mix of 50% peat-based seed starter and 50% perlite for drainage, and a way to keep temperatures steady at 65-70°F—think of it as a mini greenhouse.
Light is tricky at first: keep seeds in bright, indirect light until they sprout, then gradually introduce more sunlight. Patience is key here—germination can take 3-6 weeks, and some seeds might take even longer.
Once those first pale shoots appear, you’ll want to keep the soil consistently moist (not soggy) and avoid disturbing them. Thin seedlings to 2 inches apart when they have two true leaves, and prepare for a slow but steady growth.
These aren’t the fast-growing annuals—they’re patient plants that reward your care over years, not weeks.
Transitioning to outdoor life happens gradually, starting with hardening off in partial shade for a week before planting in a spot with dappled sunlight.
Most gardeners skip seed-starting for hostas, but if you love the challenge of nurturing something from scratch, this method delivers the satisfaction of growing a plant that’ll thrive for decades with minimal care.
📚 In This Guide
- What you need
- Instructions
- Tips and common mistakes
- Wrapping up and next steps
What you need
- ● Fresh or properly stored hosta seeds: Aim for organic, untreated seeds from a trusted supplier. A small packet (0.1g–0.2g) contains hundreds of seeds—plenty for experimentation!
- ● Seed-starting mix: Use a lightweight, sterile potting mix (e.g., Pro-Mix or coco coir) to prevent damping-off. Avoid garden soil—it’s too dense!
- ● Small seed trays or pots: Opt for biodegradable peat pots (2–3" diameter) or a 6-pack cell tray with drainage holes.
- ● Spray bottle (fine mist): Keeps seeds consistently moist without oversaturating. A 16-oz spray bottle works perfectly.
- ● Clear plastic dome or plastic wrap: Creates a humid microclimate (e.g., a humidity lid or zip-top bag with holes).
- ○ Heat mat (optional but recommended): A seedling heat mat (set to 75–85°F) speeds up germination. Skip this if your home stays warm (70°F+).
- ● Grow lights or sunny windowsill: Seeds need 12–16 hours of light daily. A LED grow light (e.g., Spectrum 900) is ideal for consistent results.
- ● Seed scarification tools: If seeds are hard-coated, lightly sandpaper them or soak in lukewarm water for 24 hours to soften.
- ● Fungicide (e.g., Mycorrhizal inoculant): Adds a protective boost against mold in damp conditions.
- ● pH test kit: Ensure your mix is slightly acidic (6.0–6.5)—hosta seeds thrive in this range.
- ● Labeling tags: Track varieties with waterproof markers or toothpicks.
- ● Thermometer/hygrometer: Monitor temperature (70–80°F) and humidity (80–90%) for optimal conditions.
Step-by-step instructions for germinating hosta seeds
Hostas from seed take patience, but these steps ensure strong, reliable sprouts.
🌱 Step 1: Prepare Seeds and Planting Medium
Hosta seeds have a hard outer coating that slows germination. Soak them in lukewarm water for 24-48 hours to soften the shell. I like to use a small jar with a loose lid—just enough water to cover the seeds completely. You'll know they're ready when the outer coating begins to crack slightly.
While the seeds soak, fill a shallow container with a mix of 50% peat moss and 50% perlite. This airy blend prevents damping-off while keeping roots moist. Moisten the mix until it feels like a wrung-out sponge—damp but not dripping. Hostas hate soggy conditions at this stage.
💧 Step 2: Sow Seeds and Maintain Consistent Moisture
Sprinkle the pre-soaked seeds ¼ inch deep in the prepared mix, spacing them 1 inch apart to prevent overcrowding. I use a small spoon to create tiny indentations—this ensures consistent depth. Cover lightly with a thin layer of additional mix, just enough to obscure the seeds.
Place the container in a clear plastic bag or under a glass cloche to create a humid microclimate. Hostas need 70-75°F soil temperatures to germinate reliably. A seedling heat mat set to 75°F speeds this along, especially in cooler climates. Check moisture daily—mist lightly if the surface feels dry to the touch.
☀️ Step 3: Provide Indirect Light and Wait for Sprouts
Hosta seeds thrive under bright, indirect light. A north-facing window works best, or place them under grow lights 6-12 inches away for 12-14 hours daily. Avoid direct sun—it overheats the container and dries out the soil too quickly. You'll see the first tiny shoots in 2-4 weeks, but some stubborn seeds take up to 6 weeks.
Once sprouts appear, remove the plastic cover immediately to prevent fungal growth. Thin seedlings to 2 inches apart when they develop their first true leaves. This reduces competition and gives each plant room to grow strong roots. Watch for leggy growth—if seedlings stretch toward the light, they need more intensity or closer placement.
🌿 Step 4: Transition to Independent Growth
After 4-6 weeks, when seedlings have 2-3 sets of leaves, it's time to harden them off. Move the container outside to a shaded spot for 1-2 hours daily, gradually increasing exposure over 7-10 days. Hostas are tough, but sudden temperature swings shock young plants.
By the time they're ready for transplanting, they should be 3-4 inches tall with 4-5 leaves. Choose an overcast day to move them into the garden, and plant them 1 inch deeper than their current container level. Hostas love shade and moisture, so mulch heavily around the base to retain humidity and suppress weeds.
Tips & tricks for perfect hosta seed germination
These simple yet game-changing strategies will help you coax even the most stubborn hosta seeds into sprouting consistently.
Soaking Strategy: The 24-48 hour soak isn't just about softening the seed coat—it's also about hydration. Use a jar with a loose lid to allow some air circulation while keeping the seeds submerged. I've found that adding a pinch of honey (1/4 teaspoon per cup of water) to the soaking water can help prevent fungal growth during this critical stage. Change the water every 12 hours to maintain freshness and oxygen levels.
Medium Texture Matters: That 50/50 peat moss and perlite mix is non-negotiable for hosta seeds. The peat holds moisture while the perlite provides crucial aeration. To test your mix's readiness, squeeze a handful—it should hold its shape but leave a slight imprint when pressed. If it crumbles, add more peat; if water drips out, mix in additional perlite. Remember, hostas despise soggy conditions at this early stage.
Light Positioning: When placing your seedlings under grow lights, position them 8-10 inches away initially. Hostas are shade-loving plants, so you want to mimic their natural environment. If you notice seedlings stretching excessively (a sign of etiolation), either move the lights closer (down to 6 inches) or increase the light duration slightly. The goal is to encourage sturdy, compact growth rather than leggy, weak stems.
Hardening Off Technique: During the 7-10 day hardening off period, I recommend increasing exposure time incrementally—start with 1 hour on day 1, then add 30 minutes each subsequent day. On cloudy days, you can extend the time slightly since the plants won't experience the same intensity of sunlight. Always choose shaded locations for this process to prevent sunburn on young, tender leaves.
Pro Tips for Hosta Seed Germination
- These simple yet game-changing strategies will help you coax even the most stubborn hosta seeds into sprouting consistently.
- Soaking Strategy: The 24-48 hour soak isn't just about softening the seed coat—it's also about hydration.
- Medium Texture Matters: That 50/50 peat moss and perlite mix is non-negotiable for hosta seeds.
Frequently asked questions
Got questions about germinating hosta seeds?
You’re not alone! Here are answers to the most common queries to help you achieve those reliable, healthy sprouts.
How long does it take for hosta seeds to germinate?
Patience is key! Hosta seeds typically take 4–12 weeks to germinate, depending on temperature, moisture, and seed freshness. Warmth (70–75°F) speeds things up, while cooler temps may delay sprouting. Don’t give up—some seeds take longer than expected!
Why aren’t my hosta seeds germinating?
If your seeds aren’t sprouting, check these common issues:
- Cold temps: Hosta seeds need consistent warmth. Move your tray to a warmer spot or use a seedling heat mat.
- Dry soil: Keep the growing medium consistently moist (not soggy). A spray bottle helps maintain humidity.
- Old seeds: Hosta seeds lose viability over time. If they’re over a year old, try fresh seeds or layering (stratification).
- Light exposure: Seeds need darkness to germinate. Cover the tray until sprouts appear, then provide indirect light.
Can I germinate hosta seeds without a heat mat?
If you lack a heat mat, try these alternatives:
- Place the seed tray on top of a refrigerator (top, not bottom) for gentle warmth.
- Use a southern window (indirect sunlight) during the day and move it to a warmer room at night.
- Wrap the tray in a plastic bag to trap moisture and warmth (ventilate daily to prevent mold).
Should I use soil or just water to germinate hosta seeds?
Start with a moist, sterile growing medium (like peat pellets or seed-starting mix) to anchor seeds and prevent rot. Once sprouts emerge, you can transition to water-only propagation (hydroponics) if desired, but soil provides better stability for fragile seedlings. Keep the mix damp but not waterlogged!
What’s the best way to transplant hosta seedlings?
Wait until seedlings have 2–3 true leaves and are about 2 inches tall. Gently remove them from the tray, keeping roots intact, and transplant into individual pots with well-draining soil. Harden off seedlings for 1–2 weeks (gradually expose them to outdoor conditions) before planting in the garden. Avoid direct sun until they’re established!
Wrapping up and next steps
Growing hosta seeds into thriving plants is all about patience, precision, and the right balance of warmth and moisture—but with these tips, you’re already ahead of the game! 🌱 Whether you’re a seasoned gardener or just starting, your dedication will soon reward you with lush, vibrant foliage.
Now that you’ve mastered the blueprint, it’s time to roll up your sleeves and plant those seeds—your future hosta garden awaits!
🌱 Next Steps:
- Start with a small batch to refine your technique.
- Document progress with photos—it’s a fun way to track growth!
- Share your wins (and lessons) with fellow plant enthusiasts!