
Container Gardens
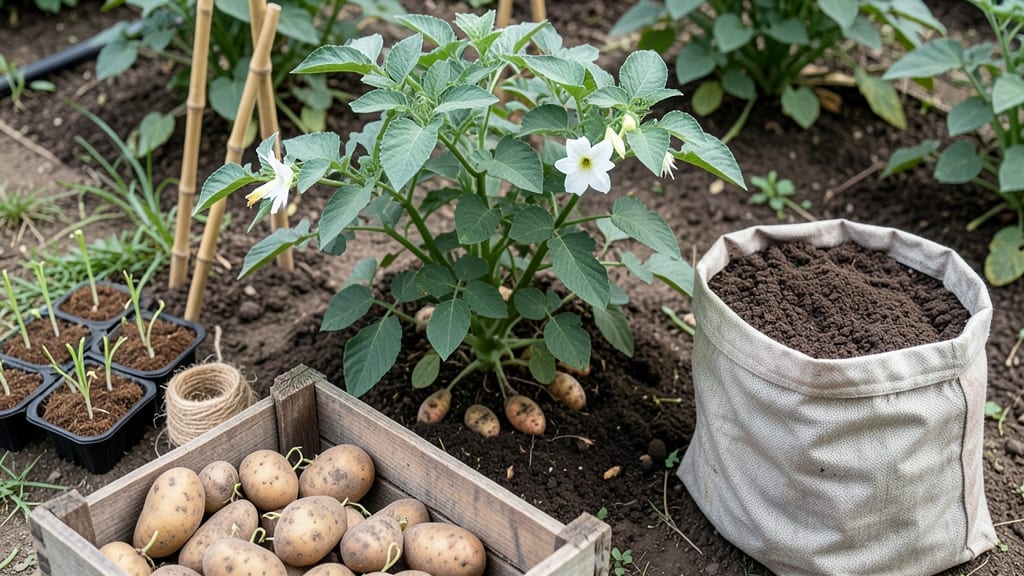
Growing seed potatoes in containers turns your balcony or patio into a 12-week potato factory—no backyard required. 🌱 I’ve grown enough spuds in 5-gallon buckets to feed my family for months, and the secret isn’t fancy soil or rare varieties, but timing, light, and a little patience.
The best part? You skip the digging, weeds, and gopher problems that make traditional potato growing a headache.
Start with certified seed potatoes (not grocery store spuds) and cut them into chunks with at least one "eye" each. Plant them in a deep container filled with well-draining soil mix, then watch as those eyes sprout into sturdy stems.
By week 6, you’ll see tiny potato starts forming at the base—just keep watering and feeding, and by harvest time, you’ll have pounds of fresh potatoes from a space smaller than a coffee table.
This method works for any climate, from city balconies to rural porches. You’ll need 6-8 hours of sunlight daily, a container at least 10 inches deep, and a steady watering routine (but no soggy soil).
The payoff? Harvests that outperform in-ground gardens—because containers warm up faster in spring and cool down slower in fall, giving you a longer growing season.
Even if you’ve killed houseplants before, potatoes are impossible to mess up—they thrive on neglect almost as much as they do on care. The only real trick is resisting the urge to dig too early. Let’s get those containers planted and start counting down to harvest day!
📚 In This Guide
- What you need
- Instructions
- Tips and common mistakes
- Wrapping up and next steps
What you need
- ● Seed potatoes: 3–5 certified disease-free seed potatoes (e.g., Yukon Gold, Red Pontiac, or Fingerlings). Choose small to medium-sized potatoes with 2–3 "eyes" (sprouts) each.
- ● Containers: At least 1 large container (10–12 gallons) per 3–5 seed potatoes. Options: Fabric grow bags (5–6 gallons each)
- ● Plastic buckets with drainage holes
- ● Wooden barrels or half-barrels
- ● Raised beds (if space allows)
- ● Potting mix: 100% organic, well-draining soil mix (avoid garden soil—it compacts!). Aim for 10–12 gallons per container.
- ● Drainage layer: 2–3 inches of gravel, perlite, or broken pottery at the bottom of each container.
- ● Watering can or hose with gentle spray: Keep soil consistently moist (not soggy!).
- ● Fertilizer: Balanced organic fertilizer (5-5-5 or 10-10-10) or compost. Use at planting and every 4–6 weeks.
- ○ Twine or stakes (optional but helpful): For tall varieties (e.g., Purple Majesty) to support vines.
- ● Mulch (straw or grass clippings) to retain moisture and regulate soil temp.
- ● Slow-release fertilizer tabs for hassle-free nutrient delivery.
- ● Potato grow bags with built-in drainage for easy harvests.
- ● Soil moisture meter to avoid over/under-watering.
- ● Insect netting if pests (like Colorado potato beetles) are a local nuisance.
Step-by-step instructions for growing seed potatoes in containers
Growing potatoes in containers is easier than you think—here's my foolproof method for a bountiful harvest.
🌱 Step 1: Chit Your Seed Potatoes Before Planting
Start by placing your seed potatoes in a bright, cool spot (around 50-60°F) for 4-6 weeks before planting. You'll see small shoots (called "chits") emerge from the eyes—these are your future plants. I like to use egg cartons to hold them upright and prevent rot.
Keep them in indirect light until the chits reach about ½ inch long. This pre-sprouting gives your potatoes a head start and ensures faster, more uniform growth. If you skip this step, your plants will take longer to establish and produce tubers.
🪴 Step 2: Choose and Prepare Your Containers
Use containers that are at least 12 inches deep and have drainage holes. I prefer fabric grow bags because they allow excess moisture to escape while still holding soil well. For four plants, you'll need about 5 gallons of potting mix per container—don't skimp on depth, as potatoes need room to grow.
Fill the bottom third of the container with a mix of 50% potting soil and 50% compost. This gives your potatoes a nutrient-rich start. Avoid garden soil—it compacts in containers and can introduce pests. Water the mix until it's evenly moist but not soggy.
☀️ Step 3: Plant Your Chitted Potatoes and Provide Sun
Place one seed potato per container, positioning it so the chits are facing upward. Cover it with about 2 inches of soil, leaving the top third of the potato exposed. This ensures the chits aren't buried too deep, which can cause rot. Water gently to settle the soil around the potato.
Move the containers to a spot that gets full sun (6-8 hours daily). If you're in a shady area, supplement with a grow light for 12-14 hours per day. You'll see the chits grow into sturdy stems within a week—this is your signal that the roots are establishing.
💧 Step 4: Maintain Moisture and Add Soil as Plants Grow
Water your potatoes when the top inch of soil feels dry to the touch. Keep the soil consistently moist but not waterlogged—potatoes hate soggy roots. I like to use a watering can with a gentle spray to avoid disturbing the soil. Fertilize lightly with a balanced, water-soluble fertilizer every 3-4 weeks to encourage tuber development.
Here's the key trick: as the stems grow taller, add more soil to the container. When the plants reach about 6 inches tall, mound soil around the stems up to the leaves. Repeat this every 2-3 weeks until the container is full. This process, called "earthing up," encourages more tubers to form and prevents greening (which makes potatoes toxic).
⏰ Step 5: Harvest and Store Your Potatoes
After about 12 weeks, when the plants flower and the leaves start to yellow, it's time to harvest. Gently empty the container and brush off the excess soil. You'll find small to medium-sized potatoes—perfect for small-space growing! Let them cure in a dark, dry place for 1-2 weeks before storing.
Store your potatoes in a cool (40-50°F), dark spot with good airflow. Avoid refrigerating them, as the cold can turn their starches to sugar and ruin the flavor. With this method, you'll get a steady harvest of fresh, homegrown potatoes—no yard required!
Tips & tricks for growing seed potatoes in containers
A few simple tricks will help you avoid common pitfalls and maximize your container potato harvest.
Chitting Success: For faster chitting, place your seed potatoes in a cardboard box with the cut sides up. This creates a humid microclimate that speeds up sprout development. I've found that keeping them in a cool basement (around 50-60°F) for those 4-6 weeks produces the strongest chits. If you notice any rot starting on the potatoes, remove them immediately to prevent spreading.
Container Material Matters: While fabric grow bags are my favorite, you can also use 5-gallon buckets with drainage holes drilled in the bottom. If using plastic containers, make sure they're opaque—light can cause greening of the potatoes. The key is maintaining that 12-inch depth to accommodate tuber growth. I've successfully grown potatoes in old trash cans lined with landscape fabric!
Sunlight Strategy: If you're supplementing with grow lights, position them just above the plant tops to avoid burning the leaves. For the required 6-8 hours of direct sun, south-facing windows are ideal. I've noticed that when plants get their full sun requirement, they develop thicker stems and more tubers. If you're using a grow light for 12-14 hours, keep it 6-12 inches above the plants and adjust as they grow.
Earthing Up Technique: When you're earthing up your plants every 2-3 weeks, do it gradually—about an inch at a time. This prevents shocking the plants and gives them time to adjust. I like to do this in the morning so the plants have time to recover before nightfall. The goal is to bury the stems up to the leaves, but never cover the leaves themselves as this can cause rot.
Pro Tips for Grow Seed Potatoes In Containers
- A few simple tricks will help you avoid common pitfalls and maximize your container potato harvest.
- Chitting Success: For faster chitting, place your seed potatoes in a cardboard box with the cut sides up. This create...
- Container Material Matters: While fabric grow bags are my favorite, you can also use 5-gallon buckets with drainage h...
Frequently asked questions
Got questions about growing seed potatoes in containers? You’re not alone—this method is packed with potential but can raise a few curiosities! Below are answers to the most common questions, so you can grow confidently and harvest like a pro.
Can I use regular grocery store potatoes for planting?
Nope! Grocery store potatoes are treated to prevent sprouting and may carry diseases. Always use certified seed potatoes from a nursery. They’re disease-free, high-quality, and ready to sprout. If you’re on a budget, save your organic, untreated potatoes from last season—but ensure they’re blemish-free and chubby (at least 2 inches wide).
How long does it take to grow potatoes in containers?
With the right conditions, you can harvest baby potatoes in 8–12 weeks, and full-sized spuds in 12–16 weeks. Speed depends on variety, sunlight (6+ hours/day), and warmth (60°F+). For faster results, choose early-maturing varieties like ‘Yukon Gold’ or ‘Red Pontiac’ and keep containers in a sunny spot. Patience pays off—just imagine those crisp, homegrown spuds!
What if my container doesn’t have enough drainage?
Poor drainage = soggy soil = rotten potatoes. If your container lacks holes, drill them or place it on a drip tray or saucer with pebbles to catch excess water. Alternatively, use a fabric grow bag (naturally breathable) or a 5-gallon bucket with holes drilled in the bottom. Pro tip: Elevate containers slightly to improve airflow and prevent waterlogging.
How do I protect my potatoes from pests in containers?
Container-grown potatoes are less vulnerable, but pests like colorado potato beetles and aphids can still crash the party. Keep them at bay with:
- Row covers (lightweight fabric to block insects).
- Neem oil spray (natural insect repellent).
- Copper tape around the container rim to deter crawling pests.
- Handpick beetles (they’re easy to spot—orange and black!).
Can I grow potatoes in containers without soil?
Try hydroponics or soilless mixes like coconut coir or peat-based potting soil blended with perlite. For hydroponics, use a deep water culture (DWC) system with nutrient-rich water. Soilless options work well in small spaces but require regular moisture checks—potatoes hate drying out. If experimenting, start with a 50/50 mix of potting soil and compost for a foolproof balance.
What do I do with leftover seed potatoes after planting?
Don’t toss those extra “eyes”! Store them in a cool, dark, dry place (like a paper bag in the fridge) for up to 2 weeks until you’re ready to plant more. If they sprout too early, pop them in the ground or a container ASAP. For long-term storage, cure them (let them sit in a bright spot for 1–2 weeks) to harden the skin, then move to a 40–50°F space with low humidity.
Wrapping up and next steps
Growing seed potatoes in containers is a rewarding way to enjoy fresh, homegrown spuds—even with limited space! With the right setup, a little patience, and these simple steps, you’ll be harvesting crisp, flavorful potatoes in just 12 weeks.
Whether you’re a beginner or a seasoned gardener, this method proves that big harvests don’t need big plots.
Now that you’re ready to plant, take the next step—mark your calendar, grab those seed potatoes, and get growing! Soon, you’ll be savoring the taste of homegrown goodness straight from your balcony or patio. Happy gardening! 🌱✨