
Lawn
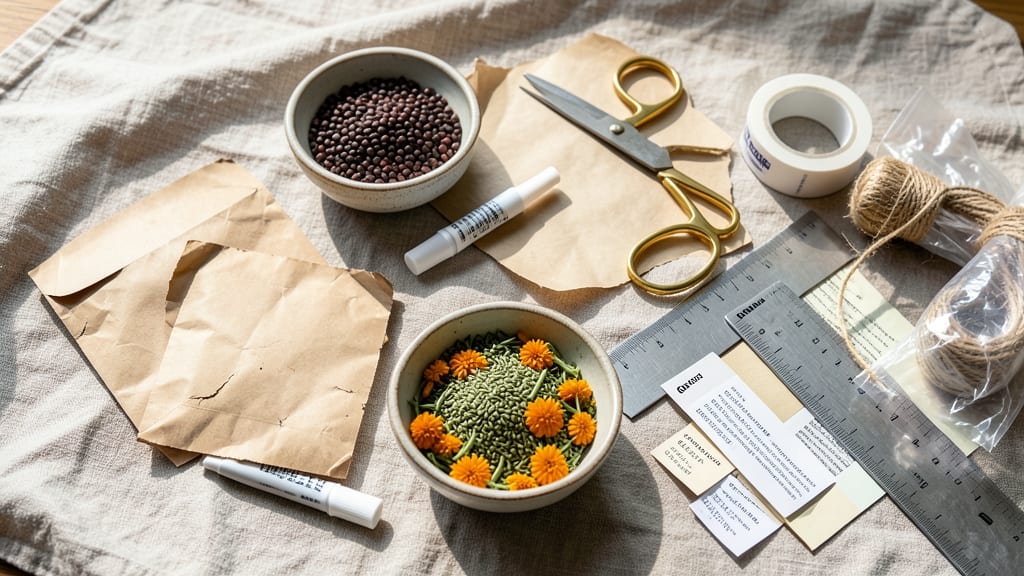
Making seed packets from this year’s harvest saves money and preserves rare varieties. 🌱 I’ve turned my garden’s excess into next year’s starter collection—no more buying seeds I can’t find or paying premium prices for heirlooms.
The process is simpler than you’d think, and it keeps your favorite plants alive for generations.
All you need are dry seeds, envelopes or small bags, and labels—plus a pencil for writing details like variety and harvest date. The drying step is critical: spread seeds on paper towels in a warm, dry spot for 1-2 weeks, stirring occasionally.
Store them in a cool, dark place, and they’ll stay viable for 3-5 years (some even longer!).
Labeling with the harvest year and plant name prevents mix-ups, while adding a tiny photo or sketch makes it even easier to remember. I’ve even turned it into a family project—kids love decorating packets with their own drawings. By spring, you’ll be planting seeds that carry your garden’s history.
This method works for vegetables, flowers, and herbs, whether you’re saving heirlooms or just organizing your collection. Start small—just a few packets—and watch your seed stash grow into a garden legacy. Ready to preserve your green thumb’s future?
📚 In This Guide
- What you need
- Instructions
- Tips and common mistakes
- Wrapping up and next steps
What you need
- ● Seeds – Any heirloom, organic, or saved seeds (ensure they’re fully dry and viable). Aim for 1–2 teaspoons per packet (adjust based on seed size).
- ○ Seed packet envelopes – Choose kraft paper or manila envelopes (4" x 5" or 5" x 7") for durability. Optional: Use recycled envelopes or even folded paper if envelopes aren’t available.
- ● Parchment paper or silica gel packets – For drying seeds (if not already dry). Note: Silica gel keeps seeds moisture-free for long-term storage.
- ● Permanent markers – Fine-tip black or colored markers for labeling (waterproof ink lasts longer!).
- ● Ruler or measuring tape – For precise seed measurements and envelope sizing.
- ● Small funnel or spoon – Helps pour seeds evenly without spills.
- ● Sealing supplies – Clear packing tape or glue stick to secure envelopes (prevents moisture seepage).
- ● Desiccant packets – Tiny moisture absorbers to place inside envelopes for extra protection.
- ● Printed seed labels – Pre-designed templates (free online!) to save time on handwriting.
- ● Plastic ziplock bags – For bulk seed storage before packaging.
- ● Hair dryer (low heat) – Quickly dry seeds if they’re slightly damp.
- ● Aluminum foil or wax paper – Line envelopes for added moisture resistance.
Step-by-step instructions for creating homemade seed packets
Here’s my foolproof method for drying, packaging, and storing seeds so they stay viable for years.
🌱 Step 1: Harvest Seeds at Peak Ripeness
Collect seeds only when they’re fully mature—this means the pods have dried on the plant and seeds rattle inside when shaken. For tomatoes, wait until the fruit is completely soft and wrinkled; for peppers, let them turn deep into their mature color and feel leathery to the touch. Harvest on a dry day to prevent mold.
Remove seeds carefully. For tomatoes, slice open the fruit and scoop out the gel with seeds, then ferment the mixture in water for 2-3 days to separate viable seeds from pulp. Rinse seeds thoroughly and spread them on a paper towel to dry. For peppers or beans, simply pull seeds from dried pods and set them aside.
💧 Step 2: Dry Seeds Completely Before Packaging
Lay seeds in a single layer on a clean, dry paper towel or mesh screen. Place them in a warm, dry spot with good airflow—like a sunny windowsill or a well-ventilated room. They’re ready when completely dry to the touch, usually within 7-10 days. Test by gently pressing a seed; if it feels hard and doesn’t leave a mark, it’s ready.
I like to use a small fan on low setting to speed up drying without risking heat damage. Never rush this step—moisture trapped in packets will cause mold and rot. Store seeds in a sealed container with a silica gel packet to absorb any lingering dampness.
✂️ Step 3: Choose Packaging Materials for Longevity
Use small, airtight envelopes made of acid-free paper or mylar bags to protect seeds from light and moisture. I prefer 1x3-inch envelopes for most seeds, as they’re large enough for labels but small enough to save space. For larger seeds like beans or corn, consider small glass jars with tight lids—they last even longer.
If using envelopes, fold them into thirds and seal with a wax seal or clear packing tape. Label each packet immediately with the seed variety, harvest year, and germination notes (like “needs stratification” or “slow to sprout”). Store packets in a cool, dark place—a sealed tin box or plastic container works well.
📝 Step 4: Label Clearly for Future Planting
Write legibly with a fine-tip marker on the envelope or jar lid. Include the seed name, harvest year, and any special instructions like “direct sow” or “needs cold treatment.” I also add a small note about germination success—like “80% in 2023”—to track performance over time. For extra durability, place a small piece of masking tape over the label to prevent ink from smudging.
Organize packets by family or type for easy retrieval. Group all tomatoes together, then peppers, then herbs, and so on. A small plastic bin with dividers keeps everything tidy and prevents crushing. Avoid storing seeds in the fridge unless your climate is very humid—temperature fluctuations can cause condensation inside packets.
⏰ Step 5: Test Germination Before Next Planting Season
Every 2-3 years, test a few seeds to ensure viability. Place 5-10 seeds between damp paper towels in a sealed plastic bag, then keep them in a warm spot (70-75°F). Check daily for sprouts—most should appear within 7-14 days. If fewer than 50% sprout, it’s time to replenish your supply or order fresh seeds.
This simple test saves money and prevents disappointment. I always test at least one packet from each variety, even if they feel dry. Seeds like parsley and onions lose viability faster, so I prioritize testing those first. Store any unused seeds back in their original packets for another year.
Tips & tricks for perfect seed packet preservation
These smart strategies will help you maximize seed viability and organization for years to come.
Harvest Timing is Everything: The 2-3 day fermentation step for tomato seeds is crucial—it removes the gel that inhibits germination. I learned this the hard way after storing unfermented seeds that failed to sprout. For pepper and bean seeds, harvest when pods are completely dry and papery to ensure maximum viability. The slight rattle test when shaken is your best indicator of readiness.
Drying Strategy for Maximum Longevity: While the 7-10 day drying window works well, I've found that using a small fan on low setting can safely reduce this to 5-7 days without risking heat damage. The key is maintaining consistent airflow—never place seeds near direct sunlight or heat sources. For humidity-prone climates, consider adding a silica gel packet to your drying container during this stage.
Packaging Upgrade: Standard 1x3-inch envelopes work fine, but I've had better luck with mylar bags for long-term storage. They create an airtight seal that blocks both light and moisture better than paper. For seeds you plan to use within 2-3 years, acid-free paper envelopes are perfectly adequate and more eco-friendly. The wax seal option is particularly useful for outdoor storage where temperature fluctuations occur.
Labeling System: I've developed a color-coded system where I use different colored fine-tip markers for different seed families—red for tomatoes, blue for peppers, green for herbs. This visual cue makes organization a breeze when it's time to plant. I also include a small QR code linking to the seed's specific growing requirements, which has saved me countless hours of research over the years.
Pro Tips for Make Seed Packets
- These smart strategies will help you maximize seed viability and organization for years to come.
- Harvest Timing is Everything: The 2-3 day fermentation step for tomato seeds is crucial—it removes the gel that inhibits germination.
- Drying Strategy for Maximum Longevity: While the 7-10 day drying window works well, I've found that using a small fan on low setting can safely reduce this to 5-7 days without risking heat damage.
Frequently asked questions
Got questions about crafting your own seed packets? Here are some common ones—and their answers—to help you save seeds like a pro!
Can I save seeds from any plant?
Not all plants produce viable seeds for saving. Focus on heirloom, open-pollinated, or non-hybrid varieties like tomatoes, beans, peppers, and herbs. Avoid hybrid seeds (e.g., F1 varieties), as they often don’t grow true to type. Always check seed-saving guidelines for specific plants!
How long can I store homemade seed packets?
With proper drying and storage, seeds typically last 1–5 years, depending on the type. Store them in a cool, dark, dry place (like a sealed container in the fridge or freezer) to extend shelf life. Test viability by doing a float test (sink = good; float = discard).
What’s the best way to label seed packets?
Use waterproof labels (like masking tape or laminate) and include:
- Plant name (e.g., "Cherry Tomato ‘Sweet 100’")
- Year harvested (to track freshness)
- Storage date (for longevity)
- Special notes (e.g., "Needs stratification" or "Disease-resistant")
Can I reuse seed packets from store-bought seeds?
Yes! Clean and dry the empty packets thoroughly, then reuse them for your homegrown seeds. Just ensure they’re moisture-free to prevent mold. For extra protection, line them with parchment paper before sealing. Pro tip: Add a silica gel packet inside to absorb humidity!
What if my seeds won’t dry properly?
If seeds stay damp, they’ll mold or rot. Try these fixes:
- Spread them out on a paper towel in a single layer for 1–2 weeks in a well-ventilated area.
- Use a dehumidifier or place a fan nearby to speed up drying.
- For stubborn moisture, try silica gel in a sealed container (remove seeds before storage).
Wrapping up and next steps
Creating your own seed packets is a rewarding way to save money, preserve heirloom varieties, and ensure next year’s garden thrives! With just a few simple steps—drying, labeling, and storing—you’ll have a sustainable, ready-to-use resource that’s as eco-friendly as it is practical.
Whether you’re a seasoned gardener or just starting out, this skill adds a layer of self-sufficiency that’s purely satisfying.
Now that you’ve mastered the art, why not take it further? Try experimenting with seed-saving techniques for different plants or even share your packets with fellow gardeners. Happy growing—your future garden (and wallet!) will thank you! 🌱✨