
Planting
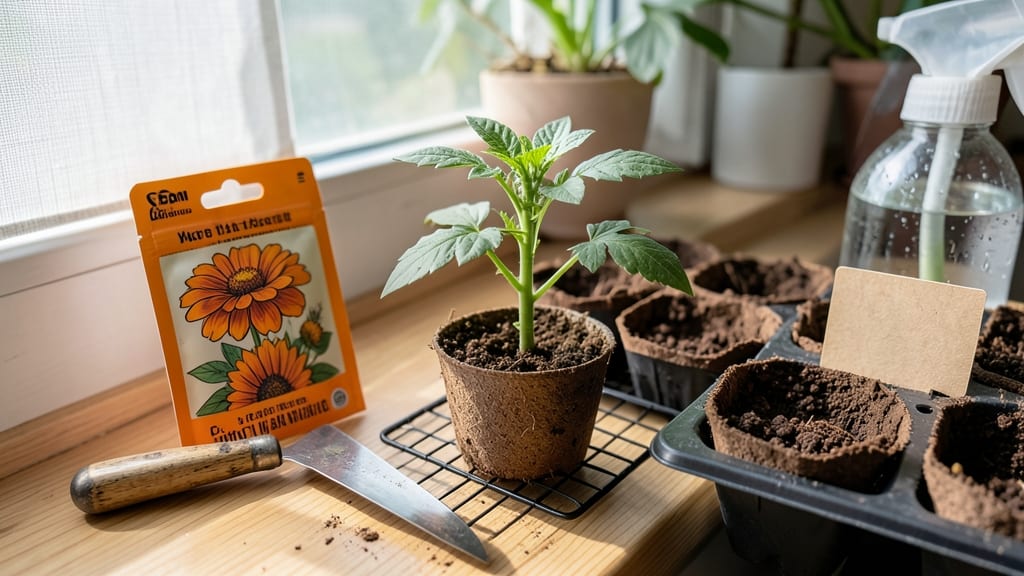
Learning how to plant a seed step by step can feel intimidating, but I've helped dozens of beginners grow their first plants—it's simpler than you think. 🌱 The secret is patience and following five straightforward stages, from soil prep to the first true leaves.
My own first attempt with marigolds taught me that even small mistakes won't ruin everything if you adjust quickly. You'll only need a few basic supplies: seed packets, a container (or garden bed), quality potting mix, and a spray bottle for watering.
I recommend starting with fast-germinating seeds like radishes or beans to build confidence before tackling slower starters. The right soil mix makes all the difference—lightweight and well-draining is key for preventing rot.
Once planted, keep the soil consistently moist but never soggy, and place your seeds in bright, indirect light until they sprout. You'll see those first green shoots in as little as 3-10 days, depending on the plant.
That moment when the seedling breaks through the soil is magical—it's when the real work begins. This method works for herbs, vegetables, and flowers alike, and even works in small spaces. The biggest mistake beginners make is overwatering or planting too deep, which we'll cover in the next section.
Let's get those seeds growing!
📚 In This Guide
- What you need
- Instructions
- Tips and common mistakes
- Wrapping up and next steps
What you need
- ● Seeds: Choose high-quality, fresh seeds (check the packet for planting depth and spacing instructions). Quantity: 1 packet (or as needed for your project).
- ● Seed-starting containers: Small pots (3–4 inches deep) or
- ● Seed trays with cells (biodegradable or plastic)
- ● Potting mix: Lightweight, sterile seed-starting mix (avoid garden soil—it’s too dense!). Quantity: Enough to fill containers ¾ full.
- ● Watering can or spray bottle: With a fine mist nozzle for gentle watering.
- ○ Grow lights or sunny windowsill: Seeds need 6–12 hours of light daily. Optional: A heat mat (for warm-season crops like peppers or tomatoes).
- ● Labels & marker: To track seed varieties and planting dates.
- ● Humidity dome or plastic wrap: Keeps moisture in while seeds germinate.
- ● Fertilizer (diluted): A balanced, water-soluble fertilizer (e.g., 5-5-5) for when seedlings sprout.
- ● Tweezers or planting stick: For delicate seeds or precise placement.
- ● Garden journal: To log progress, soil conditions, and growth milestones.
Step-by-step instructions for planting seeds like a pro
Here's my foolproof method—tested across seasons and climates—to get seeds sprouting strong every time.
🌱 Step 1: Choose the Right Seed and Prepare the Soil
Pick seeds suited for your climate and growing conditions. I always check the packet for days to germination and light requirements—this tells me exactly how much patience and setup I'll need. For container planting, fill your pot with fresh, loose seed-starting mix (never garden soil—it's too dense and may carry diseases). Moisten it until it feels like a damp sponge, not soggy.
Press the soil down lightly with your fingers until it's firm but not compacted. You want it to hold shape when you poke it, but still allow roots to push through easily. Tap the container gently on the table to settle everything evenly. This ensures seeds have good contact with moist soil, which speeds up germination.
🌱 Step 2: Plant Seeds at the Correct Depth and Spacing
Most seeds need to be planted at a depth of about twice their diameter. I use my fingernail to make a small hole—this prevents planting too deep, which can delay or prevent germination. For example, tiny basil seeds go in just ¼ inch deep, while larger tomato seeds need ½ inch of coverage.
Place 1-2 seeds per hole (unless the packet says otherwise) and cover lightly with soil. Don't pack it down—just sprinkle enough to hide the seeds. I label each pot with the seed type and date because identical seedlings can look confusing after a week. Water gently with a spray bottle until the soil surface looks evenly moist but not glistening.
💧 Step 3: Provide Warmth and Consistent Moisture
Seeds germinate fastest in warm soil—ideally between 65-75°F. I use a seedling heat mat under my trays to maintain this temperature, especially in cooler climates. Cover the container with a clear plastic dome or plastic wrap to retain moisture and warmth. Check daily but don't water again until the soil surface feels slightly dry to the touch.
This is where most beginners go wrong—they overwater and drown seeds. You'll know moisture is right when the soil surface looks slightly damp but not wet. Once 50% of seeds have sprouted, remove the cover immediately to prevent damping-off disease, which causes seedlings to collapse overnight.
☀️ Step 4: Move to Bright Light Immediately After Germination
The instant seedlings break through the soil, they need 12-16 hours of light daily. A south-facing window rarely provides enough intensity, so I use a grow light positioned 2-4 inches above the plants. Raise it as they grow to maintain that gap. Without sufficient light, seedlings stretch toward the source (called "leggy") and never recover proper strength.
You'll see strong seedlings have thick stems, deep green color, and compact spacing between leaves. If yours look pale and stretched, move the light closer or add a few more hours of artificial light. Rotate the container daily so plants grow straight instead of leaning toward the light source.
⏰ Step 5: Thin Seedlings and Encourage Healthy Growth
Once seedlings have 2-3 true leaves (the first set are cotyledons), thin them so the strongest one remains. I use scissors to snip weak seedlings at soil level—this prevents disturbing the roots of the plant you're keeping. Leave 2-3 inches of space between remaining seedlings, depending on the plant's mature size.
After thinning, water deeply at the base to settle the soil around the roots. Continue providing bright light and consistent moisture, but let the top inch of soil dry out slightly between waterings. This encourages strong root systems. Watch for first true leaves to appear—this is your signal that the seedling is establishing properly.
Tips & tricks for planting seeds like a pro
A few simple strategies that'll help you avoid the most common seed-starting pitfalls and get those sprouts growing strong.
Seed Selection: Always check the seed packet for specific instructions—some seeds like lettuce need light to germinate and shouldn't be covered, while others like beans prefer darkness. I keep a notebook to track which varieties work best in my conditions. The germination time listed on the packet tells you exactly how long to wait before worrying about failed sprouts.
The Depth Difference: Planting too deep (more than twice the seed diameter) can prevent germination entirely. For tiny seeds like marigolds, I use a toothpick to make a shallow hole—just enough to cover them lightly. Remember, seeds need darkness to germinate, so don't press soil on top too firmly.
Moisture Management: The soil should feel like a damp sponge, not a soggy washcloth. I test moisture by squeezing a handful—if water drips out, it's too wet. Most damping-off disease happens from overwatering, so I water from the bottom when possible by placing trays in shallow water for 10 minutes. This gives roots a chance to drink without drowning the surface.
Light Positioning: Those 12-16 hours of daily light are non-negotiable for strong seedlings. I place my grow lights on timers to automate this, but if you're using natural light, rotate your trays daily so plants don't lean toward the window. Watch for "leggy" seedlings—they're begging for more light! If you notice stems stretching toward the source, lower the light or add a few extra hours of artificial light immediately.
Pro Tips for Plant A Seed Step By Step
- A few simple strategies that'll help you avoid the most common seed-starting pitfalls and get those sprouts growing strong.
- Seed Selection: Always check the seed packet for specific instructions—some seeds like lettuce need light to germinate and shouldn't be covered, while others like beans prefer darkness.
- The Depth Difference: Planting too deep (more than twice the seed diameter) can prevent germination entirely.
Frequently asked questions
Got questions about planting seeds? You’re not alone—even experienced gardeners hit snags now and then! Below, we’ve answered the most common questions to help you plant with confidence.
What’s the best time of year to plant seeds?
The ideal time depends on your plant type and climate. Cool-season crops (like lettuce or peas) thrive when soil temps are below 70°F, while warm-season plants (tomatoes, peppers) need soil at 60°F+. Check your USDA Plant Hardiness Zone and seed packet guidelines for specifics. Pro tip: Direct-sow in spring or fall for best results!
How long does it take for seeds to germinate?
Germination time varies wildly—some seeds sprout in 3–7 days (radishes, beans), while others take weeks or even months (trees, orchids). Check the seed packet for exact details, and keep soil consistently moist (not soggy!). Light vs. dark matters too: some seeds (like sunflowers) need light to germinate, while others (like beans) prefer darkness.
Can I plant seeds too deep?
Yes—and it can kill your seed! A simple rule: Plant seeds 2–3 times as deep as their width. For example, a 1/4-inch-wide bean seed should go 1/2-inch deep. Tiny seeds (like lettuce) only need a light dusting of soil. Over-deep planting starves seeds of oxygen, delaying or preventing sprouting. Use your finger or a small stick to mark depth!
What if my seeds won’t sprout? Troubleshooting tips
- Check moisture: Dry soil is the #1 killer. Keep soil damp (like a wrung-out sponge) but avoid waterlogging.
- Test temperature: Too cold? Use a seedling heat mat ($10–$20). Too hot? Move pots to a cooler spot.
- Verify viability: Old seeds may fail. Do a float test (drop in water—sinkers are good, floaters are dead).
- Light exposure: Some seeds need darkness to germinate (cover with a damp paper towel). Others need light—keep them uncovered.
- Patience: Germination can take weeks for stubborn seeds. Don’t replant too soon!
Can I plant seeds in containers instead of a garden bed?
Containers are perfect for herbs, lettuce, peppers, and even small trees. Use pots with drainage holes and fill with lightweight potting mix (not garden soil). Size matters: Choose containers at least 6 inches deep for most veggies. Just ensure they get 6+ hours of sunlight daily. Bonus: Containers let you grow anywhere—balconies, patios, or even windowsills!
Wrapping up and next steps
You’ve now got all the tools—and confidence—to turn a tiny seed into a thriving plant! 🌱 Remember, patience and care are your best friends in gardening. Whether you’re growing herbs, flowers, or veggies, start small, track your progress, and celebrate every little sprout.
Ready to take the next step? Expand your green thumb:
- 🌿 Experiment with different seeds or containers.
- 📅 Plan a schedule for watering, sunlight, and fertilizing.
- 📸 Document your journey—it’s rewarding to see growth over time!