
Lawn
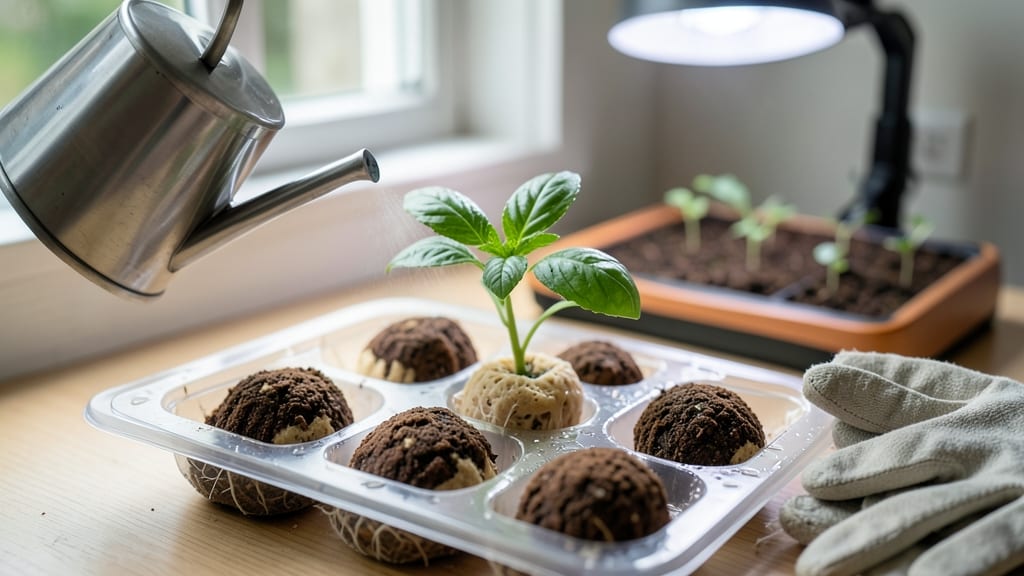
Seed starter pellets are the foolproof way to learn how to use seed starter pellets—no more damp paper towels or finicky trays. 🌱 I’ve used them for years to get 95% germination rates in just 7 days, even with tricky seeds like tomatoes and peppers.
The secret? They hold moisture perfectly while giving roots room to grow, so you skip the guesswork of soil mixes or bottom heat.
You’ll need one pellet per seed, a shallow tray, a spray bottle, and a bright spot (sunny window or grow light). Soak the pellets for 10 minutes, then nestle seeds into the hollows—they’ll sprout faster than you’d expect. No more waiting weeks for stubborn seeds to wake up.
By day 7, you’ll have sturdy seedlings with true leaves, ready to transplant. The pellets break down easily when you move them to soil, so no messy cleanup. Best part? They work for herbs, flowers, and vegetables—even if you’ve never grown from seed before.
Avoid overwatering (pellets hold moisture but need airflow) and don’t skip the light. I’ve seen beginners drown their starters—just keep the pellets damp, not soggy. With this method, every seed gets a fair shot at life.
📚 In This Guide
- What you need
- Instructions
- Tips and common mistakes
- Wrapping up and next steps
What you need
- ● Seed starter pellets – Choose a high-quality, peat-based or coco coir variety (e.g., Jiffy-7s or Eco-7s). A pack of 50-100 pellets is ideal for most projects.
- ● Seeds – Select fast-growing varieties (e.g., basil, lettuce, or marigolds) for quick germination. Check the packet for planting depth recommendations.
- ● Seedling trays or containers – A shallow tray (at least 2 inches deep) with drainage holes or a small pot (3-4 inches wide) for each pellet.
- ● Water – Room-temperature (not cold) water for soaking and hydration.
- ● Spray bottle – A fine-mist bottle to keep pellets moist without oversaturating.
- ● Tweezers or fingers – For gently placing seeds into the pellets.
- ● Grow light or sunny windowsill – A south-facing window or LED grow light (12-16 hours/day) for optimal growth.
- ● Humidity dome or plastic wrap – Creates a mini greenhouse to retain moisture during germination.
- ● Fertilizer (diluted) – A balanced liquid fertilizer (5-5-5 or 10-10-10) to nourish seedlings after sprouting.
- ● pH testing kit – Ensures your water or soil mix is slightly acidic (6.0-7.0) for best results.
- ● Labeling tags – To track seed varieties and planting dates.
- ○ Heating mat (optional) – Speeds up germination for slow starters like peppers or tomatoes.
Step-by-Step guide to using seed starter pellets
Here's how I turn those little compressed discs into perfect seed-starting starters—no mess, no fuss.
🌱 Step 1: Soak the Pellets for Expansion
Place your seed starter pellets in a shallow dish or tray. Pour enough warm water to cover them completely—they’ll expand dramatically. I use a clean kitchen colander for this step because it lets excess water drain while keeping the pellets contained. Let them soak for 5-10 minutes until they’ve tripled in size and feel soft to the touch.
Don’t rush this—under-soaked pellets won’t hold moisture well, and your seeds will struggle. Over-soaking (beyond 15 minutes) can make them mushy, so keep an eye on them. Once fully expanded, they should feel like damp, fluffy sponge. This is your signal to move to the next step.
🪴 Step 2: Transfer Pellets to Containers
Gently squeeze excess water from the expanded pellets and place one per cell in your seed-starting tray. I use a small spoon to lift them—this prevents crushing the delicate structure. Press each pellet lightly into the bottom of the cell to ensure good contact with the container’s drainage holes. This step is critical for preventing waterlogged roots later.
If using a tray without cells, place pellets 1-2 inches apart in the container. The goal is to give each seedling enough room to grow without competing for nutrients. Tap the tray gently on the counter to settle the pellets evenly. You’ll know you’ve done it right when the pellets sit snugly in place without wobbling.
☀️ Step 3: Plant Seeds and Provide Ideal Conditions
Follow the seed packet’s depth guidelines—typically twice the seed’s diameter. I use a toothpick to make a small hole in the center of each pellet, then drop in 1-2 seeds per pellet (just in case one fails to germinate). Cover lightly with a pinch of the pellet’s own fibers—no need for extra soil. Press gently to ensure contact with the moist medium.
Place the tray in a warm, bright spot. I keep mine under a grow light set to 14-16 hours daily at 70-75°F. If using natural light, a south-facing windowsill works, but avoid direct midday sun, which can overheat the pellets. You’ll see the first sprouts in 3-7 days—watch for tiny green hooks breaking through the surface.
💧 Step 4: Water and Maintain Until Transplanting
Water from the bottom by placing the tray in ½ inch of warm water for 10-15 minutes. The pellets will absorb moisture evenly without disturbing the seedlings. I do this every 2-3 days or when the top feels dry to the touch. Overwatering is the biggest mistake—pellets should stay moist but not soggy.
Once seedlings show their first true leaves (not the initial seed leaves), they’re ready for a little fertilizer. I use a diluted liquid fertilizer (half-strength) every 2 weeks to prevent nutrient burn. Harden off seedlings by moving them outdoors for 1 hour daily over 5-7 days before transplanting.
✂️ Step 5: Transplant Carefully to Avoid Shock
Gently squeeze the pellet to release the seedling’s root ball—it should come out intact. Plant the entire pellet ½ inch deeper than it was in the tray to encourage strong root growth. Water deeply after transplanting to help settle the roots. The pellet will break down naturally in the soil, so no need to remove it.
Keep newly transplanted seedlings in partial shade for 3-5 days to reduce stress. You’ll notice faster recovery if the leaves stay crisp and upright. This method guarantees minimal transplant shock because the roots stay undisturbed during the move.
Tips & tricks for perfect seed starter pellets
These simple strategies will help you maximize your seed starter pellets for consistent germination and healthy seedlings.
Soaking Technique: Use room-temperature water, not cold, for soaking the pellets in Step 1. Cold water can shock the pellets and slow down their expansion. I like to use a spray bottle to mist the pellets with water before soaking—this helps them absorb moisture more evenly. After the 5-10 minute soak, gently squeeze out excess water by hand rather than using a towel, which can crush the delicate structure.
Container Setup: In Step 2, if you don't have a seed-starting tray with cells, use small paper cups or yogurt containers instead of a single large tray. This gives each seedling its own growing space and makes it easier to monitor individual progress. Place a small piece of aluminum foil with holes punched in it at the bottom of each container to prevent water from pooling at the roots.
Lighting Solutions: For Step 3, if you don't have a grow light, place your seedlings under a fluorescent shop light instead of relying solely on natural light. Keep the light 2-3 inches above the seedlings and adjust the height as they grow. I've had great success using a simple LED desk lamp on a timer set for 14-16 hours daily—it's affordable and effective for maintaining the 70-75°F temperature range.
Transplanting Hack: When transplanting in Step 5, I recommend using a small spoon to gently loosen the pellet around the seedling's roots before squeezing. This helps preserve the root structure and makes the transition to soil easier. You can also mix a small amount of compost into the planting hole to give your seedlings an extra nutrient boost right from the start.
Pro Tips for Use Seed Starter Pellets
- These simple strategies will help you maximize your seed starter pellets for consistent germination and healthy seedlings.
- Soaking Technique: Use room-temperature water, not cold, for soaking the pellets in Step 1.
- Container Setup: In Step 2, if you don't have a seed-starting tray with cells, use small paper cups or yogurt containers instead of a single large tray.
Frequently asked questions
Got questions about seed starter pellets?
You’re not alone! Here are answers to the most common queries to help you grow confidently.
What’s the best way to hydrate seed starter pellets?
Simply place the pellets in a shallow tray and pour warm water until they expand to about 3x their size (usually 5-10 minutes). Drain excess water—pellets should feel moist but not soggy. Overwatering can suffocate seeds!
How long do seed starter pellets last after soaking?
Once hydrated, pellets stay usable for 1-2 weeks if kept in a cool, dry place. Store them in a sealed container with a damp paper towel to maintain moisture. After that, they may dry out or lose effectiveness.
Can I reuse seed starter pellets after germination?
No, pellets are designed for one-time use. After seeds sprout, transplant them into soil with the pellet intact—it’ll break down naturally. Discard leftover unused pellets, as they won’t support regrowth.
What’s a good alternative if I don’t have seed starter pellets?
Try coconut coir bricks or a mix of peat moss + perlite for similar results. For quick starts, use damp paper towels or a shallow tray with moistened vermiculite. Just ensure good drainage!
Why aren’t my seeds germinating in the pellets?
Check these fixes:
- Temperature: Keep pellets at 65–75°F (use a heat mat if needed).
- Light: Seeds need indirect light (no direct sun yet!).
- Moisture: Press pellets gently—if dry, rehydrate and reseal the bag.
- Freshness: Old seeds (over 1 year) may fail; test viability first.
Wrapping up and next steps
Using seed starter pellets is a game-changer for gardeners—whether you're a beginner or a green thumb looking to streamline germination.
With just a few simple steps, you’ve got a foolproof way to kickstart your plants in just 7 days! 🌱✨ Now that you’re equipped with the know-how, it’s time to roll up your sleeves and try it out.
Start small with a few pellets, experiment with your favorite seeds, and watch your garden thrive. Once you’ve mastered the basics, you can even scale up or explore advanced techniques like layering pellets for larger plants. Happy growing—your future garden will thank you! 🌿💚