
Propagation
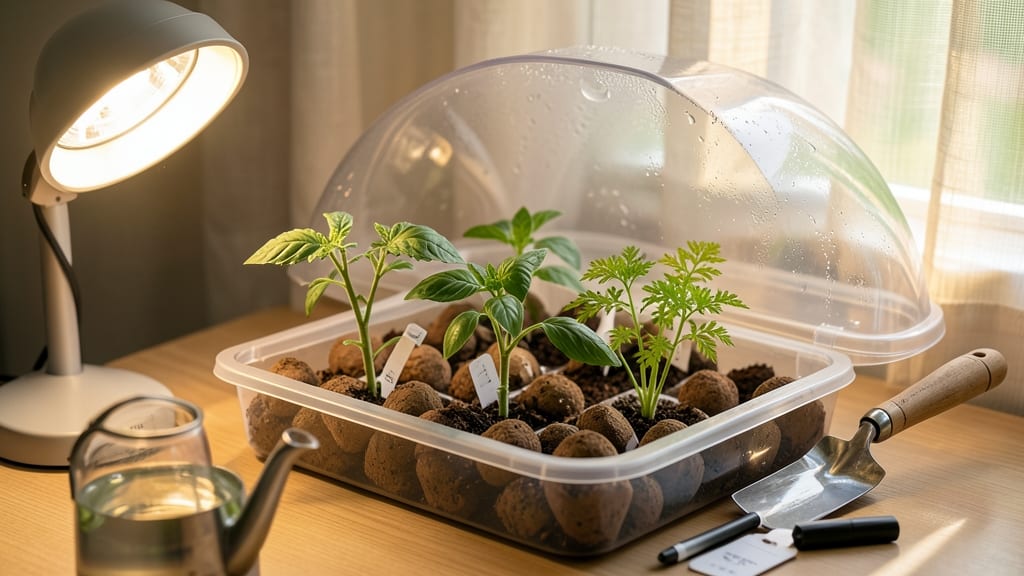
Your Jiffy seed starting kit could transform a slow, finicky seedling process into a fast, foolproof growing experience that even my black thumb can't mess up. 🌱 I've used these for years—especially with finicky seeds like snapdragons and petunias—and they cut germination time by nearly half while keeping roots undisturbed.
The magic is in those compressed peat pellets: just add water, wait five minutes, and you've got perfect starter pots without any mess. No soil prep, no sterilizing containers, and no worrying about overwatering—just pop in your seeds, keep them warm, and watch them sprout in days instead of weeks.
By the time you're ready to transplant, those seedlings will have strong roots ready to handle the move. You'll avoid the dreaded leggy seedlings that collapse when you put them in the ground, and the whole process stays clean and organized from start to finish.
Works for herbs, flowers, and vegetables alike—just adjust your light and watering based on what you're growing. Here's how to get the best results every time.
📚 In This Guide
- What you need
- Instructions
- Tips and common mistakes
- Wrapping up and next steps
What you need
- ● Jiffy Seed Starting Kit – Includes 50-100 peat pellets (check the exact count on your package).
- ● Seeds – Fast-growing varieties like marigolds, basil, or lettuce (check seed packet for recommended depth and spacing).
- ● Watering can or spray bottle – With a fine mist nozzle to avoid disturbing the pellets.
- ● Tray or container – A shallow, flat-bottomed tray with drainage holes (or a repurposed baking dish).
- ● Grow lights or sunny windowsill – A south-facing window or LED grow lights (12-16 hrs/day) for optimal growth.
- ● Scissors or knife – For trimming pellet strings (if needed).
- ● Plant labels & marker – To track seed varieties and planting dates.
- ○ Seed-starting soil mix – A lightweight, well-draining potting mix (optional if using Jiffy’s pre-moistened pellets).
- ● Heating mat – Speeds up germination for slow starters like tomatoes or peppers.
- ● Humidity dome or plastic wrap – Creates a mini greenhouse effect for extra moisture.
- ● Fertilizer (low-dose) – A balanced liquid fertilizer (5-10-5) for seedlings after sprouting.
- ● Tweezers or small spoon – For gently placing tiny seeds.
Step-by-Step instructions for using a Jiffy seed starting kit
Here's how to get your seeds sprouting in record time with these pre-made peat pellets.
🌱 Step 1: Prepare the Jiffy Pellets
Start by placing your 4 Jiffy peat pellets into the seed tray's molded slots. The pellets will expand dramatically when wet, so make sure they fit snugly in each compartment. I like to gently press them down just enough to keep them from shifting when I add water.
Fill the bottom tray with 1 inch of water—just enough to reach the bottom of the pellets when they absorb it. The pellets will soak up water from below, so avoid pouring directly on top. You'll know they're ready when they've expanded to about 2-3 inches in diameter and feel firm to the touch.
💧 Step 2: Plant Your Seeds
Once the pellets are fully expanded, gently press down on the top to create a small planting dimple. This is where you'll place your seeds—usually just 1 seed per pellet for most flowers. I tap the seed packet gently to release one seed at a time, then drop it into the dimple.
Cover the seed with a light sprinkle of the pellet's surface fibers—just enough to hide it from view. Don't press down or add extra soil. The pellet's natural fibers provide perfect moisture retention without smothering the seed. For tiny seeds, I use a toothpick to gently press them into place.
☀️ Step 3: Provide Warmth and Light
Place the tray in a warm location with indirect light until you see germination. A sunny windowsill works, but avoid direct midday sun at first—it can dry out the pellets too quickly. I like to use a seedling heat mat set to 70-75°F for the first few days, as this speeds up germination time significantly.
Keep the pellets moist by maintaining 1 inch of water in the bottom tray—never let them dry out completely. You'll know the moisture is right when the pellets feel damp but not soggy. Watch for tiny sprouts in as little as 3-7 days, depending on the seed type.
🌿 Step 4: Care for Emerging Seedlings
Once seedlings emerge, move them to a location with bright, indirect light for the first week. You'll notice the first leaves (called cotyledons) appear first, followed by the true leaves in about 10-14 days. At this point, you can gradually introduce more direct sunlight.
Continue keeping the bottom tray filled with water, but reduce the amount slightly to ½ inch as the seedlings grow. This prevents overwatering while still maintaining moisture. If you see the pellets shrinking or the seedlings wilting, it's time to add more water.
⏰ Step 5: Transplant When Ready
When seedlings have 2-3 sets of true leaves and are about 2-3 inches tall, they're ready for transplanting. The Jiffy pellets can be planted directly into the garden or pots—they'll break down naturally over time, so there's no need to remove them.
Transplant on a cloudy day or in the late afternoon to reduce stress on the young plants. Water thoroughly after transplanting to help the roots establish. You'll see your flowers blooming in just a few weeks, proving that these little pellets pack a big punch!
Tips & tricks for perfect Jiffy seed starting
Real talk: These little pellets are game-changers for impatient gardeners like me who want blooms without waiting months.
The Moisture Secret: In Step 1, when you add that 1 inch of water to the bottom tray, don't rush it. Let the pellets soak up water gradually for about 15-20 minutes before checking their size. This slow absorption creates a more stable environment for your seeds. I've seen pellets crack if you flood them too quickly—just keep the water level steady and let nature take its course.
Seed Placement Pro Tip: For Step 2, when creating that planting dimple, make it just deep enough to cradle your seed without burying it. I learned this the hard way with tiny marigold seeds—they need light to germinate! If you're working with multiple seed types, label each pellet with a toothpick before planting to avoid mix-ups later.
Light Transition Strategy: In Step 3, when moving from indirect to direct light, do it gradually over 3-4 days. I start by placing the tray near a west-facing window for a few hours daily, then slowly increase exposure. Sudden direct sunlight can shock delicate seedlings, causing them to stretch toward the light or even scorch.
Transplant Timing: For Step 5, don't wait until your seedlings are exactly 2-3 inches tall—watch for those true leaves first. I've found that some fast-growing varieties like zinnias can be ready in just 10 days, while others like snapdragons might need 2 weeks. The key is when they've developed a strong root system in the pellet, which you can gently check by squeezing the pellet sides.
Pro Tips for Jiffy Seed Starting Kit
- Real talk: These little pellets are game-changers for impatient gardeners like me who want blooms without waiting mon...
- The Moisture Secret: In Step 1, when you add that 1 inch of water to the bottom tray, don't rush it. Let the pellets ...
- Seed Placement Pro Tip: For Step 2, when creating that planting dimple, make it just deep enough to cradle your seed ...
Frequently asked questions
Got questions about your Jiffy Seed Starting Kit? You’re not alone—gardeners love these kits for their ease, but a few common concerns pop up. Here’s what you need to know before diving in!
How long does it take for seeds to germinate in a Jiffy?
Germination time varies by seed type, but most fast growers (like lettuce or radishes) sprout in 3–7 days with warmth and moisture. Check your seed packet for specifics—some delicate flowers (e.g., petunias) may take 10–14 days. Keep the peat pellets damp but not soggy for best results!
Can I reuse Jiffy peat pellets?
Nope! Jiffy peat pellets are designed for one-time use—they’re engineered to break down as seeds grow. Reusing them risks mold, poor drainage, or stunted roots. Instead, compost the used pellets or repurpose the tray for new ones. Pro tip: Save the plastic mesh trays for future starts!
What’s the ideal temperature for germination?
Most seeds thrive between 65–75°F (18–24°C), but check your seed packet for exceptions (e.g., cool-loving veggies like peas prefer 50–60°F). Use a seedling heat mat if your space runs cold. Avoid placing them near drafts or direct sunlight until sprouts appear—consistency is key!
What if my seeds aren’t sprouting?
Don’t panic! First, check moisture—peat pellets should feel damp like a wrung-out sponge. If seeds still refuse to sprout after 2 weeks, they may be old or damaged. Try these fixes:
- Test a few seeds in warm water—do they sink? (Good!) or float? (Bad—discard them.)
- Scratch the seed coat gently with sandpaper for hard-shelled seeds (e.g., beans).
- Move them to a warmer spot (e.g., on top of the fridge).
Can I use Jiffy pellets for anything other than seeds?
While they’re seed-starting superstars, Jiffy pellets work for:
- Propagating cuttings (e.g., herbs, coleus)—just dip stems in rooting hormone first.
- Growing mushrooms (with a sterile substrate like straw).
- Reviving wilting houseplants—wrap roots in a damp pellet to boost hydration.
Wrapping up and next steps
Ready to watch your garden bloom in record time? The Jiffy Seed Starting Kit makes fast germination effortless—whether you're a seasoned gardener or just starting out.
With the right setup, patience, and a little love, you’ll soon be harvesting vibrant seedlings and reaping the rewards of your green thumb! 🌱
Now that you’re armed with tips and answers, take the next step: grab your kit, pick your favorite seeds, and start planting! Share your progress or ask questions in our gardening community—we’re here to cheer you on. Happy growing! ✨