
Propagation
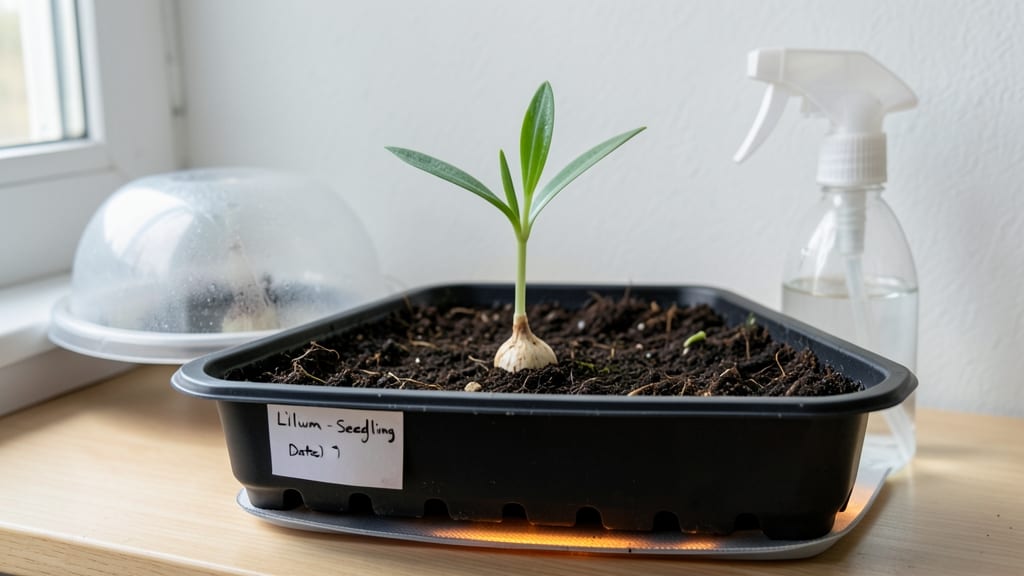
Lily seed germination turns unreliable flops into reliable blooms. 🌱 I’ve struggled with lily seeds before—planting them only to watch them rot or sprout unevenly—but this method changed everything. The key? Mimicking winter’s natural chilling period to break dormancy and trigger consistent germination.
You’ll need a simple setup: moist potting mix, a sealed plastic bag, and patience. Plant seeds just below the surface, keep them damp (not soggy), and store them in the fridge for 8-12 weeks.
This cold treatment tricks seeds into thinking winter has passed, so they’ll sprout when you move them to warmth. Hybrid lilies can work, but expect slower germination and less predictable results.
Within 4-8 weeks after stratification, you’ll see tiny green shoots pushing through the soil. Keep them in bright, indirect light and maintain steady moisture—no more than 1 inch of water per week.
The first leaves might look delicate, but with consistent care, you’ll soon have sturdy seedlings ready for transplanting.
Most gardeners quit here, but the real magic happens in year two—that’s when your first blooms appear. The trick to success? Avoid rushing the process. Cold stratification isn’t just a step; it’s the foundation for healthy, blooming lilies.
Stick with it, and you’ll have a garden full of homegrown beauty in just a couple of seasons.
📚 In This Guide
- What you need
- Instructions
- Tips and common mistakes
- Wrapping up and next steps
What you need
- ● Fresh lily seeds: Collect or purchase clean, plump seeds (avoid shriveled or damaged ones). Aim for 5–10 seeds per batch for experimentation.
- ● Cold-stratification medium: Option 1: Wet paper towels (2–3 layers, dampened with distilled water).
- ● Option 2: Peat moss or coconut coir (sterilized, 2–3 inches deep in a container).
- ● Option 3: Vermiculite or perlite (moistened, 1:1 ratio with water).
- ● Sealed container: A ziplock bag (for paper towels) or a small plastic bin (for bulkier mediums) with drainage holes.
- ● Spray bottle: For gentle misting (avoid soaking the medium).
- ● Refrigerator: A cold, dark space (34–40°F / 1–4°C) for stratification (standard fridge crispers work!).
- ● Planting pots: 4–6 inch pots with drainage holes (fill with well-draining potting mix like 50% perlite/50% compost).
- ○ Heat mat (optional but helpful): A seedling heat mat (70–75°F / 21–24°C) for post-stratification warmth.
- ● Labeling tags: To track seed varieties and planting dates.
- ● Fine-mesh screen: For pre-germination seed rinsing (removes debris).
- ● Humidity dome: A clear plastic cover to retain moisture during early growth.
- ○ Grow lights: LED or fluorescent (12–16 hours/day) for seedlings (optional if natural light is bright).
- ● Fungicide: Neem oil or hydrogen peroxide (3%) to prevent mold (dilute 1:10 with water).
How to germinate lily seeds using cold stratification
Here's my foolproof method for breaking lily seed dormancy and getting strong, healthy starts.
🌱 Step 1: Collect and Prepare Fresh Lily Seeds
Harvest seeds only from fully mature pods—wait until they turn brown and split open naturally. Remove the seeds and let them air-dry for 3-5 days in a shaded, well-ventilated area. This prevents rot during stratification. I always store them in a paper envelope with the variety name and harvest date written on it.
Lily seeds need cold stratification to break dormancy, but first, they must be scarified. Place seeds between two layers of damp paper towels, then gently rub them with fine-grit sandpaper until the outer coat is slightly roughened. This mimics natural wear from winter conditions and helps water penetrate. Don't overdo it—just enough to create tiny scratches.
❄️ Step 2: Stratify Seeds in a Cold, Moist Environment
Fill a quart-sized zip-top bag with 2 inches of moistened peat moss or coconut coir. Place the scarified seeds ½ inch deep in the mix, spacing them 1 inch apart. Seal the bag but leave it slightly open for airflow—use a toothpick to prop the corner open. This prevents mold while maintaining humidity.
Store the bag in your refrigerator's crispier drawer (where temperatures stay 35-45°F). Check weekly and mist with water if the mix feels dry. After 8-12 weeks, seeds should begin to sprout. If you see black mold, remove the seeds immediately—this means the environment is too damp. Real talk: patience is key here. Some seeds take the full 12 weeks before germination begins.
☀️ Step 3: Transition to Warmth and Light for Sprouting
Once you see green shoots (usually 2-4 weeks after stratification ends), transfer the seeds to 2-inch pots filled with sterile seed-starting mix. Press the mix gently around the seedlings to secure them without burying the stems. Place the pots under a grow light set to 14-16 hours daily—a south-facing window won't provide enough intensity for strong growth.
Keep the soil evenly moist but never soggy. You'll know moisture is right when the surface feels damp to touch but doesn't glisten. Watch for first true leaves (the second set after the initial cotyledons)—this signals the seedling has established roots. At this stage, I fertilize lightly with a half-strength liquid fertilizer to encourage leaf growth without overwhelming the young roots.
🌿 Step 4: Harden Off and Transplant Young Seedlings
After 4-6 weeks of growth (when seedlings reach 3-4 inches tall), begin hardening them off. Place pots outside in a shaded, sheltered spot for 1-2 hours the first day, gradually increasing time over 10-14 days. Lily seedlings are delicate—direct sun or cold snaps can shock them severely.
Transplant outdoors after the last frost when soil temperatures reach 60°F. Choose a spot with partial shade (morning sun, afternoon shade) and well-draining soil. Dig holes twice as wide as the root ball but only as deep as the pot. Water deeply after planting to settle the soil and reduce transplant shock. Mulch with 2 inches of organic matter to retain moisture and protect roots from temperature swings.
Tips & tricks for reliable lily seed germination
Cold stratification might seem tricky, but these insider tips will help you avoid common pitfalls and maximize your success rate.
Seed Selection Matters: In Step 1, prioritize seeds from pods that have fully matured and naturally split open. These seeds have completed their natural drying process and are far more likely to germinate successfully. I've found that seeds harvested from pods that are still green or partially closed often fail to break dormancy, no matter how long you stratify them. The key is patience—wait until the pods are completely brown and dry before harvesting.
Scarification Technique: When scarifying seeds in Step 1, focus on creating just enough abrasion to break the seed coat without damaging the seed itself. Use a fine-grit sandpaper (around 220-grit) and make light, even strokes. Think of it like sanding wood—you want to remove just enough material to expose the seed's interior. Over-scarifying can damage the delicate embryo inside, reducing germination rates. A quick test: if the seed coat feels slightly rough to touch but you can still see the seed's natural shape, you've done it right.
Stratification Environment: The 35-45°F temperature range in Step 2 is critical, but consistency matters just as much. I recommend placing a small thermometer inside the refrigerator bag to monitor temperatures—some fridges have hot spots that can push temps too high. If you notice condensation on the bag's interior, that's a sign the environment is too moist. The goal is to keep the peat moss or coconut coir consistently damp, not soggy. This balance prevents mold while maintaining the moisture seeds need to begin metabolic activity.
Light Transition: In Step 3, when moving seedlings to grow lights, position the bulbs just 2-3 inches above the pots. This proximity provides the intense light needed for strong growth without overheating the seedlings. I've seen many gardeners burn seedlings by placing lights too close—look for a gentle warmth from the bulb, not heat that makes the soil surface feel warm to touch. Rotate pots daily to ensure even growth, as seedlings will naturally lean toward the light source.
Pro Tips for Lily Seed Germination
- Cold stratification might seem tricky, but these insider tips will help you avoid common pitfalls and maximize your s...
- Seed Selection Matters: In Step 1, prioritize seeds from pods that have fully matured and naturally split open. These...
- Scarification Technique: When scarifying seeds in Step 1, focus on creating just enough abrasion to break the seed co...
Frequently asked questions
Got questions about getting those lily seeds to sprout? You’re not alone—germination can feel like a puzzle! Below, we’ve tackled the most common queries to help you avoid frustration and boost your success rate.
How long does cold stratification take for lily seeds?
Most lily seeds need 4–12 weeks in cold, moist conditions (35–45°F) to break dormancy. Some varieties, like Lilium martagon, may take longer—up to 3 months. Monitor moisture levels; soggy seeds rot, while dry seeds won’t germinate. Patience pays off—don’t rush the process!
Can I germinate lily seeds without cold stratification?
Technically yes, but success rates drop dramatically. Some tropical lilies (e.g., Lilium longiflorum) may germinate faster without stratification, but hardy species like Asiatic or Martagon lilies require cold treatment. If you skip it, try soaking seeds in warm water for 24 hours first, but expect slower or uneven sprouting.
Why aren’t my lily seeds sprouting after stratification?
Check these common culprits:
- Improper moisture: Seeds should stay damp but not waterlogged. Use a spray bottle to mist the medium.
- Wrong temperature: Post-stratification, keep seeds at 65–75°F for warmth. A seedling heat mat helps.
- Old or low-quality seeds: Fresh seeds (1–2 years old) germinate best. Store-bought seeds may be treated to prevent sprouting.
- Light exposure: Some lilies need darkness to germinate; others sprout faster with indirect light. Experiment!
Should I use peat moss or vermiculite for germination?
Both work, but vermiculite is ideal—it retains moisture while allowing airflow to prevent mold. Mix it with perlite (1:1 ratio) for best results. Peat moss can compact over time, suffocating sprouts. For a budget-friendly alternative, try coco coir (sterilized). Pro tip: Add a fungicide (like hydrogen peroxide, 3%) to the mix to ward off rot.
When is the best time to start lily seed germination?
For outdoor planting, start stratification in late fall (October–November) so seeds are ready to sprout in spring. If indoor-growing, begin anytime—just mimic seasonal changes. For example:
Season
Action
Fall
Stratify outdoors or in a fridge (4–6 weeks).
Winter/Spring
Move to warmth (65–75°F) once sprouts appear.
Summer
Plant seedlings outdoors after last frost or keep indoors with grow lights.
Wrapping up and next steps
Germinating lily seeds with cold stratification unlocks a rewarding journey toward vibrant blooms—just remember, patience and consistency are your best allies! 🌱 With the right mix of moisture, temperature control, and timing, you’ll soon witness those first tender sprouts pushing through the soil.
Once your seedlings are thriving, it’s time to transplant them into pots or garden beds, giving them space to grow into stunning, full-sized lilies.
Ready to dive deeper? Start by selecting healthy seeds and repeating the process with confidence—your future garden will thank you! 🌸