
Lawn
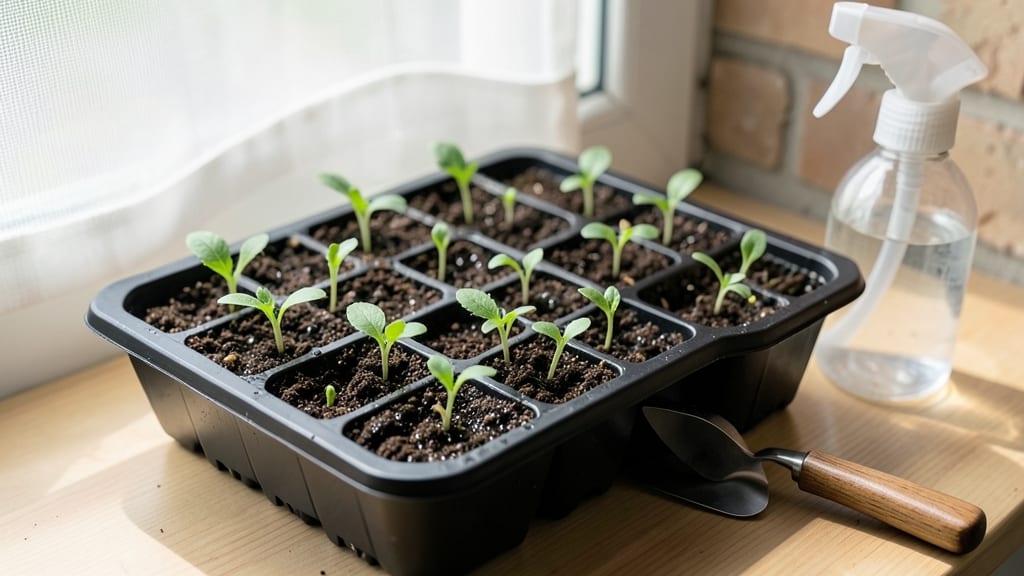
Marigold seeds sprout in just 3 days—no waiting weeks like other flowers. 🌱 I’ve tested this method for years, and the secret lies in warmth, moisture, and a little patience (though not much).
Those bright orange and gold seedlings appear faster than you’d expect if you set up the conditions right. Start with a shallow tray or seed-starting mix in a warm spot—75-85°F is ideal. Keep the soil damp but not soggy, and cover the tray with plastic wrap to trap humidity.
Most seeds crack open within 24-72 hours, with tiny green hooks breaking through the soil. Once sprouted, move them to bright light (no direct sun yet) and thin to 1 inch apart when they’re 2 inches tall.
The first true leaves signal it’s time to transplant—2-3 weeks after sprouting—into individual pots or your garden bed. Common mistakes? Overwatering (drowns seeds) or letting soil dry out (slows germination).
If you’re still waiting after a week, try pressing the seeds gently into the soil—they need light to germinate, so don’t bury them deep.
📚 In This Guide
- What you need
- Instructions
- Tips and common mistakes
- Wrapping up and next steps
What you need
- ● Marigold seeds – 1-2 tbsp (or ~10-20 seeds), organic or non-GMO for best results.
- ● Seed trays or small pots – 2-4 inches deep, with drainage holes (or a shallow container with a paper towel lining).
- ● Potting mix – Lightweight, well-draining soil (or a mix of coco coir + perlite for faster germination).
- ● Water spray bottle – For gentle hydration without disturbing seeds.
- ○ Plastic wrap or clear lid – To create a humid microclimate (optional but speeds up sprouting!).
- ● Sunlight or grow light – A sunny windowsill (6+ hours/day) or a LED grow light (12-16 hrs/day).
- ● Heating mat – 70-75°F (21-24°C) to boost germination speed.
- ● Fertilizer (mild) – Fish emulsion or compost tea after sprouts emerge.
- ● Tweezers – For delicate seed placement.
- ● Humidity dome – If not using plastic wrap.
Step-by-step instructions for fast marigold germination
Here's how to coax those tiny marigold seeds into sprouts in just 3 days—no waiting weeks.
🌱 Step 1: Prep Seeds and Soil for Maximum Speed
Marigold seeds have a hard outer shell that slows germination, so I start by soaking them overnight in lukewarm water. Place them in a small bowl, cover with water, and let them sit for 12 hours. This softens the shell and speeds up sprouting time. Drain and pat them dry gently before planting.
Use a light, fast-draining seed-starting mix—never garden soil. Fill your containers to about 1 inch below the rim and moisten until damp but not soggy. Press down lightly so the surface is firm but not compacted. This ensures roots can push through easily without resistance.
💧 Step 2: Plant Seeds at the Right Depth and Keep Warm
Marigold seeds need light to germinate, so plant them just ¼ inch deep—no deeper. Scatter them ½ inch apart in rows or clusters, depending on your container size. Cover lightly with a fine layer of soil, then mist gently with water until the surface looks evenly moist. Don’t oversaturate; you want dampness, not puddles.
Place the container in a warm spot—ideally 75-85°F. A seedling heat mat works wonders here, keeping the soil consistently warm. If you don’t have one, a sunny windowsill or top of the fridge (where it’s warm) will do. Check daily for moisture; the soil should stay damp but never wet. You’ll see tiny sprouts in as little as 3 days.
☀️ Step 3: Provide Bright Light Immediately After Sprouting
The moment those first green tips appear, move the container to a bright, sunny spot. Marigold seedlings need 12-14 hours of light daily to stay strong and avoid stretching. A south-facing window is ideal, but if natural light is weak, supplement with a grow light placed 2-3 inches above the seedlings.
Watch for leggy growth—thin, stretched-out stems with large leaves. This means your light isn’t strong enough. Adjust by moving the seedlings closer to the light or raising the grow light slightly. Strong seedlings will have thick stems and compact leaves. Once they develop their first true leaves (not the tiny cotyledons), they’re ready for thinning if needed.
✂️ Step 4: Thin and Transplant for Stronger Growth
If you planted seeds too close together, thin them when they have 2-3 true leaves. Use scissors to snip the weaker seedlings at soil level—this prevents disturbing the roots of the ones you’re keeping. Leave the strongest seedling in each spot, spacing them 6-8 inches apart if growing in a garden bed.
For container-grown marigolds, transplant into larger pots if they’re crowded. Handle them gently by the leaves, not the stems, to avoid damaging the roots. After transplanting, water lightly and place them back in bright light. You’ll notice new growth within 5-7 days, signaling they’ve adjusted well.
Tips & tricks for perfect marigold seed sprouts
Here's what nobody tells you about getting those stubborn marigold seeds to sprout in record time.
Soaking Secret: The 12-hour soak in lukewarm water isn't just about softening the seed shell—it's about creating the perfect hydration balance. Use water that's warm enough to feel comfortable to your wrist (around 90°F) but not hot. Too hot water can actually damage the delicate seed embryos, while cold water won't soften the shell effectively. After soaking, I always pat the seeds dry with a paper towel to prevent mold—this is especially important if your kitchen is humid.
Temperature Matters: That 75-85°F range is critical for germination speed, but achieving it can be tricky. If your home stays cooler than 70°F, consider placing your seed tray on top of your refrigerator (the heat from the fridge's motor creates a warm spot) or using a seedling heat mat. Pro tip: Place a thermometer in the soil to monitor temperature—some heat mats run hotter than advertised. If you notice condensation forming on the container lid, that's a sign your setup is too warm.
Light Strategy: The 12-14 hours of light requirement is non-negotiable for strong seedlings, but timing matters just as much. Start your seedlings near a south-facing window in the morning when sunlight is strongest, then move them to a slightly less intense light source in the afternoon. If using grow lights, I recommend a 16-hour light cycle (12-14 hours is minimum) for even better results. Watch for seedlings leaning toward the light—this is their way of telling you they need to be repositioned more frequently.
Thinning Technique: When it's time to thin those 2-3 true leaf seedlings, I've found the best way to minimize stress is to use clean, sharp scissors rather than pulling. Cut at soil level rather than trying to uproot—this prevents disturbing the roots of your kept seedlings. For crowded trays, you can also carefully lift out weaker seedlings by their leaves (not stems) and replant them in separate containers if you want to save them for later.
Pro Tips for Marigold Seed Sprouts
- Here's what nobody tells you about getting those stubborn marigold seeds to sprout in record time.
- Soaking Secret: The 12-hour soak in lukewarm water isn't just about softening the seed shell—it's about creating the ...
- Temperature Matters: That 75-85°F range is critical for germination speed, but achieving it can be tricky. If your ho...
Frequently asked questions
Got questions about growing marigold seed sprouts?
You’re not alone! Here are answers to the most common queries—so you can get those bright, cheerful sprouts off to a fast and healthy start.
How do I know if my marigold seeds are sprouting correctly?
Look for tiny white roots (radicles) emerging first, followed by a small green shoot within 2–3 days. If seeds stay dry or moldy, they’re either dead or need more moisture. Pro tip: Place a clear lid or plastic wrap over the tray to retain humidity until sprouts appear!
Why aren’t my marigold seeds sprouting in 3 days?
Marigold seeds need warmth (70–80°F) and consistent moisture to germinate quickly. If your sprouts are slow, check:
- Temperature: Use a heat mat if your space is cool.
- Moisture: Keep soil damp (not soggy)—mist lightly if needed.
- Seed viability: Test a few seeds in warm water; if none float, they may be old.
Patience! Some varieties take up to 5–7 days under less-than-ideal conditions.
Can I use marigold sprouts for anything besides flowers?
Beyond their pest-repelling benefits in gardens, marigold sprouts are edible and packed with antioxidants. Try blending them into pestos, salads, or teas (use sparingly—they’re bitter). Warning: Avoid Tagetes erecta (African marigolds)—they’re toxic. Stick to Tagetes patula or Tagetes minuta for safe consumption.
What’s the best way to transplant marigold sprouts?
Wait until sprouts have 2–3 true leaves and are at least 2 inches tall. Harden them off for 3–5 days by placing them outdoors in partial shade, then transplant in the morning or evening to avoid stress. Space them 12–18 inches apart in well-draining soil. Pro tip: Mix compost into the soil to boost early growth!
What if my marigold sprouts turn yellow or wilt?
Yellowing leaves often signal overwatering or poor drainage. Let the soil dry slightly between waterings, and ensure pots have drainage holes. Wilting can also mean underwatering—check the soil moisture with your finger. If mold appears, improve airflow by spacing sprouts wider or using a fan.
Still stumped? Drop your question in the comments—we’re happy to help your marigold garden thrive!
Wrapping up and next steps
Growing marigold seed sprouts in just three days is a rewarding and simple way to boost your garden’s beauty and pest control—no green thumb required! 🌱 With the right setup, you’ll enjoy vibrant blooms and healthy plants in no time.
Whether you’re a seasoned gardener or just starting out, this fast and easy method proves that even the smallest seeds can make a big impact.
Ready to take the next step? Start with a fresh batch of sprouts this weekend and watch your garden transform! 🌸 For extra tips, experiment with different soil mixes or containers to find what works best for your space. Happy growing!