
Flowers
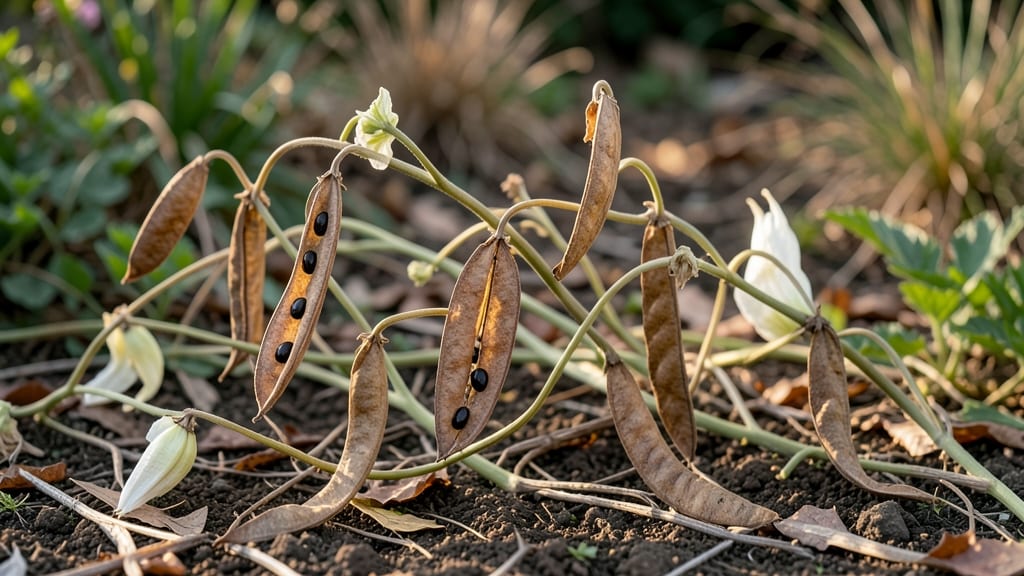
Twisting moonflower seed pods off their vines is a gardener’s secret to next year’s dreamy white blooms. 🌙 I’ve learned the hard way—snapping them too early or too late ruins the seeds inside, but when done right, you’ll have a stash of moonflower magic ready for planting.
The key is patience and knowing exactly when those pods are ready to harvest.
First, you’ll need a pair of sharp pruners or clean scissors and a paper bag for collecting the pods. Moonflowers grow fast—sometimes 6-10 feet in a single season—so keep an eye out for pods that turn from green to brown and start splitting open.
That’s your cue they’re mature and ready for the twist-and-pull technique.
Once harvested, let the pods dry completely in a warm, dry place for 1-2 weeks before cracking them open. The seeds inside should be plump and dark—any shriveled or light-colored ones won’t sprout.
Plant them ½ inch deep in well-draining soil after the last frost, and watch as they climb and bloom all summer long.
Here’s the trick: moonflowers thrive in zones 9-11, but even in cooler climates, you can start them indoors 8-10 weeks before the last frost. Just avoid overwatering—these tropical beauties hate soggy roots.
With the right timing, you’ll have a jungle of vines ready to produce those iconic night-blooming flowers by midsummer.
📚 In This Guide
- What you need
- Instructions
- Tips and common mistakes
- Wrapping up and next steps
What you need
- ● Moon flower seed pods (fully mature & dried) – Collect 10–20 pods per plant (or more if you’re going big!). Look for brown, papery pods that split open easily.
- ● Sharp pruning shears or scissors – A clean, sterilized pair to snip stems without crushing pods (avoid dull blades!).
- ● Paper bags or breathable mesh sacks – 2–3 bags (1–2 ft wide) to allow airflow while drying. Brown paper lunch bags work in a pinch!
- ○ Newspaper or silica gel packets – For drying pods indoors (optional but helpful in humid climates).
- ● Small paper envelopes or airtight containers – For long-term seed storage (e.g., 3x5” envelopes or mason jars with lids).
- ● Magnifying glass – To inspect pods for pests or mold before storage.
- ● Desiccant packets – Place 1–2 in storage containers to absorb excess moisture.
- ● Labeling markers & tags – To mark pods with the harvest date (e.g., “Moonflower 2024”).
- ● Glove – A lightweight pair to protect hands from prickly stems.
- ● Patience – Wait until pods are fully brown and crispy (usually 2–4 weeks after flowering).
- ● Dry, well-ventilated space – A sunny porch, garage, or indoor area with airflow (avoid humidity!).
- ● Knowledge of moonflower care – Familiarity with Ipomoea alba helps avoid harvesting too early!
How to harvest moon flower seed pods without damaging next year’s blooms
Here’s my foolproof method for collecting moon flower seeds while keeping your plants healthy and ready to bloom again.
🌱 Step 1: Identify Mature Seed Pods
Moon flower seed pods ripen when they turn from green to a papery brown and begin splitting open naturally. I wait until at least 50% of the pod has dried—this ensures the seeds inside are fully mature and viable. Gently squeeze the pod: if it feels crisp and hollow, it’s ready. Harvesting too early means immature seeds that won’t sprout.
Look for pods that have longitudinal splits—these are the ones releasing seeds naturally. If you find any that are still fully closed and green, leave them on the vine. Overripe pods can scatter seeds everywhere, so don’t wait too long. I like to work on a dry morning when the pods are fully dry and brittle.
✂️ Step 2: Harvest Without Twisting or Breaking
Twisting moon flower pods off the stem is a common mistake—it often snaps the stem and damages the plant. Instead, use clean, sharp scissors to snip the entire pod ½ inch above the stem attachment. This leaves a clean break and prevents tearing. If you’re harvesting by hand, pinch the base of the pod and pull gently but firmly upward—it should release cleanly without resistance.
Place the harvested pods in a paper bag (not plastic) to allow airflow while they finish drying. I label each bag with the harvest date—this helps track seed viability later. Avoid storing them in humid areas, as moisture can cause mold before you even get to planting.
🪴 Step 3: Dry and Extract Seeds Properly
Spread the harvested pods on a flat, dry surface (like a baking sheet) in a warm, shaded spot for 3-5 days. The goal is to let them dry completely—you’ll know they’re ready when they crumble easily between your fingers. If you rush this step, the seeds may not germinate properly. I check daily and stir them gently to ensure even drying.
Once fully dry, place the pods in a clean, dry jar and shake them vigorously. The seeds will fall out while the empty pod husks stay behind. Sift the mixture through a fine mesh strainer to separate seeds from any remaining debris. Store the seeds in a paper envelope in a cool, dark place—this preserves their viability for 2-3 years. Label the envelope with the harvest year and variety.
🌿 Step 4: Prepare for Next Year’s Planting
Moon flower seeds are light-sensitive, so I pre-chill them for 2 weeks in the fridge before planting. Place them in a sealed bag with a damp paper towel to maintain moisture. This cold stratification mimics winter conditions and breaks dormancy, ensuring stronger germination. After chilling, sow seeds ½ inch deep in well-draining soil and keep them moist until sprouts appear.
Here’s the thing—moon flowers self-seed easily, so you might already have volunteers popping up around your garden. If you want to control where they grow, plant them in well-draining soil with full sun exposure. They’ll reward you with those iconic night-blooming flowers next season, just like the ones you harvested.
Tips & tricks for perfect moon flower seed collection
Avoid these common pitfalls—and keep your moon flowers thriving for next year’s blooms.
Timing is Everything: In Step 1, resist the urge to harvest pods too early. Those crisp, hollow pods with longitudinal splits are your golden ticket to viable seeds. I’ve learned this the hard way—harvesting too soon means seeds that won’t germinate. The 50% dryness rule is non-negotiable for seed maturity. If you’re unsure, wait one more day—patience here pays off with stronger plants next season.
Harvest Technique Matters: Step 2’s clean snip method saves your plants from damage. I’ve seen gardeners twist pods off stems, leaving jagged breaks that invite disease. Use your scissors to cut just above the stem attachment—this leaves a clean break and keeps the plant healthy. For hand harvesters, pinch at the base and pull firmly upward; the pod should release without resistance. This precision ensures your moon flowers stay strong for next year’s spectacular blooms.
Drying Strategy: The 3-5 day drying period in Step 3 is critical—don’t rush it! I’ve tried skipping this step, and the seeds either didn’t germinate or grew weak plants. Spread pods on a baking sheet in a warm, shaded spot (like a covered porch) and check daily. When they crumble easily between your fingers, they’re ready. This thorough drying prevents mold and ensures seed viability for up to three years when stored properly.
Storage Wisdom: After extraction, store seeds in paper envelopes—not plastic—to prevent moisture buildup. I’ve found that labeling each envelope with the harvest year and variety saves headaches later. Place them in a cool, dark pantry where they’ll maintain viability. This simple step means you won’t be scrambling to identify last year’s seeds when planting time comes around.
Pro Tips for Moon Flowers Seed Pods
- Avoid these common pitfalls—and keep your moon flowers thriving for next year’s blooms.
- Timing is Everything: In Step 1, resist the urge to harvest pods too early. Those crisp, hollow pods with longitudina...
- Harvest Technique Matters: Step 2’s clean snip method saves your plants from damage. I’ve seen gardeners twist pods o...
Frequently asked questions
Got questions about harvesting moon flower seed pods? You’re not alone!
Here are some of the most common queries—and their answers—to help you master the twist-resistant technique for next year’s stunning blooms.
When is the best time to harvest moon flower seed pods?
Harvest moon flower seed pods when they turn tan or light brown and start splitting open naturally—usually late summer to early fall (August–October in most climates). Wait until the pods are dry but not brittle to avoid losing seeds. If harvested too early, they won’t store well; too late, and the seeds may scatter!
Why do moon flower seed pods twist when I try to remove them?
Moon flower seed pods twist because of their spiral dehiscence—a natural mechanism to release seeds. To prevent this, gently squeeze the base while twisting counterclockwise (like opening a jar). If they resist, let them dry further or use clean scissors to snip the stem just above the pod. Pro tip: Work on a dry day to reduce moisture-related sticking!
How should I store moon flower seeds for planting next year?
Store seeds in a paper envelope or breathable container with a silica gel packet to absorb moisture. Keep them in a cool, dark place (like a fridge) for up to 2–3 years. Label the envelope with the harvest date! Avoid plastic bags—condensation can cause mold.
Can I plant moon flower seeds directly from the pod?
Yes! Once pods are fully dry, you can crush them by hand to release seeds or sow them directly into the soil. Moon flowers thrive in warm soil, so wait until after the last frost (spring or early summer). Press seeds 1/4-inch deep and keep soil moist until germination (usually 1–2 weeks).
What if my moon flower seed pods won’t open or release seeds?
If pods stay closed, they may need more drying time—try hanging them upside down in a paper bag for a few days to encourage natural splitting. If they’re still stubborn, lightly nick the pod with scissors to release seeds. Avoid forcing them open prematurely, as this can damage viability.
Are there alternatives if I can’t harvest seeds myself?
If you miss the harvest window, buy fresh seeds online from reputable sellers (look for Ipomoea alba or “moon vine” labels). Some nurseries also sell potted moon flowers—just check for seed pods when purchasing! Alternatively, ask local gardeners or seed swaps for saved seeds.
Wrapping up and next steps
Harvesting moon flower seed pods the right way ensures a bountiful crop of lunar blooms next season—without the frustration of twisted stems or wasted effort! 🌙 With the right tools, timing, and techniques, you’re not just preserving seeds; you’re securing the future of your garden’s enchanting nighttime beauty.
Ready to grow with confidence?
Your next step? Mark your calendar for late summer or early fall and gather your supplies. Then, watch your moon flowers thrive—and your garden glow—year after year!