
Planting
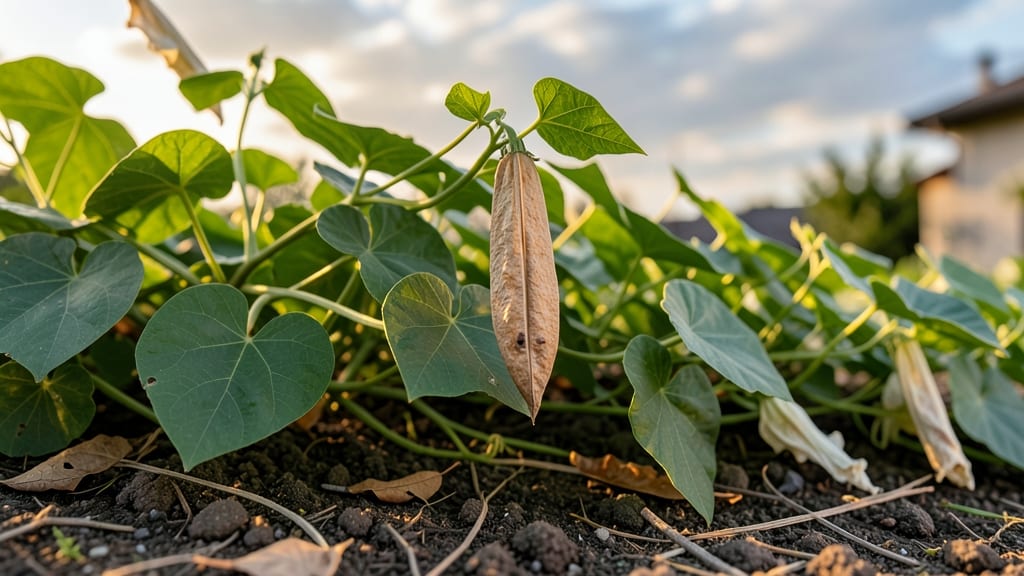
Twisting a moonflower plant seed pod until it releases its seeds is the surest way to know they're ready. 🌙 I learned this trick after wasting seeds from pods that weren't quite mature—now I harvest only when the pods crack open with a gentle twist.
The key moment arrives in late summer when the pods turn from green to brown and begin splitting naturally.
You'll need just a few tools: sharp pruning shears for harvesting, a paper bag to collect seeds, and a dry, dark place to cure them. The pods must dry completely before storing—any moisture left behind will turn seeds into mush within weeks.
Once dry, store them in an airtight container where they'll stay viable for 2-3 years.
Planting these seeds in spring after the last frost gives them time to establish before summer's heat. Press them just below the soil surface in well-draining, slightly sandy mix—they need warmth to germinate, so black plastic mulch speeds things up.
Within 10-14 days, you'll see those first delicate shoots unfurling toward the light.
Even in small spaces, moonflowers thrive as annuals or perennials in warm climates. The twist test ensures you're not wasting seeds, and proper storage means you'll always have fresh ones ready for next season's moonlit blooms. Here's how to do it right the first time.
📚 In This Guide
- What you need
- Instructions
- Tips and common mistakes
- Wrapping up and next steps
What you need
- ● Moonflower seed pods: 5–10 fully mature pods (ensure they’re dry and slightly papery to the touch).
- ● Paper towels or coffee filters: 2–3 sheets (for moisture control).
- ● Plastic zip-top bags: 2–3 quart-sized bags (to create a humid environment).
- ● Spray bottle: Small (for misting—avoid soaking!).
- ○ Pencil or marker: For labeling (optional but helpful!).
- ● Notebook or phone: To track observations over 7–10 days.
- ● Magnifying glass: For inspecting seed details up close.
- ● Seedling trays or small pots: If you plan to sow viable seeds immediately.
- ● Humidity dome or clear lid: To enhance moisture retention.
- ● Thermometer: To monitor temperature (ideal range: 65–75°F).
How to test moonflower seed pods for viability before harvesting
Here’s the foolproof method I use to save time and energy—no guesswork, just reliable results.
🌱 Step 1: Wait for the Right Time to Check
Moonflower seed pods are ready for viability testing when they’ve turned tan or light brown and feel dry to the touch. You’ll know they’re mature because they’ll easily twist off the vine with a gentle tug—this usually happens 4-6 weeks after the flowers bloom. If you test too early, the seeds won’t be fully developed, and the twist test won’t work.
I like to check pods in the morning when the vines are dry. A damp pod will feel heavier and stickier, making it harder to assess properly. Wait until the pods are completely dry and crispy before proceeding.
🌿 Step 2: Perform the Twist Test
Gently grasp the pod between your thumb and forefinger, about ½ inch from the base where it meets the vine. Twist firmly but slowly—you’re not trying to break it, just apply steady pressure. A viable pod will snap cleanly with a slight pop sound, revealing dry, brown seeds inside. If it resists or tears unevenly, the seeds likely need more time.
If the pod feels rubbery or splits messily, leave it on the vine for another 3-5 days and retest. The twist test is your best indicator, but I’ve found that pods that twist easily almost always yield viable seeds.
✂️ Step 3: Harvest and Store Viable Pods
Once a pod passes the twist test, carefully snip it off the vine with clean pruning shears. Place it in a paper bag (not plastic—this prevents mold) and label it with the harvest date. Store the bag in a cool, dry place (like a pantry) for 2-4 weeks to let the seeds fully dry out. This extra drying step is crucial—moisture trapped inside the pod will cause seeds to rot during storage.
I like to shake the bag gently every few days to help loosen seeds from the pod walls. After 2-4 weeks, open the bag and gently break apart the pods to release the seeds. Discard any pods that still feel damp or have mold.
🪴 Step 4: Test a Few Seeds for Germination (Optional but Recommended)
Before storing all your seeds, pick 3-5 seeds from a viable pod and perform a quick germination test. Place them on a damp paper towel inside a sealed plastic bag, then store in a warm spot (70-75°F). Check daily—you should see sprouts in 5-10 days. If fewer than half sprout, the batch may need more drying time or wasn’t fully mature.
This step saves you from planting dozens of seeds only to find they won’t grow. I’ve had batches where the twist test worked, but the germination rate was low—always double-check before storing your entire harvest.
⏰ Step 5: Store Seeds Properly for Next Season
Once seeds are fully dry and viable, transfer them to an airtight container (like a small glass jar) and add a desiccant packet to absorb any lingering moisture. Label the container with the variety name and harvest date. Store in a dark, cool place (like a refrigerator) where they’ll stay viable for 2-3 years. Moonflower seeds are slow to lose potency, but keeping them dry and cool maximizes their lifespan.
I like to write the germination date on the container too—this helps track how long the seeds remain viable. If you’re unsure, test a few seeds every 6-12 months to confirm they’re still good.
Tips & tricks for perfect moonflower seed pod harvesting
Here's what nobody tells you about getting foolproof results with moonflower seeds—no wasted effort, just reliable harvests.
Timing is Everything: The 4-6 week window after flowering is critical. I've learned this the hard way—testing too early means immature seeds that won't germinate, while waiting too long risks the pods drying out completely on the vine. Check pods every 2-3 days during this window to catch them at peak viability. The morning after a dry night is the best time to test, as dew can make pods feel artificially damp.
Twist Test Technique: When performing the twist test in Step 2, focus on the ½ inch base where the pod meets the vine—this is the weakest point. Apply steady pressure rather than jerking, and listen for that telltale pop. If you hear cracking instead of a clean snap, the seeds likely need more time. I've found that pods that twist with minimal resistance almost always contain fully developed seeds ready for harvest.
Storage Wisdom: The 2-4 week drying period in Step 3 is non-negotiable for preventing mold. I recommend placing your paper bags in a well-ventilated area with good airflow—like an open pantry shelf rather than a closed cabinet. Gently shaking the bags every few days helps release seeds from the pods without damaging them. If you notice any pods developing mold during this period, remove them immediately to prevent contamination of the entire batch.
Germination Test Insight: The optional germination test in Step 4 is worth doing, even if it seems like extra work. I've had batches where the twist test passed but germination rates were dismal—usually because the seeds weren't fully dry. Place your test seeds near a sunny window to maintain the 70-75°F temperature without needing special equipment. If you see sprouts within 5-10 days, your entire batch is likely viable and ready for storage.
Pro Tips for Moonflower Plant Seed Pod
- Here's what nobody tells you about getting foolproof results with moonflower seeds—no wasted effort, just reliable ha...
- Timing is Everything: The 4-6 week window after flowering is critical. I've learned this the hard way—testing too ear...
- Twist Test Technique: When performing the twist test in Step 2, focus on the ½ inch base where the pod meets the vine...
Frequently asked questions
Got questions about moonflower seed pods and their twist-tested viability? You’re not alone! Here are some of the most common queries—plus clear, actionable answers to help you master the harvest.
How do I know when a moonflower seed pod is ready to harvest?
Twist-test your pods when they turn tan or brown and feel dry to the touch (usually 7–10 days after flowering). A mature pod should easily twist off with a gentle turn—if it resists, wait another day or two. Avoid harvesting when pods are still green or damp, as seeds may not germinate.
What if the seed pod won’t twist off, even when it looks dry?
Don’t force it! Use sterilized scissors to snip the stem cleanly if twisting fails. Check for overripe pods (shriveled or cracked)—these may have already released seeds. If pods are stubbornly green, they’re not ready yet. Pro tip: Harvest in the morning when moisture levels are lowest for easier twisting.
How long do moonflower seeds stay viable after harvest?
Freshly harvested seeds from twist-tested pods have the highest germination rates (up to 90% if stored properly). Store them in a cool, dry place (like a paper envelope in the fridge) for 1–2 years. After that, viability drops sharply—test a few seeds annually to check.
Can I grow moonflower from store-bought seeds, or do I need to harvest my own?
Store-bought seeds work fine for basic growth, but home-harvested pods often yield healthier, more vigorous plants. If buying seeds, opt for organic, non-GMO varieties labeled for Ipomoea alba (moonflower). For best results, twist-test your own pods—it’s a fun, rewarding process!
What should I do if my seed pod gets eaten by pests before harvesting?
Moonflower pods are squishy targets for slugs, snails, and beetles. Prevent damage with:
- Handpicking pests in the evening ( they’re sluggish then).
- Setting up beer traps or copper barriers.
- Using row covers if pests are severe.
Wrapping up and next steps
Growing moonflower plants from seed pods is a rewarding experience that combines patience with the joy of nurturing life. By mastering the twist-test for viability and following proper planting techniques, you’ll set the stage for stunning, fragrant blooms that light up your garden. 🌙✨ Ready to take the next step?
Start by gathering your seeds, preparing your soil, and giving these delicate beauties the care they deserve—your moonlit garden awaits!