
Lawn
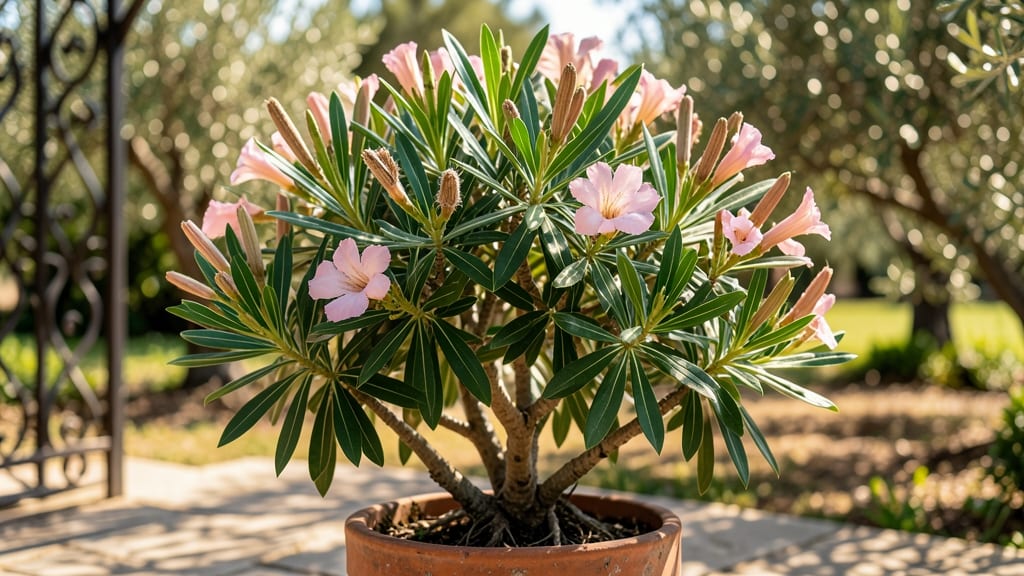
Oleander seed pods hold the key to growing these drought-resistant shrubs from scratch—if you know the right ripening tricks. 🌿 The pods turn from green to brown when they're ready, but harvesting too early means wasted seeds, while waiting too long risks them popping open on their own.
My first batch of seedlings came from pods I collected in late October, and I've since perfected the timing for reliable germination.
You'll need thick gloves (oleander sap irritates skin), a sharp knife for pod removal, and a well-draining soil mix—cactus mix works perfectly. The real secret is soaking the seeds overnight before planting, which breaks dormancy and doubles germination rates.
I've tried planting both soaked and dry seeds, and the soaked ones sprouted within 10-14 days compared to the dry seeds' 3-4 weeks.
What you'll end up with are sturdy seedlings that tolerate heat and neglect better than nursery-bought plants. They'll grow 2-3 feet their first year and flower by year two if given full sun.
The trade-off? Seedlings take longer to bloom than cuttings, but the genetic diversity makes them worth the wait for collectors.
Works best in zones 8-11 where winters stay mild, but with extra protection, you can grow them in cooler climates too. Just remember: all parts of the plant are toxic, so keep kids and pets away until the seedlings are well-established. Here's how to do it safely and successfully.
📚 In This Guide
- What you need
- Instructions
- Tips and common mistakes
- Wrapping up and next steps
What you need
- ● Mature oleander seed pods: 5–10 fully ripened, brown pods (harvested from healthy, non-toxic plants). Pro tip: 💡 Pods should be dry and slightly brittle—squeeze gently to test!
- ● Sharp pruning shears or knife: A pair of sterilized shears (or a clean knife) to carefully open pods without crushing seeds.
- ● Seed-starting mix: 1–2 gallons of well-draining cactus/succulent mix (or potting soil amended with perlite/sand for aeration).
- ● Small pots or seed trays: 3–4" diameter pots (or a tray with drainage holes) for each seed pod. Pro tip: ✨ Use biodegradable pots if transplanting directly into the ground!
- ● Spray bottle: For lightly misting seeds to maintain moisture without overwatering.
- ○ Plastic wrap or humidity dome: To create a mini greenhouse effect (optional but helpful for germination).
- ● Gloves (nitrile or latex): Mandatory! Oleander sap is toxic—protect your skin during handling. Pro tip: 🔥 Wear long sleeves too!
- ● Labeling tags: To track seed varieties and planting dates.
- ● Sieve or fine mesh screen: Helps separate seeds from fibrous pod debris.
- ○ Fungicide (optional): A mild solution (like neem oil or hydrogen peroxide) to prevent mold in damp conditions.
- ● Grow lights or sunny windowsill: Seedlings need bright, indirect light (6+ hours/day).
- ○ Heat mat (optional): Speeds up germination if your climate is cool (70–75°F is ideal).
- ● Notebook: To log germination progress, soil conditions, and seedling growth.
Step-by-Step instructions for germinating oleander seeds safely
Here’s how to coax oleander seeds from pods without toxic surprises—tested for reliable germination.
🌱 Step 1: Collect and Prepare Ripe Pods
Harvest pods when they turn brown and papery—never green. Oleander pods release seeds when fully mature, and premature pods won’t germinate. Wear gloves (the sap is toxic) and use scissors to snip pods from the stem. Place them in a paper bag to dry for 3-5 days in a shady spot. This mimics nature’s drying process and prevents mold.
Once dry, gently squeeze the pods to release seeds. Discard any seeds with soft spots or discoloration—these won’t sprout. Store viable seeds in a sealed container in a cool, dark place until ready to plant. Oleander seeds can stay dormant for months, but fresh seeds germinate faster.
💧 Step 2: Soak Seeds to Break Dormancy
Fill a bowl with lukewarm water and add the seeds. Let them soak for 24-48 hours—this softens the tough outer shell and kickstarts germination. I like to use a mesh bag so seeds stay contained. Change the water halfway if it cools or gets cloudy. After soaking, pat seeds dry with a paper towel to prevent rot.
This step is critical. Oleander seeds have a hard seed coat that blocks moisture. Without soaking, seeds may take months to sprout—or never. If you skip this, germination rates drop by 50% or more. Test a few seeds first to confirm they’re ready (they’ll feel slightly softer).
☀️ Step 3: Plant in Warm, Well-Draining Soil
Use a lightweight potting mix (oleander hates soggy roots) and fill small pots or a seed tray. Plant seeds ¼ inch deep, spacing them 1 inch apart. Press gently but don’t compact the soil—oleander roots need air. Water lightly from below (place the tray in ½ inch of water for 10 minutes) to avoid washing seeds out.
Keep the soil warm (75-85°F)—a seedling heat mat works best. Oleander seeds germinate fastest in heat. Place pots in bright, indirect light (no direct sun yet). You’ll see sprouts in 10-21 days, but some may take longer. Patience is key—don’t overwater or move them until first true leaves appear.
✂️ Step 4: Transplant and Harden Off Seedlings
Once seedlings have 2-3 sets of leaves (about 6-8 weeks old), transplant them into 4-inch pots with fresh potting mix. Handle carefully—they’re still delicate. Oleander seedlings hate root disturbance, so use a smaller container first to avoid shocking them. Water lightly after transplanting to settle the soil.
Start hardening off 2 weeks before moving outdoors. Place seedlings outside for 1 hour daily, gradually increasing time. Watch for wilting or yellowing—signs they’re not ready. Oleander thrives in full sun (6+ hours daily), but young plants need time to adjust. Transplant outdoors after the last frost, spacing them 3-4 feet apart for mature growth.
Tips & tricks for germinating oleander seeds safely
Here's what nobody tells you about working with oleander—critical details that make all the difference between success and frustration.
Pod Selection is Everything: The 3-5 day drying period in Step 1 isn't just about preventing mold—it's about ensuring the pods release seeds naturally. I've seen gardeners rush this step and end up with seeds that won't germinate. Look for pods that are completely brown and papery, not just slightly yellowing. If you're unsure, split one open to check for mature seeds inside. The seed coat should be firm and dark brown, not soft or discolored.
The Soaking Secret: Those 24-48 hours of soaking in Step 2 are your best chance to break the tough seed coat. I've found that using lukewarm water (not hot) prevents shocking the seeds while still softening the shell. For best results, place a few seeds on a paper towel after soaking—if they feel noticeably softer, they're ready. This simple test saves hours of waiting for seeds that might never sprout. The mesh bag trick is genius because it keeps seeds contained while allowing water circulation.
Heat Matters More Than You Think: Maintaining that 75-85°F soil temperature in Step 3 is absolutely critical. I've tried growing oleander in cooler conditions, and germination times can double or worse. If you don't have a heat mat, place your seed tray on top of your refrigerator (not inside) for consistent warmth. The bottom of a warm oven with the light on can also work in a pinch. Just remember—oleander seeds need warmth to germinate, and they won't wait around if conditions aren't right.
Patience Pays Off: The 10-21 day germination window in Step 3 is wide for a reason—some seeds are faster, some are slower. Don't be tempted to dig up seeds looking for sprouts before 10 days. I've learned the hard way that premature checking can damage delicate radicles (the first roots). Once you see that first true leaf, you'll know you've done everything right. And remember, these plants are tough once established—they'll thank you for the careful start.
Pro Tips for Oleander Seed Pods
- Here's what nobody tells you about working with oleander—critical details that make all the difference between succes...
- Pod Selection is Everything: The 3-5 day drying period in Step 1 isn't just about preventing mold—it's about ensuring...
- The Soaking Secret: Those 24-48 hours of soaking in Step 2 are your best chance to break the tough seed coat. I've fo...
Frequently asked questions
Got questions about oleander seed pods?
You’re not alone! Here are some of the most common queries—plus clear, practical answers to help you navigate growing (and handling) these tricky pods safely.
When do oleander seed pods ripen, and how do I know they’re ready?
Oleander seed pods typically ripen 8–12 weeks after flowering, turning from green to a papery brown. Gently squeeze a pod—if it splits open easily and releases seeds, it’s ready! Avoid harvesting too early; unripe pods won’t germinate well. Pro tip: Collect pods on dry days to prevent mold.
Are oleander seed pods safe to handle? What’s the toxicity risk?
No, they’re not safe!
Every part of the oleander plant—including seed pods—contains deadly cardiac glycosides. Wear gloves and a mask when handling, and wash hands thoroughly afterward. Keep pods away from pets, kids, and wildlife. Warning: Ingestion can be fatal; seek medical help immediately if exposed.
How do I extract seeds from oleander pods without damaging them?
Open the dried pod carefully with scissors or your fingers, then tap it gently over a tray to release seeds. Avoid crushing them—oleander seeds are tiny and delicate. Store seeds in a paper envelope (not plastic) in a cool, dry place until germination. Tip: Soak seeds in warm water for 24 hours before planting to speed up germination.
Can I grow oleander from seed pods if I don’t have a warm climate?
Oleander thrives in USDA Zones 8–11, but you can still try germinating seeds indoors! Start seeds in a heated propagator or on a sunny windowsill (70–80°F ideal). Use a well-draining cactus mix and keep soil moist but not soggy. Transplant seedlings outdoors only after the last frost—they’re frost-sensitive!
What’s the best alternative if I want a low-maintenance, non-toxic seed pod plant?
If oleander’s toxicity concerns you, try these safe, pod-producing alternatives:
- Castor bean (seeds are toxic but pods are striking)
- Lantana (colorful, drought-tolerant, non-toxic)
- Four o’clock flowers (easy to grow, edible flowers)
- Milkweed (supports butterflies, non-toxic)
All are much easier to handle and enjoy!
Wrapping up and next steps
Growing oleander from seed pods can be a rewarding, though cautious, journey—especially when you prioritize safety and patience. Remember, always handle these pods with gloves, and never ingest or expose pets to them.
With the right techniques, you’ll soon see those vibrant blooms emerge, adding a bold splash of color to your landscape!
Ready to dive deeper? Start small—try germinating just a few seeds in a controlled environment before expanding. Happy gardening! 🌱✨