
Orchid Care
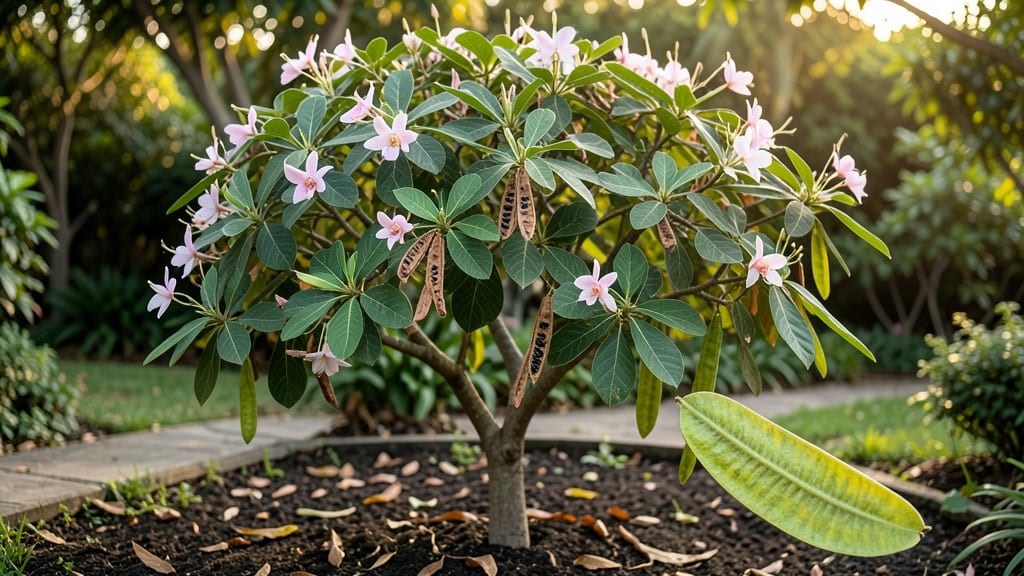
Extracting seeds from orchid tree pods feels like opening a tiny treasure chest—each pod holds the potential for a stunning, drought-tolerant tree. 🌿 The key is timing: harvest pods when they turn from green to brown and split open naturally, usually in late summer or early fall.
If you rush, the seeds won’t germinate; if you wait too long, they’ll scatter on their own.
Once you’ve collected them, the real magic happens in the preparation. Soak the pods in warm water for 24 hours to soften the tough outer shell, then gently squeeze to release the seeds—no sharp tools needed.
These seeds are tiny but mighty, and they need a moist, well-draining mix of perlite and peat moss to wake up from their natural dormancy.
With patience, you’ll see seedlings emerge in 4-8 weeks, though some may take longer. The biggest challenge? Keeping the medium consistently moist without drowning the seeds—too much water invites fungal rot, while too little stalls germination.
A humidity dome or plastic wrap helps create the tropical conditions these seeds crave.
Outdoor growers in warm climates can transplant seedlings directly into the ground once they’ve developed 3-4 true leaves, but be prepared for a slow start. Orchid trees grow slowly at first but reward you with drought-resistant, fast-growing trees that thrive in full sun.
The payoff? A tree that lives for decades—and starts with just one pod.
📚 In This Guide
- What you need
- Instructions
- Tips and common mistakes
- Wrapping up and next steps
What you need
- ● Mature orchid tree seed pods: 3–5 fully ripe, brown, and slightly papery pods (harvest when they naturally split open).
- ● Sharp pruning shears or scissors: Sterilized, with a clean blade (avoid rust or dull edges).
- ● Disposable gloves (nitrile or latex): 1 pair to protect hands from sap and potential irritation.
- ● Paper towels or coffee filters: 2–3 sheets for drying seeds.
- ● Small bowl or container: Shallow, with smooth sides (e.g., ceramic or glass) for seed soaking.
- ● Distilled or dechlorinated water: ½ cup (120 ml) at room temperature.
- ● Fine-mesh strainer or sieve: 1 (pore size: ~1mm) for rinsing seeds.
- ● Paper plates or seedling trays: 1–2 with drainage holes (for germination setup).
- ● Sterilized potting mix: 1–2 cups of well-draining orchid or cactus mix (avoid peat-heavy blends).
- ○ Spray bottle (optional): 1 for misting seeds post-extraction.
- ● Hydrogen peroxide (3% solution): 1 tbsp mixed with water for seed disinfection (if mold risk is high).
- ● Fungicide (e.g., Mycorrhizal inoculant): A pinch to prevent damping-off in trays.
- ● Grow lights or sunny windowsill: For consistent humidity control during germination.
- ● Labeling tags: 3–5 to track seed pod sources and extraction dates.
Step-by-step guide to extracting orchid tree seeds from pods
Here's how to carefully open those plump seed pods without damaging the delicate seeds inside.
🌱 Step 1: Identify and Harvest Ripe Seed Pods
Wait until the pods turn from green to a papery brown color—this signals full ripeness. Gently twist the pod at its base to detach it from the tree. If it resists, use clean pruning shears to make a precise cut ½ inch below the pod. Avoid crushing the pod, as even slight pressure can rupture the seeds inside.
Place the harvested pods in a dry, shaded location for 1-2 weeks to complete drying. You'll know they're ready when the outer shell feels brittle and cracks easily when gently squeezed. This drying process is critical—wet pods release seeds prematurely and risk mold.
💧 Step 2: Sterilize Tools and Prepare Work Surface
Orchid seeds are microscopic and vulnerable to contamination. Wipe down your work surface with 70% isopropyl alcohol, then lay a clean paper towel underneath. Sterilize scissors or a small knife by swabbing them with rubbing alcohol and letting them air-dry completely. Work in a dust-free area to prevent airborne particles from landing on your seeds.
I like to use a shallow glass dish for seed extraction—it contains any accidental spills and makes cleanup effortless. Keep a small bowl of distilled water nearby for immediate rinsing if needed. The goal is to maintain absolute cleanliness throughout this process.
✂️ Step 3: Carefully Open the Pods Without Damaging Seeds
Hold the dried pod firmly with one hand while using the sterilized scissors to make a ¼-inch vertical slit along its length. Avoid cutting all the way through—just enough to create a hinge. Gently pry open the pod using the scissors' tip, working from one end to the other. You'll see a fine, powdery mass inside that's actually thousands of individual seeds.
If the pod resists, let it sit in a warm, dry place for another 24 hours to soften further. Never force it open—patient persistence prevents seed loss. Once opened, transfer the seed mass to a clean, dry container using a soft paintbrush. Brush gently in one direction to release the seeds without creating static that could scatter them.
🌿 Step 4: Store Seeds Properly for Germination
Place the container with seeds in a cool, dark location (around 50-60°F) for 4-6 weeks to stratify. This mimics winter conditions and improves germination rates. Seal the container loosely—just enough to keep out debris while allowing airflow. Check weekly for any signs of moisture buildup, which can cause mold.
After stratification, store the seeds in a sealed container with a moistened paper towel at the bottom. Keep them refrigerated until ready to sow. The paper towel maintains humidity without creating a waterlogged environment. Label the container with the date and orchid variety—these seeds won't stay viable forever, and tracking helps you time planting precisely.
Tips & tricks for perfect orchid tree seed pod handling
Working with orchid tree seed pods demands patience and precision—here's how to elevate your success rate without sacrificing those delicate seeds.
Pod Maturity Check: The 1-2 week drying period in Step 1 is non-negotiable for viability. Test readiness by gently squeezing—if the pod cracks with light pressure, it's ready. I've learned the hard way that rushing this step leads to premature seed release and mold risk. Place pods in a paper bag with small ventilation holes for even drying.
Tool Sterilization Secret: Beyond just wiping with alcohol, I recommend double-sterilizing your tools. First pass with 70% isopropyl alcohol, then flame-sterilize the scissors or knife by quickly passing them through a candle flame (let cool completely). This extra step eliminates any lingering microbes that could compromise your seeds during extraction.
Seed Transfer Technique: When using a soft paintbrush in Step 3, work in a single direction to prevent static buildup that scatters seeds. I've found that brushing against the grain of the container's surface creates less friction. For stubborn seed masses, lightly tap the container instead of brushing—this releases seeds without creating airborne particles.
Pro Tips for Orchid Tree Seed Pods
- Working with orchid tree seed pods demands patience and precision—here's how to elevate your success rate without sacrificing those delicate seeds.
- Pod Maturity Check: The 1-2 week drying period in Step 1 is non-negotiable for viability.
- Tool Sterilization Secret: Beyond just wiping with alcohol, I recommend double-sterilizing your tools.
Frequently asked questions
about orchid tree seed pods—here’s what you’ve been wondering!How do I know when orchid tree seed pods are ready to harvest?
Harvest pods when they turn papery brown and split open naturally—usually 6–12 months after flowering. Avoid harvesting if pods are still green or firm, as seeds won’t be mature. Tap them gently; ripe pods will release seeds easily. Pro tip: Wear gloves—seeds are microscopic and can irritate skin!
Can I speed up germination of orchid tree seeds?
Orchid tree seeds (Bauhinia spp.) are not fast-germinating like veggies—they often take 6–12 months in ideal conditions. For faster results, use a sterile mix of sphagnum moss and perlite, keep humidity at 70–80%, and maintain warmth (75–85°F). Patience is key—these seeds rely on mycorrhizal fungi in nature!
What if my orchid tree pods won’t open on their own?
If pods stay closed, they may need help. Gently score the pod with a sterilized knife along the seam, then let it dry in a warm, dry place for 1–2 weeks. Avoid forcing them open too soon—immature seeds won’t survive. If pods rot or mold, discard them and wait for the next flowering cycle.
Are orchid tree seeds viable outside their native climate?
Yes! Orchid trees adapt well to USDA Zones 9–11, but seeds can germinate in cooler zones if sown indoors. Start seeds in a humid propagator or sealed container, then transplant seedlings outdoors after frost risk passes. Hardier varieties (like Bauhinia variegata) tolerate brief cold snaps better.
What’s the best alternative if I can’t find orchid tree seeds?
Try these easy-to-find orchid tree alternatives:
- Grafted saplings: Buy from nurseries (faster growth, but pricier).
- Air layering: Propagate from a healthy branch of an existing tree.
- Hybrid seeds: Some orchid nurseries sell pre-germinated Bauhinia hybrids.
Wrapping up and next steps
Extracting seeds from orchid tree seed pods is a rewarding journey into the delicate world of orchid cultivation! With patience and the right techniques, you’ve unlocked the potential to grow these stunning plants from scratch.
Whether you’re a seasoned gardener or a curious beginner, every seed pod holds the promise of new life—so why not take that next step?
Ready to nurture your orchid tree seeds? Start by gathering your supplies, following the gentle extraction process, and giving your seeds the care they deserve. Your green thumb—and these tiny treasures—will thank you! 🌱✨