
Lawn
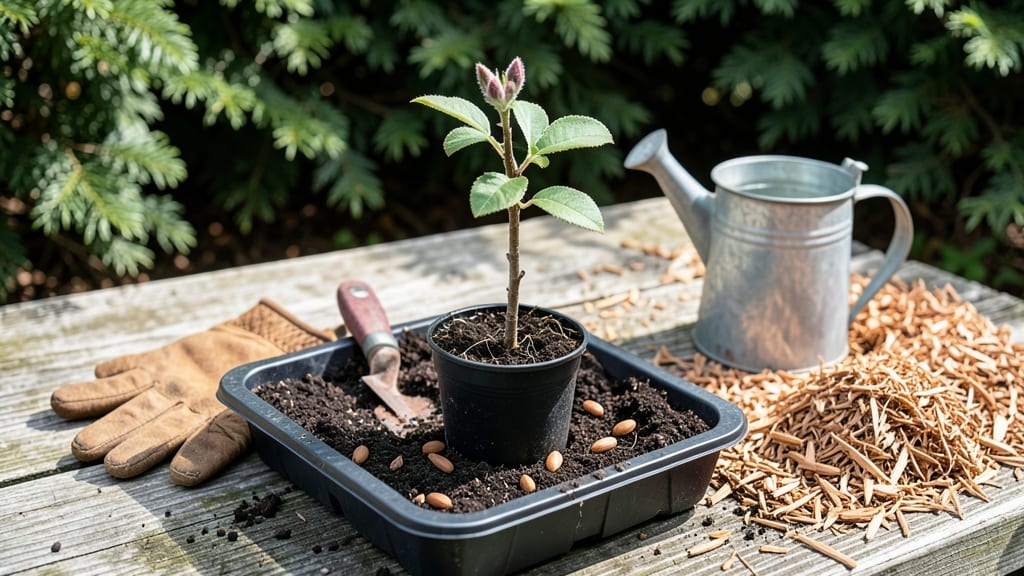
Planting peach tree seeds now means juicy fruit in 5-7 years—if you handle the cold stratification right. 🌱 I learned the hard way that skipping this step means months of waiting for seeds that never sprout.
The secret lies in mimicking winter’s chill, which breaks dormancy and boosts germination rates from near-zero to nearly 50%.
You’ll need fresh peach pits (no store-bought dried ones—they won’t work), a damp paper towel, a sealed plastic bag, and a fridge for 6-8 weeks. The process is simple but requires patience: after stratification, plant the seeds just below the soil surface in well-draining pots.
Keep them consistently moist but never soggy, and expect tiny shoots in 4-6 weeks.
Once seedlings emerge, you’ll see the first true leaves—those tell you it’s time to move them into individual pots with nutrient-rich soil. They’ll grow slowly at first, but with proper sunlight (6+ hours daily) and occasional fertilizer, you’ll have sturdy 12-inch seedlings ready for transplanting next spring.
The payoff? A tree that’s uniquely yours, resistant to local pests, and loaded with flavor.
Fair warning: fruit won’t appear for years, but the journey is worth it. Most gardeners quit after the first winter—don’t be one of them. With consistent care, your seedling will outgrow store-bought trees and reward you with fruit that tastes like summer in every bite. Let’s get those pits stratified!
📚 In This Guide
- What you need
- Instructions
- Tips and common mistakes
- Wrapping up and next steps
What you need
- ● Peach pit (seed): 1–2 fresh, plump pits from ripe peaches (avoid bruised or soft ones).
- ● Cold stratification setup: Small paper towel or dampened peat moss (enough to wrap the pit).
- ● Plastic bag with air holes (or a sealed container).
- ● Refrigerator (33–40°F / 0–4°C) for 8–12 weeks.
- ● Potting soil: 1–2 gallons of well-draining, sterile potting mix (or 50% potting soil + 50% perlite/sand).
- ● Small pots: 2–3 biodegradable or plastic pots (4–6 inches deep).
- ● Spray bottle for gentle watering.
- ● Grow lights or sunny windowsill (south-facing, 6+ hours of light/day).
- ● Label & marker to track planting dates.
- ● Seedling heat mat (for faster germination in cool climates).
- ● Fungicide (to prevent damping-off disease).
- ● Garden gloves (for handling soil and pits).
- ● Transplanting tray (if moving seedlings outdoors later).
- ● Peach tree fertilizer (balanced 10-10-10, diluted to half-strength).
Step-by-step guide to planting peach tree seeds
Here’s how to turn those peach pits into thriving young trees—it takes patience, but the reward is worth it.
🌱 Step 1: Extract and Prepare the Seeds
Start by cleaning the peach pits thoroughly—scrub off any remaining fruit flesh and let them dry completely for 24 hours. This prevents mold from developing during stratification. I like to soak them in a weak bleach solution (1 part bleach to 10 parts water) for 10 minutes to kill any lingering bacteria, then rinse well.
Once dry, place the pits in a heavy-duty plastic bag or airtight container. Seal it tightly—this creates the right humidity for stratification. Store the bag in your refrigerator’s crisper drawer, where temperatures stay consistently between 35-40°F. Check them monthly to ensure no mold has formed.
⏰ Step 2: Stratify for 90-120 Days
Cold stratification mimics winter conditions, breaking the seed’s dormancy so it can germinate. Keep the bag in the fridge for 90-120 days, giving the seed time to soften and prepare for growth. You’ll know it’s ready when the pit feels slightly softer to squeeze—almost like a ripe avocado pit.
I mark the bag with the date to avoid over-stratifying, which can reduce germination rates. If you forget, don’t stress—seeds can handle up to 6 months in cold storage, though 3-4 months is ideal. This step is critical: skipping it means waiting years, if ever, for germination.
🌿 Step 3: Plant the Stratified Seeds
Fill small pots (about 3-4 inches deep) with a mix of 50% potting soil and 50% perlite or sand for drainage. Plant each pit 1 inch deep, pressing lightly to ensure good soil contact. Water gently until the soil is moist but not soggy—you want the pit to stay in place without floating.
Place the pots in a warm, bright spot (around 70°F) with indirect light. A seedling heat mat can speed up germination if your home runs cooler. Keep the soil consistently moist—never let it dry out completely, but avoid waterlogging, which causes rot. Germination can take 2-6 weeks, so patience is key.
☀️ Step 4: Transplant and Care for Young Seedlings
Once the seedling reaches 4-6 inches tall and has 3-4 true leaves, it’s ready for its first transplant. Choose a slightly larger pot (around 6 inches deep) and use the same soil mix. Handle the seedling carefully—peach trees are sensitive to root disturbance.
Move the pot to a sunny window or under a grow light for 14-16 hours daily. Young peach trees need full sun to develop strong stems. Water when the top inch of soil feels dry, but avoid overhead watering to prevent fungal diseases. By the end of the first year, your seedling should be sturdy enough to handle outdoor planting in spring.
Tips & tricks for perfect peach tree seed planting
Turning peach pits into thriving trees takes more than just patience—it’s about understanding the little details that make all the difference. Here’s what I’ve learned from years of trial and error.
Cleaning is Critical: That 24-hour drying time isn’t just about preventing mold—it’s also about ensuring your pits are completely free of moisture that could cause rot during stratification. I’ve found that the 10-minute bleach soak (1 part bleach to 10 parts water) is a game-changer for killing any lingering bacteria. Skip this step, and you risk introducing pathogens that could sabotage your entire project.
Temperature Matters: The 35-40°F range in your fridge’s crisper drawer is perfect for stratification, but every refrigerator is different. If your fridge runs warmer, consider moving the bag to the coldest section or even the freezer’s bottom shelf (just don’t let it freeze). The goal is consistent cold—fluctuations can confuse the seed’s dormancy cycle.
Patience Pays Off: Those 90-120 days of stratification might seem long, but rushing this step is a common mistake. I’ve seen seeds that were removed too early (after just 60 days) fail to germinate, while others that waited the full 120 days sprouted within weeks. Mark your calendar or set a phone reminder—this step is non-negotiable for reliable results.
Soil Mix Secrets: The 50/50 blend of potting soil and perlite/sand isn’t just about drainage—it’s about creating the right balance of moisture retention and airflow. Too much soil can compact and suffocate the seedling, while too much perlite might dry it out too quickly. I like to add a handful of worm castings to the mix for extra nutrients without altering the drainage.
Pro Tips for Peach Tree Seed Planting
- Turning peach pits into thriving trees takes more than just patience—it’s about understanding the little details that...
- Cleaning is Critical: That 24-hour drying time isn’t just about preventing mold—it’s also about ensuring your pits ar...
- Temperature Matters: The 35-40°F range in your fridge’s crisper drawer is perfect for stratification, but every refri...
Frequently asked questions
Got questions about growing peach trees from seed? You’re not alone—this process can feel tricky at first! Below, we’ve rounded up the most common questions (and answers) to help you avoid pitfalls and set your seedlings up for success.
How long does cold stratification take for peach tree seeds?
Cold stratification typically requires 60–90 days in the fridge (or buried outdoors in winter). Place seeds in a damp paper towel or moist sand inside a sealed bag. Check them monthly—if they sprout early, move them to a sunny windowsill or grow light. Patience is key here!
Can I plant peach seeds directly in the ground without cold stratification?
Direct planting might work in mild climates, but success rates drop dramatically. Without stratification, seeds often rot or fail to germinate. For best results, always cold-stratify first. If you’re in a warm zone, mimic winter by planting seeds in fall and covering them with mulch for natural cold exposure.
Are peach tree seedlings true to the parent tree’s fruit quality?
Probably not! Seedlings often produce smaller, less flavorful fruit (or even wild-type peaches). For consistent, high-quality fruit, graft a named variety onto your seedling later. Think of this as a free rootstock—a great head start, but not a guarantee of gourmet peaches.
Why aren’t my peach seeds germinating after stratification?
Check these fixes:
- Too wet/dry: Seeds need moisture but not soggy conditions. Use damp (not wet) paper towels or sand.
- Not enough cold: Ensure temps stay 35–45°F (2–7°C). A fridge’s crisper drawer works well.
- Old seeds: Fresh seeds (current year) germinate best. If seeds are >1 year old, soak in warm water overnight first.
- No light: Once sprouted, move to bright, indirect light (or a grow light).
What’s the best time to transplant peach seedlings outdoors?
Wait until spring’s last frost and soil temps reach 60°F (15°C)—usually April–May in most zones. Harden off seedlings first: Gradually expose them to outdoor conditions over 7–10 days. Choose a sunny, sheltered spot with well-draining soil. Young trees are fragile, so avoid transplant shock!
Wrapping up and next steps
Planting peach tree seeds is a rewarding journey that blends patience with the joy of nurturing life.
By following cold stratification and proper care, you’ll set the stage for a thriving tree that may one day bear delicious fruit. Don’t wait—start your seeds today! Once your seedlings sprout, transplant them into pots or the ground, and watch your garden grow.
🌱 Pro tip: Keep a planting journal to track progress and share your success with fellow gardeners!