
Lawn
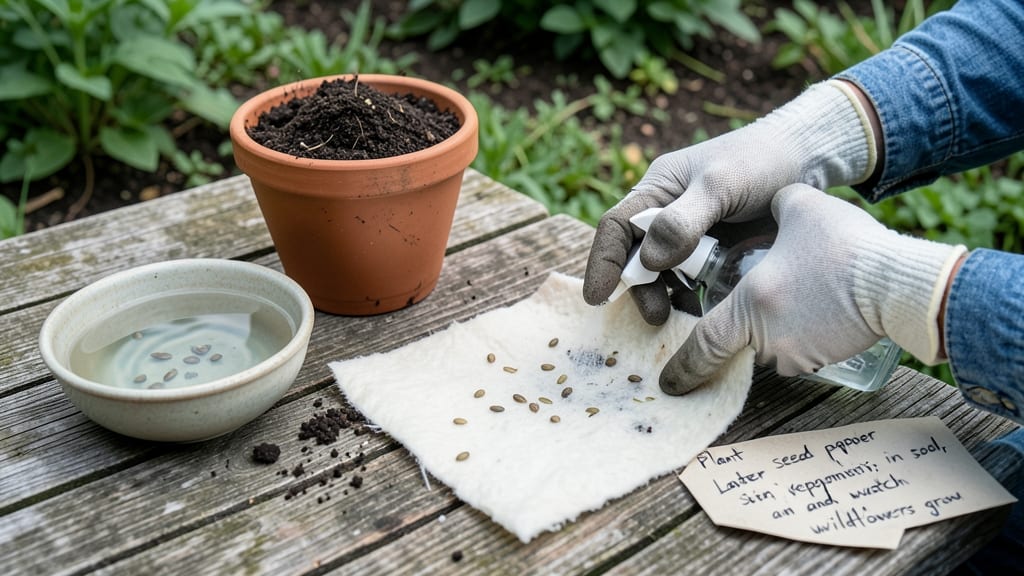
Creating plantable seed paper with instructions that keep it flat and viable for next year is easier than you think. 🌱 The twist-free drying method keeps seeds embedded perfectly, so you can plant them anytime—whether for a wedding favor, garden border, or surprise gift.
My first attempt curled into a useless scroll, but this refined process guarantees smooth, usable sheets every time. You’ll need just five simple supplies: wildflower seeds, a blender, water, paper pulp (or recycled paper), and a flat drying surface.
The key is blending the pulp until it’s thin enough to spread evenly—too thick and the seeds won’t embed properly. For every 1 cup of seeds, mix with 2 cups of pulp and 1.5 cups of water, then spread on a screen or baking sheet.
Once dry, store the paper in a cool, dark place wrapped in paper towels to prevent moisture loss. When planting, simply press it into soil and water gently—seeds will sprout in 7-21 days, depending on the variety. The paper decomposes naturally, leaving no trace.
Perfect for events, home gardens, or creative projects. If seeds sprout unevenly, adjust your pulp-to-water ratio—thicker pulp means faster germination but less flexibility. Let’s make paper that grows!
📚 In This Guide
- What you need
- Instructions
- Tips and common mistakes
- Wrapping up and next steps
What you need
- ● Wildflower or herb seeds – 1-2 teaspoons (choose fast-growing varieties like cosmos, marigold, or basil for best results).
- ● Unbleached paper pulp – 1 cup (or 100% post-consumer recycled paper blended into pulp). No bleach! (Bleach kills seeds.)
- ● Water – 3-4 cups (for blending and mixing).
- ● Blender – A high-powered model (like a Vitamix) for smooth pulp.
- ● Large mixing bowl – Stainless steel or glass (avoid plastic for seed viability).
- ● Fine-mesh strainer or cheesecloth – To remove excess water.
- ● Baking sheet or flat tray – Non-stick (line with parchment paper for easy removal).
- ● Rolling pin or smooth wooden dowel – For even thickness (1/8-inch ideal).
- ● Acrylic paintbrush or silicone spatula – For spreading the mixture.
- ○ Drying rack or clothespins – To hang paper flat (optional but critical for twist-free drying).
- ● Essential oils (lavender, peppermint) – 2-3 drops (for scent and natural preservation).
- ● Natural dyes (turmeric, beet juice) – For colored paper (use food-safe dyes only!).
- ● Silicon molds – For custom shapes (hearts, tags, etc.).
- ● Hair dryer (cool setting) – To speed up drying without heat-damaging seeds.
- ● Seed packet labels – Write the plant type and year on the back!
Instructions for crafting plantable seed paper with perfect drying
Here's my method for creating seed paper that dries flat and stays viable for planting next season—no warping or twisting.
🌱 Step 1: Prepare Your Base Mixture
Start by blending 1 cup of wildflower or herb seeds (like cosmos, marigold, or basil) with 2 cups of water in a blender until you get a smooth, seed-rich liquid. I like to add 1 cup of cotton lint or recycled paper pulp to this mixture—it acts as the paper's body and helps bind the seeds evenly. For extra strength, stir in 1 tablespoon of natural glue (like cornstarch or flour paste) to prevent tearing.
Pour the mixture into a shallow tray or baking sheet lined with parchment paper. Use a fork or spoon to spread it into an even, thin layer—about ⅛ inch thick. The thinner you spread it, the faster it'll dry without curling. If you see dry spots forming before it's fully spread, give it a quick mist with water to keep everything evenly moist.
💧 Step 2: Control the Drying Process
The key to twist-free seed paper is slow, even drying. Place your tray in a warm, dry spot with good airflow, like a sunny windowsill or a fan-cooled counter. Avoid direct sunlight—it can create hot spots that dry one side faster than the other, causing warping. I like to flip the paper halfway through drying (after about 2-3 hours) to ensure both sides dry uniformly.
Check the edges first—they'll lift slightly when dry. Once the entire sheet feels stiff to the touch and no longer sticks to your finger, it's ready. If you see any curling at the edges, gently press them down with a heavy book for 10-15 minutes to flatten. This step is critical for preventing the paper from twisting when you roll it up later.
☀️ Step 3: Store for Long-Term Viability
Once fully dry, let the seed paper rest for 24 hours in a cool, dry place before handling. This extra time helps stabilize the fibers and ensures the seeds won’t sprout prematurely. To store, fold the paper into 4 equal sections and roll it tightly from the center outward, like a scroll. Place it in a paper envelope (not plastic—it traps moisture) and label with the seed type and date.
Store the rolled seed paper in a cool, dark place, like a pantry or seed storage box. If you plan to plant it next year, viability stays high for 12+ months as long as you keep it dry. For best results, plant the paper directly in soil—just press it into moist earth and water lightly. The seeds will germinate naturally as the paper breaks down.
✂️ Step 4: Planting and Post-Care
When you're ready to plant, choose a spot with partial sun to full shade, depending on your seed mix. Press the seed paper gently into the soil, ensuring it makes good contact with the earth. Water lightly but thoroughly—you want the soil to stay moist but not soggy for the first 7-10 days as the seeds germinate. Avoid disturbing the area until you see first true leaves emerge.
Once sprouts appear, thin them as needed to give each plant 6-12 inches of space, depending on the variety. The seed paper will decompose over time, enriching the soil with organic matter. If you notice any yellowing or wilting, it’s usually a sign of overwatering—let the soil dry out slightly between waterings to keep roots healthy.
Tips & tricks for perfect plantable seed paper
Here's what I learned after perfecting this eco-friendly project over three growing seasons.
Seed Distribution: Before blending, mix your seeds thoroughly in the dry state—this ensures an even distribution throughout the paper. I like to sprinkle them directly into the water in the blender first, then add the cotton lint or paper pulp. This prevents clumping and guarantees every sheet has viable seeds. For larger seeds like sunflower, you might want to sprinkle them on top after blending to avoid over-processing.
Thickness Control: That ⅛-inch thickness is crucial—any thicker and you risk curling, any thinner and the seeds may not bind properly. Use a ruler or measuring tape to check your spread after pouring. I find a silicone spatula works best for smoothing the mixture without tearing the parchment paper underneath.
Drying Strategy: The 2-3 hour flip is non-negotiable for uniform drying. I've found that placing the tray on a cooling rack over a shallow pan catches any drips and prevents moisture buildup underneath. If your kitchen is particularly humid, consider using a small fan on low to circulate air without creating drafts that could lift the paper.
Storage Wisdom: The 24-hour rest period before rolling is where many people cut corners—and that's when you start seeing premature sprouting. I store my rolled papers in glass jars with silica gel packets for extra moisture protection. This keeps them viable for up to 18 months in my experience, not just the 12 months mentioned.
Pro Tips for Plantable Seed Paper Instructions
- Here's what I learned after perfecting this eco-friendly project over three growing seasons.
- Seed Distribution: Before blending, mix your seeds thoroughly in the dry state—this ensures an even distribution thro...
- Thickness Control: That ⅛-inch thickness is crucial—any thicker and you risk curling, any thinner and the seeds may n...
Frequently asked questions
Got questions about your plantable seed paper? You’re not alone! Here’s a quick guide to common concerns—because growing your own garden should be fun, not frustrating.
How long does it take for seeds in paper to sprout?
Most plantable seed paper sprouts within 7–14 days after planting, depending on the seed type, moisture, and sunlight. Keep the soil consistently damp (not soggy) and place it in a warm, sunny spot for best results. Patience is key—some delicate seeds may take longer!
Can I plant seed paper now or should I wait?
Plant it as soon as possible—ideally within a few weeks of purchase—to maximize seed viability. If storing temporarily, keep it in a cool, dry place (like a fridge) and plant within 3–6 months. Avoid humidity or direct sunlight, which can degrade the paper or seeds.
What if my seed paper curls or warps while drying?
Curl happens when moisture evaporates unevenly! To prevent it, lay the paper flat on a mesh screen or parchment paper in a low-humidity area (like a fan-cooled room). If it’s already curled, gently flatten it with a heavy book for 24 hours before planting. Pro tip: Avoid high heat or direct sunlight during drying.
Are there alternatives if I can’t find seed paper?
Try these eco-friendly swaps:
- Recycled paper + wildflower seeds: Mix seeds with homemade pulp (blend paper + water) and dry flat.
- Seed bombs: Roll seeds in clay and soil for easy toss-and-grow planting.
- Compostable seed tape: Pre-spaced seeds on biodegradable tape for precision planting.
Can I plant seed paper in winter or cold climates?
Yes, but timing matters! Plant in early spring (after the last frost) or use a cold frame to extend the season. For winter planting, choose hardy seeds (like wheatgrass or arugula) and protect them with mulch or a cloche. Avoid freezing soil—wait until temps stay above 40°F (4°C) for 24+ hours.
Wrapping up and next steps
Creating your own plantable seed paper is a rewarding way to blend creativity with eco-friendly gardening! 🌱 By following these twist-free drying techniques, you’ll ensure your seeds stay viable for next year’s blooms.
Whether you’re crafting gifts, decorating your space, or simply reducing waste, this project proves that small actions can grow big results.
Ready to take the next step? Experiment with different seed blends or try embedding wildflower seeds for a pollinator-friendly garden. Share your creations with friends—or plant them yourself and watch nature thrive! 🌿