
Lawn
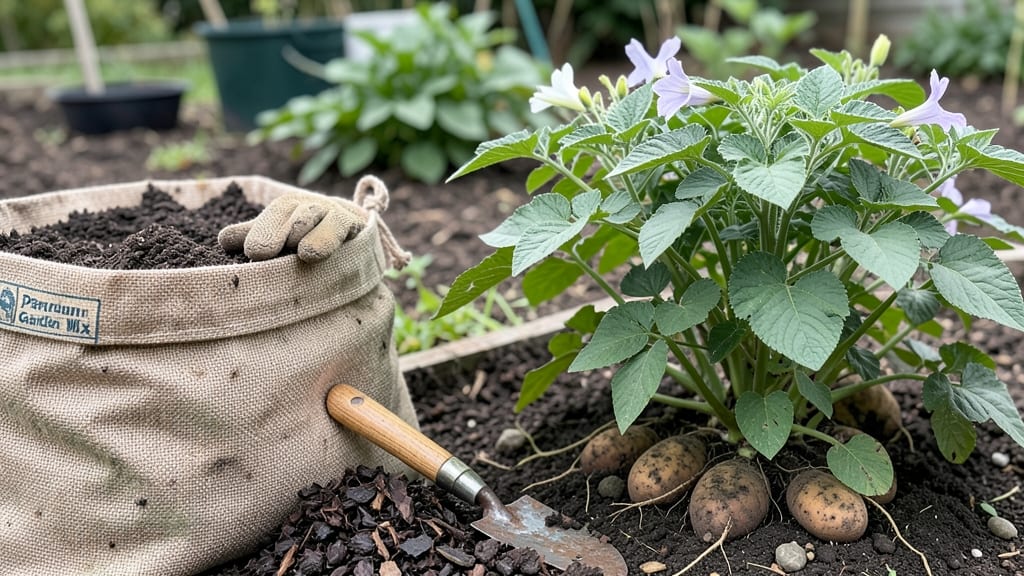
Planting seed potatoes in a bag lets you grow a full harvest on a balcony or patio—no yard required. 🌱 I’ve turned 5-gallon buckets into potato producers, and the secret is simple: the right bag, proper chitting, and consistent care.
By mid-summer, you’ll pull out pounds of new potatoes from just a few seed potatoes.
Start with 3-5 seed potatoes per bag, chitting them for 4-6 weeks before planting. Use a 5-gallon bucket with drainage holes or a sturdy grow bag filled with a mix of 50% potting soil and 50% compost.
Plant your seed potatoes 4 inches deep, spacing them evenly, and water lightly after planting.
Keep the bag in a sunny spot and water whenever the top inch of soil feels dry. In 8 weeks, you’ll see shoots emerge, and by harvest time, you’ll have 20-30 pounds of potatoes from one bag.
The best part? No digging—just tip the bag and scoop out your harvest.
This method works for any variety, from red potatoes to fingerlings, and even in small spaces. Just avoid overwatering and watch your potato plants thrive without taking over your garden. Ready to grow?
📚 In This Guide
- What you need
- Instructions
- Tips and common mistakes
- Wrapping up and next steps
What you need
- ● Seed potatoes: 3–5 certified disease-free seed potatoes (choose varieties like Yukon Gold, Red Pontiac, or Fingerlings). Pro tip: Cut larger potatoes into chunks with at least 2–3 "eyes" (buds) each, let them dry for 1–2 days to prevent rot.
- ○ Grow bag: A 5–10 gallon fabric or plastic bag with drainage holes (or a 5-gallon bucket with holes drilled in the bottom). Optional: Add a saucer or tray underneath to catch excess water.
- ● Potting mix: Lightweight, well-draining soil mix (avoid garden soil—it compacts and holds too much moisture). A 50/50 blend of peat moss or coco coir and perlite/vermiculite works well.
- ● Watering can or hose with a gentle spray nozzle: Avoid overwatering—seed potatoes need moisture, but soggy soil invites rot.
- ○ Fertilizer (optional but helpful): Balanced, slow-release fertilizer (e.g., 10-10-10) or organic options like composted manure or worm castings.
- ● Potassium-rich fertilizer (e.g., 0-0-50) when flowers appear to boost tuber development.
- ○ Gloves (optional): Protect your hands from soil and sharp potato edges.
- ● Sunlight: A sunny spot (6+ hours of direct sunlight daily). A balcony, patio, or sunny windowsill works!
- ○ Chitting (pre-sprouting) seed potatoes (optional but recommended): Place seed potatoes in a bright, cool spot (50–60°F) 2–4 weeks before planting.
- ● Sprouts (chits) will emerge, giving your potatoes a head start!
- ● Drainage check: Ensure your bag has drainage holes or modify a bucket/container with a drill.
Step-by-step instructions for planting seed potatoes in a bag
Here's how to grow a full harvest of potatoes in just a few square feet of space—no digging required.
🪴 Step 1: Choose and Prepare Your Grow Bag
Use a sturdy 5-gallon fabric grow bag (the kind with drainage holes) or a heavy-duty plastic bag with holes punched in the bottom. Fill it ¾ full with a mix of 50% potting soil and 50% compost—this gives roots room to spread while keeping moisture balanced. I like to add a handful of slow-release fertilizer to the bottom layer for steady nutrition.
Leave the bag open at the top for now. You'll see why in the next step. Give the soil a good shake to settle it—this prevents future compaction when you add more soil later. Water the mix until it's damp but not soggy, like a wrung-out sponge. This ensures your seed potatoes won't dry out when you plant them.
🌱 Step 2: Pre-Chit and Plant Your Seed Potatoes
First, pre-chit your seed potatoes by placing them in a bright, cool spot (around 55-60°F) for 2-3 weeks before planting. You'll see tiny sprouts (chits) emerge—these are your future plants. Once they're 1-2 inches long, it's time to plant.
Place 3-4 seed potatoes (each with multiple eyes) at the bottom of the bag, spaced evenly around the edges. Cover them with 2-3 inches of soil, leaving the top ⅓ of each potato exposed to light. This encourages early sprouting. Water gently until the soil looks damp 1 inch below the surface.
☀️ Step 3: Maintain and "Hill" the Bag Weekly
Keep the bag in a spot with full sun (6+ hours daily) and water when the top inch of soil feels dry. You'll know it's time when the soil pulls away from the bag's sides. Avoid soaking the bag—potatoes rot in waterlogged soil.
Here's the magic: Every 2-3 weeks, add 2-3 inches of fresh soil mix around the stems, burying the foliage up to the leaves. This "hilling" prevents greening (toxic to eat) and encourages more tuber formation. Stop hilling when the bag is full or 4-6 weeks before harvest—you want those tubers to mature.
⏰ Step 4: Harvest When Foliage Yellows
Your potatoes are ready when the leaves turn yellow and die back (usually 8-10 weeks after planting). If you're impatient, you can dig a few early potatoes at 7 weeks—they'll be smaller but still tasty. For full-sized harvests, wait until the foliage is completely brown.
Empty the bag carefully, sifting through the soil to find potatoes. Let them cure in a dark, dry place for 1-2 weeks before storing. This toughens their skins and extends shelf life. I spread mine on a tray lined with newspaper—no need for fancy equipment.
🌿 Step 5: Save Seeds for Next Year (Optional)
If you want to replant, select the largest, healthiest potatoes from your harvest. Cut them into 2-inch chunks, each with 2-3 eyes, and let them dry for 24 hours before storing in a cool, dark place. These will be your seed potatoes for next season—just pre-chit them again before planting.
Don't toss the small or misshapen potatoes! They're perfect for immediate cooking. The real reward here is watching how one bag can produce 4-6 pounds of potatoes—enough for multiple meals—without taking up garden space.
Tips & tricks for perfect space-saving potato harvests
A few simple tricks can transform your bag-growing success from good to spectacular. Here's what I've learned after years of experimenting with this method.
Pre-Chitting Pays Off: Don't skip the 2-3 week pre-chitting at 55-60°F—this isn't just optional, it's the foundation. I've tried planting without it, and while the potatoes still grow, you'll get fewer tubers and slower growth. The chits give your plants a head start that makes all the difference in that small bag space. Place them on a tray near a bright window but out of direct sun to maintain that perfect temperature.
Soil Mix Matters More Than You Think: The 50/50 potting soil to compost mix is your secret weapon. I've found that adding a handful of worm castings to that bottom layer gives you an extra boost of nutrition without overloading the roots. The castings break down slowly, feeding your plants throughout the growing season. If you don't have worm castings, just stick with the original mix—it still works beautifully.
Hilling Technique Timing: That "every 2-3 weeks" hilling schedule is crucial for maximum yield. I've learned to set a calendar reminder because it's easy to forget in the busy growing season. Each time you hill, you're essentially creating new growing space for more tubers to form. Stop when you're 4-6 weeks from harvest—that final growth period is when your potatoes really bulk up.
Harvesting Strategy: When you're ready to harvest at 8-10 weeks, don't empty the whole bag at once. Dig through carefully and leave any small potatoes still attached to the roots—they'll keep growing! I've harvested bags that yielded 5 pounds one week and another 2 pounds a few weeks later. This two-stage approach gives you potatoes at different sizes for different uses—small ones for mashing, larger ones for roasting.
Pro Tips for Planting Seed Potatoes In A Bag
- A few simple tricks can transform your bag-growing success from good to spectacular. Here's what I've learned after y...
- Pre-Chitting Pays Off: Don't skip the 2-3 week pre-chitting at 55-60°F—this isn't just optional, it's the foundation....
- Soil Mix Matters More Than You Think: The 50/50 potting soil to compost mix is your secret weapon. I've found that ad...
Frequently asked questions
Got questions? You’re not alone—growing potatoes in bags is simple, but a few details can make all the difference! Here are answers to the most common queries to help you grow a bountiful harvest with confidence.
How deep should I bury the seed potatoes in the bag?
For best results, place seed potatoes 4–6 inches deep in the bag, with the eyes (sprouts) facing upward. As the plants grow, add more soil or compost to cover the stems up to the leaves—this encourages stronger roots and more tubers. Just leave the top few inches exposed to sunlight!
When is the best time to plant seed potatoes in a bag?
Plant seed potatoes 2–4 weeks before your last expected frost in spring (or late summer for fall harvests). In most regions, this means March–April for a summer crop. If your climate is warm year-round, you can plant anytime—but avoid extreme heat, which stresses young plants.
Can I use regular grocery store potatoes as seed potatoes?
Technically yes, but certified seed potatoes are best because they’re disease-free and produce stronger yields. If you use grocery store potatoes, chit them (sprout in sunlight) for 4–6 weeks before planting to jumpstart growth. Avoid potatoes treated with sprout inhibitors or those that’ve been stored for months.
What do I do if my potato plants get bugs or diseases?
Start with healthy seed potatoes and well-draining bags to prevent issues. For pests like Colorado potato beetles, handpick adults or use neem oil. If you spot blight (brown spots on leaves), remove affected foliage immediately and improve airflow by spacing plants apart. Copper fungicide can also help as a last resort.
How do I know when the potatoes are ready to harvest?
Potatoes are ready in 8–12 weeks, but you can check earlier! Gently brush aside the soil near the base of the plant—if you see small potatoes (golf-ball size), they’re harvestable. For larger tubers, wait until the flowers fade and leaves start yellowing. Dig carefully to avoid damaging the potatoes!
Can I reuse the same bag for multiple potato crops?
Yes! After harvesting, empty the bag, rinse it thoroughly, and let it dry in the sun. Replace the soil with fresh compost or potting mix to prevent disease buildup. For a second crop, plant fast-maturing varieties (like ‘Red Norland’) in late summer for a fall harvest.
Wrapping up and next steps
Planting seed potatoes in a bag is a game-changer for small spaces, offering a low-maintenance, high-reward way to grow your own harvest—no garden required! 🌱 Whether you’re a beginner or a seasoned gardener, this method saves space, water, and effort while delivering delicious, homegrown spuds in just 8 weeks.
The key? Patience, proper prep, and a little TLC—and you’ll be feasting on your bounty before you know it.
Ready to dig in? Start small—try one bag this season, experiment with varieties, and watch your confidence (and potato pile!) grow. Next up: Harvest your spuds like a pro and plan your next crop—maybe even a potato-themed dinner to celebrate your success! 🥔✨