
Propagation
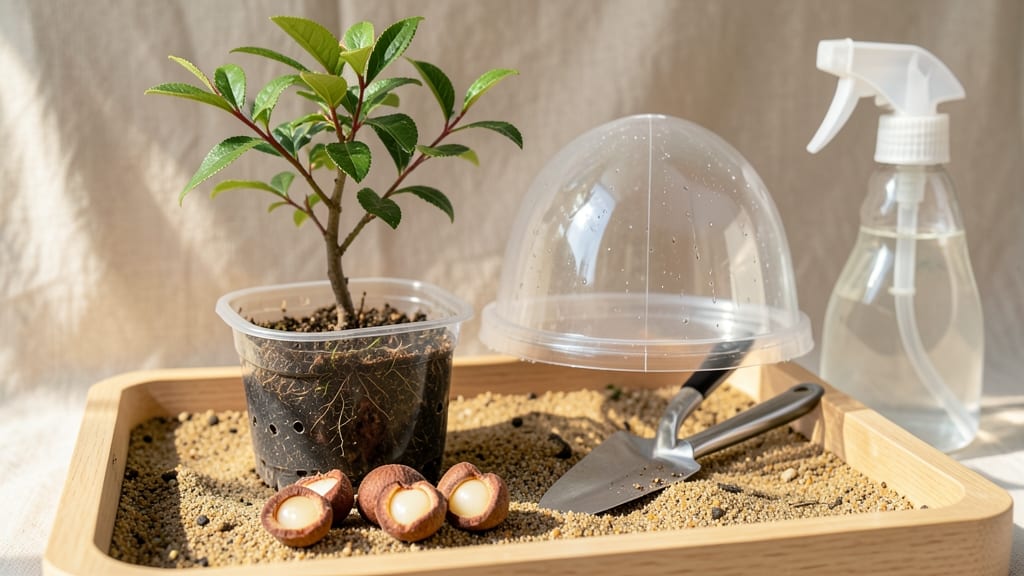
Mastering pomegranate seed propagation isn’t just about planting—it’s about unlocking the secret to reliable new plants without the guesswork. 🌱 I’ve learned the hard way that not all seeds sprout, but with this twist-free viability check, you’ll know exactly which ones to plant for success.
The key starts with fresh seeds from a ripe pomegranate—no need for fancy tools, just a bowl of water. After 24 hours, you’ll see which seeds sink (viable) and which float (skip them). This simple step saves weeks of waiting on seeds that might never grow.
Once you’ve identified your winners, plant them in a warm, well-draining mix and keep the soil consistently moist. Within 4-6 weeks, you’ll spot those first tiny leaves—proof you’re on the right track. Patience is key here; slow growth is normal, but consistency pays off.
This method works year-round, whether you’re starting indoors or in a warm greenhouse. The twist? You’ll end up with sturdy, disease-resistant plants that thrive with minimal fuss. Let’s get those seeds growing!
📚 In This Guide
- What you need
- Instructions
- Tips and common mistakes
- Wrapping up and next steps
What you need
- ● Pomegranate seeds: 5–10 fresh, plump seeds (harvested from a ripe pomegranate, not store-bought, which are often treated to prevent germination).
- ● Well-draining potting mix: 1–2 gallons of a blend designed for seeds or seedlings (e.g., 50% peat moss, 30% perlite, 20% vermiculite). Pro tip: Avoid heavy garden soil—it can suffocate roots!
- ● Small pots or seed trays: 2–4 biodegradable pots (3–4 inches deep) or a seed tray with individual cells (for easier transplanting).
- ● Spray bottle: For gentle watering (avoid over-saturating the soil).
- ○ Plastic wrap or humidity dome: To create a mini greenhouse effect (optional but helpful for humidity).
- ● Labeling tags: To track seed varieties (if propagating multiple types).
- ● Grow lights: LED or fluorescent lights (12–16 hours/day) if natural light is limited.
- ● Heating mat: A seedling heat mat (70–75°F) to speed up germination in cooler climates.
- ● Fertilizer: A diluted, balanced liquid fertilizer (e.g., 5-5-5) for seedlings after 4–6 weeks.
- ● Tweezers: For delicate seed placement (if you’re feeling fancy!).
Step-by-Step guide to propagating pomegranates from seed
Here's how to grow strong pomegranate seedlings—no guesswork, just reliable results.
🌱 Step 1: Extract and Prepare the Seeds
Cut open a fresh, ripe pomegranate and scoop out the seeds, being careful to avoid the bitter membranes. Rinse them under cool water to remove any remaining pulp. The key here is freshness—seeds from a store-bought fruit may not germinate as well as those from a recently harvested pomegranate.
Spread the seeds on a paper towel and let them air-dry for 24 hours in a warm, shaded spot. This prevents mold and ensures they’re ready for planting. You’ll need 4 seeds for this process, so pick the plumpest ones—size matters for germination success.
💧 Step 2: Soak and Plant the Seeds
Fill small pots (2-3 inches deep) with a well-draining seed-starting mix (avoid garden soil—it’s too dense). Moisten the mix until it’s damp but not soggy. Plant the seeds ½ inch deep, spacing them 1 inch apart in each pot. I like to use biodegradable pots so I can transplant without disturbing the roots later.
Water gently until the soil is evenly moist, but don’t oversaturate—pomegranate seeds rot easily if left too wet. Place the pots in a warm spot (70-80°F) where they’ll stay consistently moist. A seedling heat mat helps if your home runs cooler.
☀️ Step 3: Provide Warmth and Light for Germination
Cover the pots loosely with plastic wrap to retain humidity, but remove it daily for 5-10 minutes to prevent mold. Pomegranate seeds can take 2-4 weeks to sprout—patience is key. Once they germinate, uncover them completely and move them to a bright, indirect light spot (no direct sun yet).
You’ll know they’re ready for more light when the first true leaves (not the initial seed leaves) appear. At this stage, keep the soil lightly moist—water when the top inch feels dry. Overwatering now can cause damping-off, a fungal disease that kills seedlings overnight.
🌿 Step 4: Transplant and Harden Off Seedlings
After 4-6 weeks, when seedlings have 3-4 sets of true leaves, it’s time to transplant. Gently remove them from their pots and place them in 4-inch containers with fresh potting mix. Handle the roots carefully—pomegranates are sensitive to root disturbance.
Let the seedlings adjust to their new pots for 3-5 days before introducing them to outdoor conditions. Start with 1-2 hours of shade on the first day, gradually increasing their time outside over 10-14 days. This process, called hardening off, prepares them for the garden or a larger container.
⏰ Step 5: Maintain and Monitor Growth
Once hardened off, pomegranate seedlings need full sun (6+ hours daily) and well-draining soil. Water deeply once a week, letting the soil dry slightly between waterings. Overwatering is the fastest way to kill these plants—yellowing leaves are a red flag.
Fertilize lightly with a balanced, water-soluble fertilizer every 4-6 weeks during the growing season. Pomegranates are slow to mature from seed—3-5 years before they bear fruit—but proper care now ensures a strong, healthy plant for years to come.
Tips & tricks for perfect pomegranate seed propagation
These little-known tricks will help you avoid common pitfalls and boost your success rate with pomegranate seeds.
Seed Selection Tip: When choosing your 4 seeds in Step 1, look for ones that are plump and uniformly shaped. I've found that seeds with a slight sheen often germinate faster—this indicates good moisture content. Avoid any seeds that feel hollow when tapped gently or have cracks, as these are unlikely to sprout. The 24-hour drying period is crucial here: it prevents mold while maintaining viability.
Germination Environment: The 70-80°F temperature range in Step 2 is ideal, but consistency matters more than exact degrees. If your home runs cooler, place pots on a seedling heat mat or near a warm spot like the top of your fridge. I've seen germination times double when seeds are kept too cool—patience is key, but warmth speeds up the process. That daily 5-10 minute uncovered period prevents mold buildup while still maintaining humidity.
Light Transition Strategy: When moving seedlings to bright indirect light in Step 3, I recommend starting with a north-facing window if possible. South-facing windows can be too intense initially. Watch for the first true leaves—they'll appear slightly darker and more textured than the initial seed leaves. This is your cue to increase light exposure gradually over 3-4 days to avoid sunburn on delicate seedlings.
Transplanting Hack: For Step 4's transplant, I've had the most success using a damp paper towel to gently wrap around roots before transferring to new pots. This keeps them intact and reduces shock. After transplanting, give your seedlings a light misting with water to help them settle into their new environment. The 3-5 day adjustment period is where many beginners see failure—don't rush this step!
Pro Tips for Pomegranate Seed Propagation
- These little-known tricks will help you avoid common pitfalls and boost your success rate with pomegranate seeds.
- Seed Selection Tip: When choosing your 4 seeds in Step 1, look for ones that are plump and uniformly shaped. I've fou...
- Germination Environment: The 70-80°F temperature range in Step 2 is ideal, but consistency matters more than exact de...
Frequently asked questions
Got questions about growing pomegranates from seeds? You’re not alone! Here are some of the most common queries—and their straightforward answers—to help you navigate the process with confidence.
How long does it take for pomegranate seeds to germinate?
Germination can take anywhere from 2 to 4 weeks, depending on temperature, moisture, and seed viability. Keep the soil consistently moist (not soggy!) and maintain warmth (around 70–75°F). Patience is key—some seeds may surprise you by sprouting faster, while others take longer. If nothing emerges after 6 weeks, they may need a little extra coaxing (or might not be viable).
Can I propagate a pomegranate from store-bought seeds?
Store-bought pomegranate seeds are a great starting point, but bear in mind they may not be true to the parent plant’s variety. For example, a seed from a "Wonderful" pomegranate might grow into a different type with unique fruit characteristics. If you want consistent results, opt for seeds from a known cultivar or root cuttings from a healthy plant.
What’s the best time of year to plant pomegranate seeds?
Start seeds indoors in early spring (4–6 weeks before the last frost) for a head start. If you’re direct-sowing outdoors, wait until after the last frost when soil temperatures are consistently above 60°F. Pomegranates thrive in warm climates, so avoid planting in fall or winter unless you’re in a frost-free zone. A greenhouse or grow light setup can extend your growing season.
Why aren’t my pomegranate seeds sprouting?
Several factors could be at play: dormancy (some seeds need stratification or scarification), old or low-quality seeds, or inconsistent moisture/temperature. Try soaking seeds in warm water for 24 hours before planting, or gently nick the seed coat with sandpaper to encourage germination. If using older seeds, viability drops significantly after 1–2 years, so fresher is better!
Can I grow a pomegranate tree from a cutting instead of seeds?
Yes! While seed propagation is simpler, cuttings offer faster, more reliable results and maintain the parent plant’s traits. Take 4–6 inch semi-hardwood cuttings in late spring or early summer, dip in rooting hormone, and plant in moist perlite or sand. Keep humidity high (use a plastic bag or propagator) and roots should form in 4–8 weeks. This method is ideal for gardeners eager to skip the wait for seed germination.
Wrapping up and next steps
Growing pomegranates from seed is a rewarding journey that blends patience with the joy of nurturing life! 🌱 By mastering the twist-free viability check, you’ve unlocked a reliable way to cultivate new plants—no guesswork required.
Whether you’re a seasoned gardener or a curious beginner, this method ensures your seeds have the best shot at thriving.
Ready to turn your seeds into lush pomegranate trees? Start by planting your viable seeds in well-draining soil and keep them cozy in a warm, sunny spot. Watch as your efforts bloom into vibrant foliage—and maybe even fruit—over time. Happy growing! 🌿