
Propagation
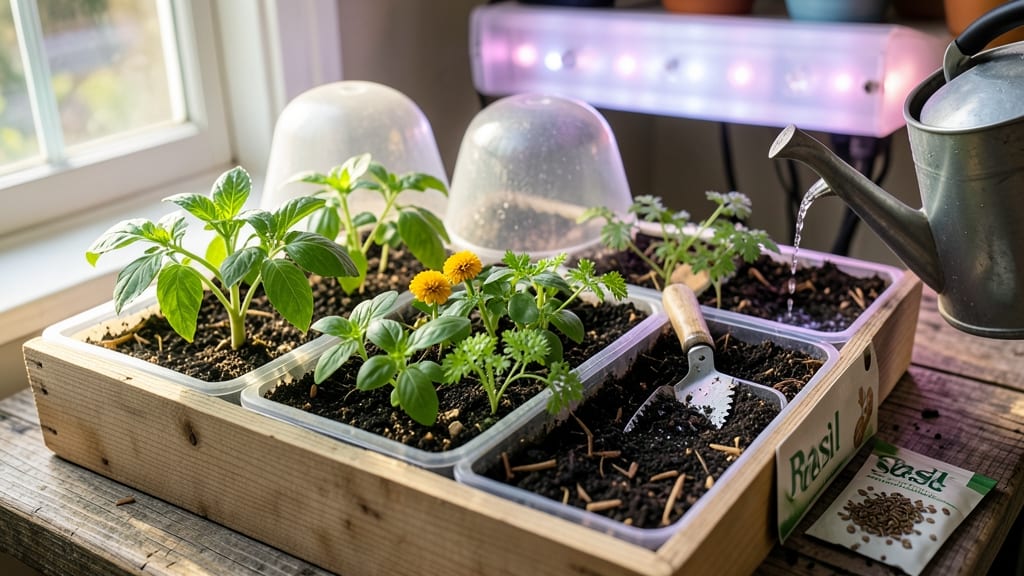
Your seed-starting success starts with the right potting soil—lightweight loam that crumbles easily and holds just enough moisture without drowning roots. 🌱 I learned the hard way that cheap garden soil or dense mixes smother seeds and invite rot, but the perfect blend makes germination feel like magic: tiny sprouts pushing through in days instead of weeks.
The best mixes combine peat moss or coconut coir for moisture retention with perlite or vermiculite (about 20% each) to keep things airy. Commercial seed-starting mixes do this work for you, but DIY versions cost less and let you adjust texture.
Just avoid garden soil—it's too heavy, compacted, and full of pathogens that seeds can't fight. You'll see seeds germinate faster and seedlings grow stronger with this balance. The soil should feel like a damp sponge that falls apart when squeezed, not a brick that resists your fingers.
Over-packing is the biggest mistake—fluff it gently like you're tucking in a baby plant. For best results, sterilize your mix (bake at 200°F for 30 minutes) and keep it slightly moist, not soggy.
This method works for everything from delicate lettuce to tough tomato seeds—once you master the soil, the rest is easy.
📚 In This Guide
- What you need
- Instructions
- Tips and common mistakes
- Wrapping up and next steps
What you need
- ● Base potting soil: 50% sterilized seed-starting mix (look for labels like "lightweight" or "organic"). Avoid garden soil—it’s too dense and can harbor pathogens.
- ● Perlite or vermiculite: 25% (by volume). Perlite adds aeration, while vermiculite retains moisture. Pro tip: 💡 Use perlite if you’re in a dry climate; vermiculite works better for humidity.
- ○ Coco coir or peat moss: 25% (optional but recommended). Improves water retention and structure. Warning: 🌡️ Avoid peat moss if you’re eco-conscious—coco coir is a sustainable swap!
- ● Seed-starting trays or pots: 2–4" deep (biodegradable or plastic). Aim for 1–2 seeds per cell or 1 seed per pot to avoid overcrowding.
- ● Mixing container: A clean 5-gallon bucket or large tub (sterilized with a 10% bleach solution if reused).
- ○ Sterilized gloves & mask: Optional but wise—soil can carry fungi or bacteria that might trigger allergies.
- ● Spray bottle or watering can: With a fine mist nozzle to avoid compacting soil.
- ● Worm castings: 5–10% (boosts nutrients without overwhelming seedlings).
- ● Compost or aged manure: 5% max (too much can cause rot).
- ● Mycorrhizal fungi: A pinch per tray (enhances root growth).
- ● pH test kit: Ensure your mix is 6.0–7.0 (most seeds prefer slightly acidic to neutral soil).
Instructions for creating the perfect seed-starting potting soil mix
Here's how to blend a lightweight, rot-resistant mix that gives seedlings the perfect start.
🌱 Step 1: Choose Your Base Components
Start with 50% peat moss or coconut coir—this holds moisture while allowing air to circulate. I use coconut coir because it's renewable and holds more water than peat. Add 30% perlite or vermiculite for that critical drainage and aeration. Perlite adds extra air pockets, while vermiculite retains moisture better—pick based on your climate.
For the remaining 20%, blend in worm castings or compost to feed hungry seedlings. Too much compost can compact the mix, so keep it light. I sift mine through a fine-mesh screen to remove any large chunks that could block roots. This ensures your mix stays fluffy and root-friendly.
💧 Step 2: Sterilize and Combine Dry Ingredients
Spread all dry components on a clean tarp or large tray. If you're repurposing garden soil or old potting mix, bake it in the oven at 200°F for 30 minutes to kill pathogens. This step is non-negotiable—disease lurking in your mix will rot seedlings before they even sprout.
Use a clean shovel or large spoon to gently fold the ingredients together. Aim for a uniform texture—no pockets of pure peat or clumps of perlite. I like to run my fingers through the mix to check for consistency. It should feel light like a cloud but not powdery. If it sticks together when squeezed, add a little more perlite.
✂️ Step 3: Moisten Without Waterlogging
Add water gradually while mixing. The goal is a mix that holds together when squeezed but doesn't drip. I use a spray bottle for the first pass, then work in water with my hands until it reaches the right consistency. Too much water creates anaerobic pockets that suffocate roots—you'll see seedlings turn black and mushy if this happens.
Test your moisture level by grabbing a handful. When you squeeze, a few drops should form at your fingertips, but the mix shouldn't feel soggy. If it feels damp like a wrung-out sponge, you're golden. Let the mix sit for 10 minutes to let moisture distribute evenly before using.
☀️ Step 4: Fill Containers and Prep for Planting
Fill your seed-starting containers 2/3 full with the mix, pressing down lightly to eliminate air pockets. Leave 1 inch from the top for seeds and watering. I use a clean spoon to create small divots for seeds—this prevents burying them too deep.
For extra protection against damping-off, sprinkle a thin layer of horticultural sand or perlite on top before planting. This creates a barrier that reduces fungal spores from touching sensitive seedlings. Water gently from the bottom if possible, letting the mix absorb moisture without disturbing the surface.
🌿 Step 5: Maintain Ideal Conditions
Keep your freshly mixed soil in a warm, humid environment until planting. I cover trays with plastic wrap to maintain moisture and warmth—just remove it for 10 minutes daily to prevent mold. The perfect seed-starting mix stays warm at 70-75°F and never feels cold to the touch.
Once planted, maintain moisture by watering at the base rather than from above. You'll know you've nailed the mix when seedlings emerge with strong, white roots rather than weak, blackened stems. This is your reward for getting the balance just right!
Tips & tricks for perfect seed-starting soil mix
These game-changing tips will help you create the ultimate seed-starting environment where every seedling thrives from the first sprout.
The Sterilization Secret: The 200°F sterilization for 30 minutes is your first line of defense against damping-off disease. I've seen seedlings saved by this step alone—don't skip it, even if your garden soil looks clean. For extra peace of mind, place your sterilized mix on a baking sheet lined with aluminum foil during the process. This makes cleanup effortless and prevents any accidental spills from contaminating your workspace.
Texture Test: After combining your dry ingredients in Step 2, run your fingers through the mix to check for consistency. It should feel like a cloud—light enough to crumble between your fingers but with just enough cohesion to hold its shape when gently squeezed. If it sticks together like wet sand, you need more perlite. This texture is what prevents those dreaded black, mushy seedlings that signal overwatering or poor drainage.
Moisture Mastery: Those 10 minutes of resting time after adding water in Step 3 are crucial. This lets moisture distribute evenly throughout the mix, preventing dry pockets that can stunt root growth. I like to think of it as the "goldilocks moment"—not too wet, not too dry, but just right. You'll know you've nailed it when the mix holds together when squeezed but doesn't drip water when you let go.
Climate-Smart Adjustments: In humid climates, you might need to reduce the worm castings to 15% instead of 20%—they can contribute to excess moisture retention. For dry climates, consider adding an extra 5% perlite to help maintain moisture levels. The key is always to maintain that perfect balance between moisture retention and drainage that your seedlings crave.
Pro Tips for Potting Soil For Seed Starting
- These game-changing tips will help you create the ultimate seed-starting environment where every seedling thrives fro...
- The Sterilization Secret: The 200°F sterilization for 30 minutes is your first line of defense against damping-off di...
- Texture Test: After combining your dry ingredients in Step 2, run your fingers through the mix to check for consisten...
Frequently asked questions
Got questions about the best potting soil for seed starting? You’re not alone! Here are some of the most common concerns—and their answers—to help you grow with confidence.
What’s the difference between potting soil for seed starting and regular potting mix?
Seed-starting mixes are lighter and sterile, packed with perlite, vermiculite, or coconut coir to improve aeration and drainage. Regular potting soil is denser and nutrient-rich, which can suffocate tiny seeds or cause rot. Think of seed mix as a fluffy blanket for delicate sprouts!
How long can I store unopened potting soil for seed starting?
Unopened bags last 1–2 years if stored in a cool, dry place (like a garage or basement). Once opened, use it within 3–6 months—or refrigerate it to extend freshness. If the mix smells musty or grows mold, toss it and start fresh!
Can I make my own seed-starting mix at home instead of buying it?
A simple DIY blend is 50% peat moss or coconut coir, 30% perlite or vermiculite, and 20% compost or worm castings. Sterilize ingredients by baking them at 200°F (93°C) for 30 minutes to kill pathogens. Just avoid garden soil—it’s too heavy and may harbor diseases.
Why do my seeds rot in the potting mix, even if it’s supposed to be well-draining?
Overwatering or poor airflow are the top culprits. Let the top inch of soil dry between waterings, and avoid sealing trays with plastic wrap for long periods. If your mix feels compacted, fluff it gently or add more perlite. Pro tip: Bottom-watering (placing trays in shallow water) gives you better control!
Do I need to fertilize seeds right away in potting soil?
Not at first! Seed-starting mixes are low in nutrients to prevent burning tender roots. Wait until seedlings have 2–3 true leaves before applying a diluted liquid fertilizer (half-strength). Over-fertilizing can harm young plants—think of it like feeding a baby solids, not a full meal!
Wrapping up and next steps
Choosing the right potting soil for seed starting is the secret to healthy, thriving seedlings—lightweight, well-draining, and free from disease-causing pathogens. Whether you opt for a pre-mixed blend or a DIY mix, prioritizing sterility, aeration, and moisture control sets your plants up for success.
Now that you’re armed with the knowledge, it’s time to roll up your sleeves and get growing! 🌱
Your next step? Grab your seeds, prepare your trays, and watch those tiny sprouts emerge with confidence. Happy planting—your green thumb is about to shine! 🌿