
Lawn
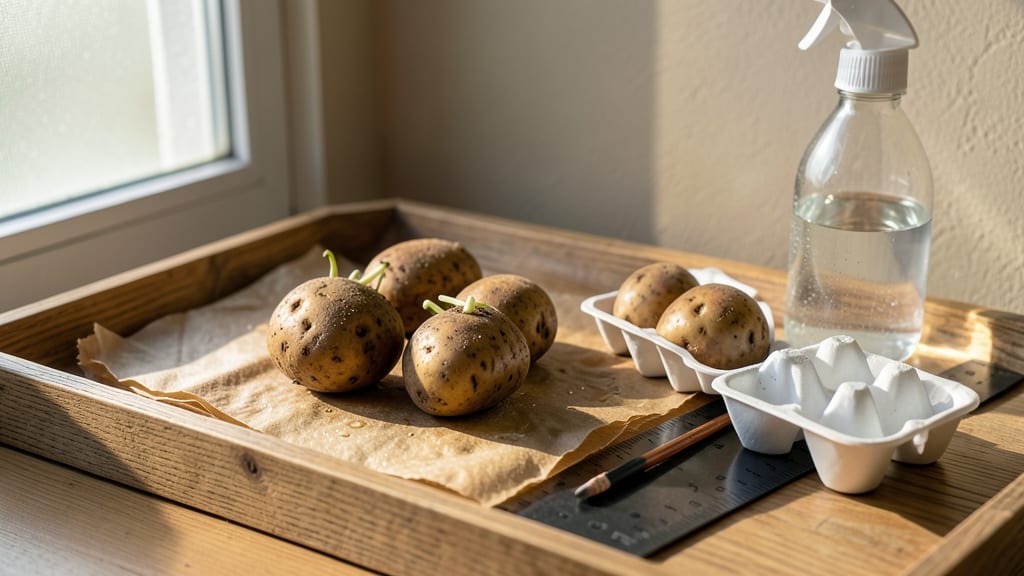
Pre-sprouting seed potatoes gives you a 10-day head start on the season—no more waiting for slow, weak plants to catch up. 🌱 I learned the hard way that chitting (that’s the technical term) turns floppy, underperforming tubers into sturdy, fast-growing plants that produce bigger harvests with less effort.
The secret is simple: light, patience, and the right timing before the last frost. You’ll need just three things: your seed potatoes, a bright spot (a sunny windowsill or under grow lights), and a little time—about 4-6 weeks before planting outdoors.
The process is foolproof: place them in a cool, dark spot to sprout, then move them to light once green sprouts appear. No fancy equipment needed, just a tray or egg carton to keep them organized.
Once planted, those pre-sprouted potatoes dive into the soil like they’ve been there all along. You’ll see faster emergence, stronger stems, and plants that resist disease better than their unsprouted cousins. The payoff? Heavier yields and fewer wasted plants—because nobody likes digging up a garden full of blanks.
Works for both early and late varieties, and even small spaces. Here’s exactly how to do it without overcomplicating things.
📚 In This Guide
- What you need
- Instructions
- Tips and common mistakes
- Wrapping up and next steps
What you need
- ● Seed potatoes: Certified disease-free, organic or heirloom varieties (e.g., Yukon Gold, Red Pontiac, or Fingerlings).
- ● Quantity: 1–2 lbs per 10 sq ft of garden space (adjust based on your harvest goals!).
- ● Containers for chitting: Egg cartons (plastic or cardboard), or
- ● Small pots (3–4 inches deep) with drainage holes.
- ● Well-draining soil or growing medium: Potting mix, coco coir, or even pearlite for aeration.
- ○ Optional: Add a light layer of compost for nutrients.
- ● Bright, indirect light source: South-facing windowsill, or a grow light (12–16 hrs/day).
- ● Spray bottle: For gentle misting (keeps soil moist but not soggy!).
- ● Humidity dome or plastic wrap: Creates a mini greenhouse to speed up sprouting.
- ● Thermometer: Ideal sprouting temp is 55–65°F (13–18°C)—too warm = leggy sprouts!
- ● Fungicide (copper-based): A preventive spray if your seed potatoes have a history of blight.
- ● Labeling tags: Mark varieties and planting dates to avoid mix-ups later!
Step-by-step instructions for pre-sprouting seed potatoes
Here's how I get my potatoes off to a flying start—stronger plants, earlier harvests, and fewer surprises.
🌱 Step 1: Select and Prepare Your Seed Potatoes
Start with certified disease-free seed potatoes—the foundation of a healthy crop. Look for tubers with 2-3 eyes (the little dimples where sprouts emerge) and no signs of green skin (which indicates toxin buildup from sunlight). I like to choose medium-sized potatoes because they balance energy reserves with surface area for sprouting.
Place the potatoes in a cool, dark spot (like a pantry) for 2-4 weeks before chitting. This jumpstarts the eyes without forcing premature growth. The goal is to see tiny green shoots ½ inch long—that’s your cue they’re ready for the light. If you skip this step, you’ll end up with uneven sprouting and weaker plants.
⏰ Step 2: Chit the Potatoes Under Light
Once sprouts appear, move the potatoes to a bright, indirect light source—a sunny windowsill works perfectly. Position them with the eyes facing upward so the sprouts grow toward the light. I use a 6-inch egg carton to hold them upright; the individual cups keep each potato stable and prevent tangling.
Keep the room at 55-65°F—too warm, and the sprouts grow leggy; too cool, and they stall. You’ll see sturdy, white sprouts in about 2 weeks. Avoid direct sunlight now—it turns sprouts green and bitter. Watch for sprouts 1-2 inches long with small roots forming—that’s when they’re ready for planting.
🪴 Step 3: Plant the Chitted Potatoes
Dig trenches 4-6 inches deep in well-draining soil, spacing them 12-15 inches apart in rows 3 feet apart. Place each potato eyes-up in the trench, then cover lightly with soil—just enough to bury the sprouts by 1 inch. This protects them from frost while allowing the tops to emerge quickly.
Water gently but thoroughly to settle the soil around the tubers. The key here is consistent moisture—neither soggy nor bone-dry. You’ll know you’ve done it right when the soil feels damp but not waterlogged to the touch. Mulch with 2-3 inches of straw to retain moisture and regulate soil temperature.
☀️ Step 4: Monitor and Maintain Through Germination
Once shoots break through the soil, they’ll grow 1-2 inches per week if conditions are right. Keep the soil evenly moist—potatoes are shallow-rooted and drought-sensitive. I water deeply every 3-4 days (or more often in hot weather), aiming for 1 inch of water per week. Too little, and the tubers stay small; too much, and they rot.
When the foliage reaches 6 inches tall, add a 2-inch layer of soil around the stems to encourage tuber formation deeper underground. This is called "hilling," and it prevents greening and boosts yield. Watch for yellowing leaves—a sign of overwatering or disease. Remove affected plants immediately to protect the rest.
Tips & tricks for perfect pre-sprouting seed potatoes
Here's what nobody tells you about chitting—these tricks will help you avoid common pitfalls and get a head start on your garden.
Selection Tip: When choosing seed potatoes, prioritize those with 2-3 eyes that are evenly spaced. I've found that medium-sized potatoes (about 3-4 ounces each) strike the perfect balance between energy reserves and surface area for sprouting. Avoid potatoes with green skin—those contain solanine, a toxin that can stunt growth or even harm animals if consumed.
Temperature Matters: The 55-65°F range during chitting is non-negotiable. Too warm, and you'll get leggy, weak sprouts that struggle to support the plant. Too cool, and growth stalls completely. I keep mine on a pantry shelf away from heating vents—consistent temperature is more important than exact degrees. A simple thermometer in the room helps monitor conditions without guesswork.
Lighting Strategy: Bright, indirect light is crucial after the initial dark period. I've had the best results with east-facing windows where morning sunlight is gentle. If you don't have suitable natural light, a grow light on a timer (12-14 hours/day) works perfectly. Just avoid direct midday sun—it causes the sprouts to turn green and bitter, which can affect plant vigor later.
Planting Preparation: When it's time to plant, don't rush the soil burial. The 1-inch coverage of soil over the sprouts protects them from frost while allowing the tops to emerge quickly. I like to use a small shovel to create individual pockets for each potato—this keeps them stable and prevents them from shifting during watering. The trenches should be 4-6 inches deep to accommodate the tubers without burying them too deeply.
Pro Tips for Pre Sprouting Seed Potatoes
- Here's what nobody tells you about chitting—these tricks will help you avoid common pitfalls and get a head start on ...
- Selection Tip: When choosing seed potatoes, prioritize those with 2-3 eyes that are evenly spaced. I've found that me...
- Temperature Matters: The 55-65°F range during chitting is non-negotiable. Too warm, and you'll get leggy, weak sprout...
Frequently asked questions
Got questions about pre-sprouting seed potatoes?
You’re not alone! Here are answers to the most common concerns—so you can chit like a pro and grow a bountiful harvest.
What’s the best time to start chitting seed potatoes?
Start chitting 4–6 weeks before your last frost date (or when you plan to plant outdoors). For most gardeners, this means early spring—around late February to March in cooler climates. Sprouts should be 1–2 inches long with a slight green tint when ready to plant.
How long does it take for seed potatoes to sprout?
With ideal conditions (cool, dark, and humid), sprouts appear in 2–4 weeks. Keep them in a bright, cool spot (like a sunny windowsill) after they emerge to encourage healthy growth. Patience pays off—rushing can lead to weak, leggy sprouts!
Can I eat the sprouts from chitted potatoes?
Nope! The green parts of sprouts contain solanine, a toxin harmful to humans. Only plant the white or light-brown base of the sprout. Toss any green growth before planting—it’s not safe for consumption or composting (unless you’re treating it as waste).
What if my potatoes rot or mold while chitting?
Mold or soft rot usually means too much moisture or poor airflow. Fix it by:
Prevent future issues by choosing firm, disease-free seed potatoes and storing them in a cool, dark place before chitting.
Do I have to chit potatoes, or can I plant them unsprouted?
You can plant unsprouted potatoes, but chitting gives you a 2–3 week head start on growth. Unsprouted tubers may take longer to emerge, and you risk weaker plants if planted too early. Chitting is especially helpful in shorter growing seasons—it’s worth the effort for a faster, hardier harvest!
Wrapping up and next steps
Pre-sprouting your seed potatoes—also called chitting—is a simple yet powerful trick to jumpstart your garden and boost your harvest. 🌱 With just a little patience and the right conditions, you’ll enjoy hardier plants, earlier blooms, and bigger yields come harvest time.
Ready to put this knowledge into action? Grab those seed potatoes, follow the steps, and get ready to watch your garden thrive like never before!
Your next step? Mark your calendar for planting day (typically 2–4 weeks after sprouts appear) and start prepping your soil. Happy gardening—your future harvests will thank you! 🌿