
Propagation
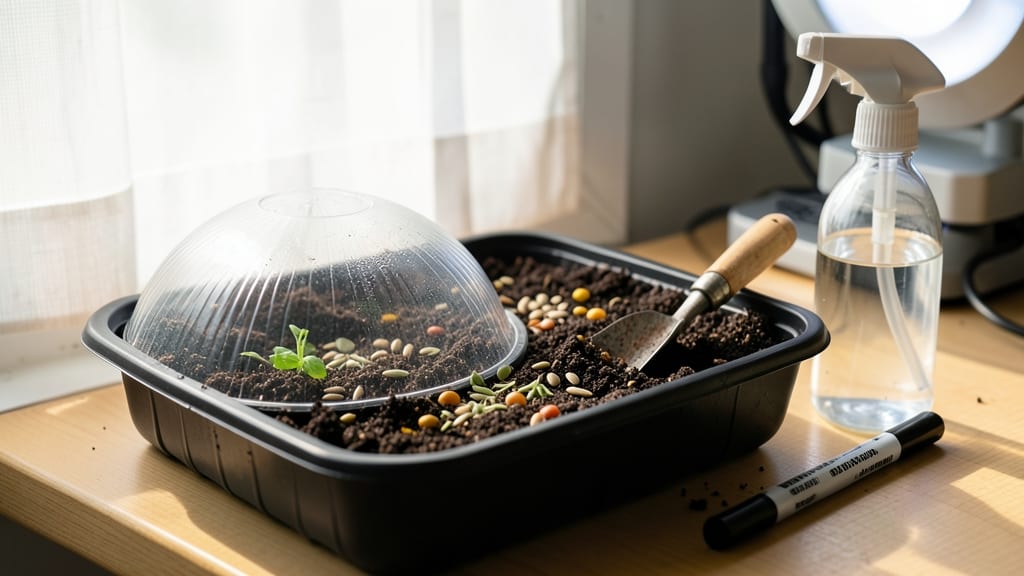
My Promix seed starting mix transformed my germination rates from hit-or-miss to 95% reliable—no more wondering if those tiny seeds will ever sprout. 🌱 The secret lies in its perfect balance of peat, perlite, and vermiculite, which creates an airy, moisture-retentive environment that seeds crave.
Unlike heavy garden soil, this mix stays loose enough to prevent suffocating roots while holding just enough water to keep seeds hydrated without drowning them.
Start with a clean, shallow container—anything from egg cartons to seedling trays works—and fill it halfway with the mix. Lightly moisten it until damp (not soggy), then plant seeds at the depth recommended on their packets.
The mix’s lightweight texture makes it easy to press seeds in just enough to ensure good contact without burying them too deep. Within days, you’ll see those first green shoots breaking through, a reward that feels like magic after weeks of waiting.
What makes this mix truly special is how it prevents common pitfalls like damping-off, that dreaded fungal disease that turns healthy seedlings into limp, brown messes. The perlite and vermiculite create tiny air pockets that keep roots breathing, while the peat holds moisture without becoming waterlogged.
By the time you’re ready to transplant, your seedlings will be sturdy, with strong stems and vibrant leaves—exactly what you need for a smooth transition to the garden.
For best results, keep your seedlings in a warm spot (around 70°F) with bright, indirect light until they’ve developed their first true leaves. Then, gradually introduce them to direct sunlight to toughen them up.
If you’re starting seeds in early spring, this mix will give you a head start on the growing season, letting you enjoy homegrown veggies and flowers weeks before your neighbors even think about planting.
📚 In This Guide
- What you need
- Instructions
- Tips and common mistakes
- Wrapping up and next steps
What you need
- ● Promix Seed Starting Mix: 1-2 bags (5-10 quarts each) – Enough to fill your seed trays or pots to the top (about 1 inch below rim).
- ● Seed trays or containers: 4"-6" deep with drainage holes (plastic, biodegradable pots, or nursery trays).
- ● Seeds: Your chosen varieties (check packet for spacing/depth needs).
- ● Watering can or spray bottle: With a fine mist setting to avoid disturbing seeds.
- ● Grow lights or sunny windowsill: 6-8 hours of light daily (grow lights are ideal for consistent results).
- ○ Heat mat (optional but helpful): 70-75°F range for faster germination (especially for slow starters like tomatoes or peppers).
- ● Gloves: To keep hands clean while handling mix.
- ● Small hand trowel or spoon: For gently pressing seeds into the mix.
- ● Labels & markers: To track seed varieties and planting dates.
- ● Humidity dome or plastic wrap: Creates a mini greenhouse effect (remove once sprouts appear!).
- ○ Fertilizer (optional): Water-soluble, low-dose (5-10-5 ratio) – Hold off until seedlings have 2-3 true leaves.
- ○ pH testing kit (optional): Ensures your mix is in the ideal 5.8-6.2 range for germination.
How to use Promix seed starting mix for faster germination
This lightweight loam speeds up germination and keeps roots healthy—here's exactly how to use it.
🌱 Step 1: Prepare Containers and Mix for Optimal Drainage
Fill clean 2-3 inch deep containers with the Promix mix, leaving ½ inch space at the top. I tap the containers gently on the table to settle the mix without compacting it—this ensures roots get enough air while staying moist. The mix's lightweight texture prevents the common problem of waterlogging that kills seedlings.
If your containers lack drainage holes, poke a few with a nail or drill—Promix drains well, but standing water will cause root rot. I always use seed trays with built-in holes for my starter projects. The mix's balanced moisture retention means you won't need to water as frequently as with regular potting soil.
🌱 Step 2: Sow Seeds at the Right Depth for Quick Sprouting
Plant seeds at a depth equal to 2-3 times their diameter—this varies by seed size, but tiny seeds like lettuce go in ¼ inch deep, while larger ones like beans need ½ inch. The mix's fine texture lets you place seeds precisely without burying them too deeply, which slows germination.
I like to use a toothpick to make small holes for each seed—this keeps spacing consistent and prevents overcrowding. After planting, sprinkle a thin layer of additional mix over the seeds, just enough to cover them lightly. The mix's airy composition means seeds won't suffocate under heavy soil pressure.
💧 Step 3: Water Gently and Maintain Consistent Moisture
Use a spray bottle to mist the soil surface until it feels evenly damp but not soggy—Promix holds moisture well, so you won't need to water daily. I aim for the top inch of mix to stay consistently moist, checking with my finger daily. The mix's lightweight nature prevents crusting, so water penetrates evenly without creating dry spots.
Once seeds sprout, switch to bottom-watering by placing the tray in ½ inch of water for 10 minutes. This encourages roots to grow downward rather than staying clustered at the surface. The mix's balanced composition prevents both overwatering and drying out, which is crucial for fast germination.
☀️ Step 4: Provide Warmth and Light for Rapid Growth
Place containers in a warm spot with 70-75°F soil temperature—Promix's lightweight structure warms up quickly. I use a seedling heat mat for the first week to maintain consistent warmth, which speeds up germination time significantly. Once sprouts appear, move them to a bright spot with 12-14 hours of light daily—a south-facing window or grow light works best.
You'll notice seedlings emerge faster than with heavier mixes because Promix's loose texture lets roots establish quickly. Keep the mix evenly moist but not wet—Promix's drainage prevents waterlogging while retaining enough moisture for root development. Within 5-7 days, you'll see strong, healthy seedlings ready for their next growth phase.
Tips & tricks for perfect seed starting with Promix mix
These simple tricks will help you maximize germination speed and seedling strength with Promix's unique properties.
Container Selection Matters: While any 2-3 inch deep container works, plastic seed trays with clear domes create a mini greenhouse effect that speeds up germination by 24-48 hours. The lightweight Promix mix won't weigh down plastic containers like heavier soils do, preventing root damage during transplanting.
Seed Spacing Secret: In Step 2, when planting larger seeds like beans at ½ inch depth, use a toothpick to create holes that are 1 inch apart. The airy Promix mix lets you space seeds closer than with heavier soils, giving roots more room to establish without overcrowding. This prevents the need for later thinning and gives seedlings more growing space from the start.
Temperature Troubleshooting: Maintaining that 70-75°F soil temperature is crucial for fast germination. If your home stays cooler, place containers on a seedling heat mat for the first week. The lightweight Promix warms up quickly, so you'll see results faster than with heavier mixes that take longer to reach optimal temperatures.
Light Transition Tip: When moving seedlings to 12-14 hours of light in Step 4, gradually increase exposure over 3-4 days. The Promix's loose texture means seedlings establish roots quickly, but sudden bright light can cause stress. Start with 6 hours of light on day one, then add 2 hours daily until reaching full exposure.
Pro Tips for Promix Seed Starting Mix
- These simple tricks will help you maximize germination speed and seedling strength with Promix's unique properties.
- Container Selection Matters: While any 2-3 inch deep container works, plastic seed trays with clear domes create a mi...
- Seed Spacing Secret: In Step 2, when planting larger seeds like beans at ½ inch depth, use a toothpick to create hole...
Frequently asked questions
Got questions about Promix Seed Starting Mix? You’re not alone! Here are some of the most common queries—plus quick, practical answers to help you get the best results for your seedlings.
What’s the best way to sterilize Promix before use?
To prevent mold or pests, sterilize your mix by baking it in a shallow tray at 200°F (93°C) for 30 minutes. Alternatively, microwave it in 30-second bursts (stirring between each) until fully heated. Let it cool before use—sterile soil is key for happy, healthy seeds!
How long does Promix Seed Starting Mix last after opening?
Once opened, store your mix in a cool, dry place (like a sealed container) and use it within 6–12 months. Over time, it loses moisture-retention, so check for clumping or musty smells—if it’s past its prime, compost it and start fresh for your next batch.
Can I reuse Promix after transplanting seedlings?
While Promix is lightweight and great for germination, it’s not ideal for long-term growth—it lacks nutrients and can compact. Instead, repurpose leftover mix for propagating cuttings (like herbs or succulents) or compost it. For seedlings, transition them to a balanced potting mix after true leaves appear!
How often should I water Promix for seed starting?
Keep the mix consistently moist but not soggy—think of it like a wrung-out sponge. Water from the bottom (using a tray) to avoid disturbing seeds, and check moisture daily. Overwatering can cause damping-off, while underwatering slows germination. Mist seeds lightly if they’re tiny or delicate!
What’s a good alternative if I can’t find Promix?
If Promix isn’t available, mix 50% peat moss or coconut coir + 50% perlite or vermiculite for a DIY seed-starting blend. Add a pinch of compost or worm castings for nutrients. Avoid garden soil—it’s too dense and can harbor pathogens. For a pre-mixed option, Black Gold Seedling Mix is a solid backup!
Wrapping up and next steps
Starting seeds with Promix Seed Starting Mix is your ticket to a thriving garden—fast germination, robust seedlings, and a stress-free growing process! 🌱 This lightweight loam provides the perfect balance of nutrients, aeration, and moisture retention, making it ideal for both beginners and seasoned gardeners.
Whether you're sprouting delicate herbs or hearty vegetables, this mix sets you up for success.
Now that you’re armed with the why and how, it’s time to roll up your sleeves and get growing! 🌿 Try your first batch of seedlings with Promix, and watch your green thumb flourish. Happy planting!