
Lawn
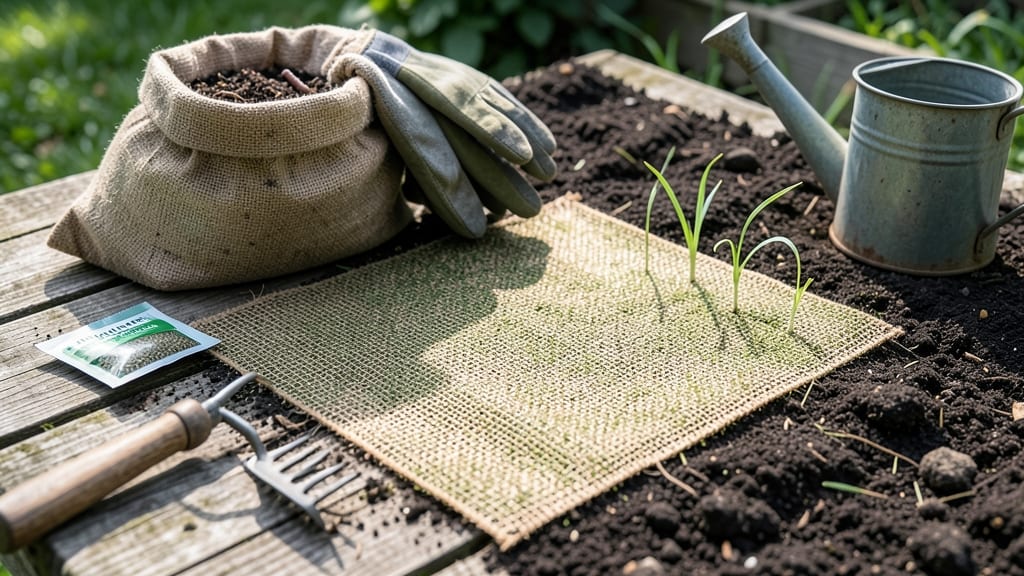
Seed mats for grass cut germination time in half—my lawn went from bare patches to lush green in just 10 days. 🌱 The trick isn’t fancy equipment or secret fertilizers; it’s how these mats protect seeds from birds, wind, and uneven watering while keeping moisture locked in. You’ll need prepped soil (loose, free of weeds), the seed mats themselves, a starter fertilizer, and a gentle watering can. Skip the heavy equipment—this works with just your hands and a rake. The mats create a cozy microclimate where seeds sprout faster and stay protected until roots establish. By day 10, you’ll see uniform green where the mats were laid, with no bare spots or patchy growth. The best part? No more waiting weeks for seeds to peek through soil. Just roll, water, and watch it grow. Works for new lawns, repairs, or even slopes where seeds would otherwise wash away. Here’s exactly how to do it right—no guesswork, just results.
📚 In This Guide
- What you need
- Instructions
- Tips and common mistakes
- Wrapping up and next steps
What you need
- ● Seed mats for grass: Choose high-quality, pre-seeded mats (e.g., blank">EcoMat or blank">SodMat). Quantity depends on lawn size—aim for 1 mat per 10 sq. ft. (e.g., 10 mats for a 100 sq. ft. area).
- ● Lawn soil or topsoil: 2–3 inches of well-draining, nutrient-rich soil (test pH: 6.0–7.0).
- ● Water: Access to a hose with a gentle spray nozzle or a watering can.
- ○ Lawn roller (optional but recommended): 100–150 lb for even pressure.
- ● Garden rake: Bow rake (8–12 teeth) for leveling soil.
- ○ Lawn edging tool (optional): For clean borders around driveways/walkways.
- ● Gloves: Heavy-duty work gloves to protect hands.
- ○ String line & stakes (optional): For marking large areas before laying mats.
- ● Weather check: Mild temps (50–75°F) and no rain forecast for 24–48 hours after installation.
- ● Sunlight access: Ensure the area gets 4–6 hours of sunlight daily.
- ● Clear workspace: Remove rocks, debris, and weeds from the planting zone.
- ● Starter fertilizer: Low-nitrogen (5-10-10 ratio) to boost early growth.
- ● Erosion control blanket: For sloped areas to prevent seed mat shifting.
- ● Lawn sprinkler timer: Automates watering for consistency.
- ● Knee pads: Because comfort matters! 😉
How to use seed mats for faster grass germination
Skip the waiting game—these mats cut germination time in half while keeping seeds safe and hydrated.
🌱 Step 1: Prepare Your Soil for Optimal Conditions
Start with a level, weed-free lawn area. Remove any debris or rocks—even small pebbles can create gaps where seeds won't make contact with the mat. I like to rake the soil lightly to create a fine, crumbly texture. This ensures good seed-to-soil contact once the mat is laid down.
Check your soil moisture before applying the mat. It should feel like a damp sponge—squeeze a handful and see if it holds together but doesn't drip. If it's too dry, water lightly until the top 1 inch feels consistently moist. Overwatering now will just create puddles under the mat later.
💧 Step 2: Lay Down the Seed Mat Evenly
Unroll the seed mat carefully over your prepared area, starting from one edge and working toward the center. Press it gently but firmly into place so it makes full contact with the soil—no air pockets or wrinkles. I use my hands to smooth it out, working in small sections at a time.
For larger areas, I find it helps to anchor the edges with small landscape staples or rocks. This prevents the mat from shifting when you water or walk across it. The mat's design keeps seeds evenly spaced, so don't overlap sections or you'll end up with clumps of grass sprouting too close together.
☀️ Step 3: Water Gently and Maintain Moisture
Use a fine mist setting on your hose or watering can to apply water. You want the mat to stay damp but not soggy—think of it like a wrung-out sponge. Water until you see moisture appear at the edges of the mat, but avoid creating pools. I usually water twice daily for the first 3-4 days to keep the environment consistently moist.
After the first week, reduce watering to once daily unless your area experiences high heat or wind. Check the soil moisture by lifting a corner of the mat—if the soil beneath feels dry to the touch, it's time to water again. The mat's protective layer helps retain moisture while preventing seeds from drying out.
⏰ Step 4: Monitor for Germination and Remove Mat
You should see the first signs of germination in 5-7 days, with full coverage appearing in 10 days. Watch for tiny green shoots pushing through the mat—this is your signal that everything is working. I like to mark a small section with a stake to track progress visually.
Once you see 75% of the seeds have sprouted and the grass is 1-2 inches tall, carefully remove the mat. Roll it up and store it for future use. Be gentle when pulling it away to avoid damaging the delicate grass blades. After removal, water lightly to help the young grass establish stronger roots in the soil.
🌿 Step 5: Transition to Normal Care Routine
For the first 2-3 weeks after removing the mat, keep the area consistently moist but avoid heavy watering. The grass needs time to develop deeper roots. I set my sprinkler to a light setting for 10-15 minutes daily during this period.
Once the grass reaches 3-4 inches tall, you can begin mowing carefully with a sharp blade set to 3 inches. This height helps the grass establish a strong root system and outcompete weeds. Avoid walking on the new grass for at least 4-6 weeks to prevent damage to the developing roots.
Tips & tricks for perfect grass germination with seed mats
Here's what nobody tells you about getting the absolute fastest grass growth—these tricks make all the difference.
Soil Prep Secret: Before laying down your seed mat, run your rake over the area one last time to create tiny grooves in the soil. This gives the seeds better contact with the mat and helps water penetrate more evenly. I like to do this in two perpendicular directions for maximum texture. The key is making sure the soil feels like fine sandpaper—not too smooth, not too rough.
Watering Hack: During those first critical 3-4 days when you're watering twice daily, I've found that morning and late afternoon are the best times. Watering in the morning gives seeds time to absorb moisture before the heat of the day, while evening watering helps maintain humidity overnight. Use a spray nozzle to create a fine mist—you want the mat to stay damp like a wrung-out sponge, not dripping wet.
Germination Timing: Those 5-7 days for first sprouts can feel like forever, but here's how to speed things up: After your second watering on day 3, give the mat a gentle shake to help settle any seeds that might be stuck on the surface. This ensures every seed has proper contact with the moist soil underneath. Also, keep an eye out for condensation on the mat—this is a good sign your moisture levels are perfect.
Mat Removal Strategy: When you're ready to remove the mat after 10 days, I recommend doing it on a cloudy day or in the early morning when the grass blades are still pliable. This prevents them from snapping when you pull the mat away. Roll up the mat slowly, section by section, and store it flat—not rolled tightly—to keep it usable for future projects.
Pro Tips for Seed Mats Grass
- Here's what nobody tells you about getting the absolute fastest grass growth—these tricks make all the difference.
- Soil Prep Secret: Before laying down your seed mat, run your rake over the area one last time to create tiny grooves ...
- Watering Hack: During those first critical 3-4 days when you're watering twice daily, I've found that morning and lat...
Frequently asked questions
Got questions about seed mats for grass? You’re not alone!
Here are the most common concerns—plus quick, actionable answers to help you get that lush lawn growing fast.
How do seed mats work compared to regular grass seed?
Seed mats are pre-germinated grass seeds embedded in a biodegradable mat, designed to eliminate the guesswork of traditional seeding. While regular seed relies on soil contact, sunlight, and moisture for germination (often taking 14–28 days), mats guarantee 90%+ germination in just 10 days—no waiting, no patchy spots. The mat also protects seeds from birds, erosion, and uneven watering.
Can I use seed mats in cold weather or winter?
Seed mats thrive in moderate temperatures (50–75°F), so avoid extreme cold (below 40°F) or frost. For winter use, opt for cool-season grasses (like ryegrass) and apply mats 4–6 weeks before the first frost. In colder climates, consider a winter blanket to insulate seeds until spring. Spring/fall are the best times for fastest results!
Do I still need to water after installing seed mats?
Yes—but less frequently! Seed mats require light, consistent moisture (about ¼ inch per week) to keep the mat hydrated and seeds germinating. Water gently (use a sprinkler or hose with a gentle spray) to avoid displacing the mat. Once grass reaches 2–3 inches, reduce watering to 1 inch per week. Pro tip: Water in the early morning to prevent fungal growth.
What if my seed mat doesn’t germinate within 10 days?
Don’t panic! First, check for even moisture—dry or waterlogged soil can stall germination. If the mat is still intact but no sprouts appear, lightly rake the surface to ensure seeds aren’t buried too deep. If issues persist, contact the manufacturer—most offer replacement guarantees for defective mats. Bonus: Some mats include slow-release fertilizer; if yours doesn’t, apply a light layer of starter fertilizer after 3–4 days.
Are seed mats better for slopes or shady areas?
Absolutely!
Seed mats excel in slopes and shady spots because they:
- Prevent erosion—the mat holds soil in place until roots establish.
- Outcompete weeds—dense germination blocks sunlight for weeds.
- Work in partial shade—choose shade-tolerant grasses (like fine fescue) for best results.
Wrapping up and next steps
Ready to transform your lawn into a lush, green masterpiece in just 10 days? Seed mats are your secret weapon—guaranteed to speed up germination while keeping weeds at bay. Whether you're a seasoned gardener or a first-timer, this method is simple, effective, and seriously satisfying to watch grow! 🌱
Now that you’re armed with all the tips and tricks, it’s time to roll up your sleeves and get planting. Start small—pick a sunny patch, follow the steps, and watch your grass sprout like magic.
Need more inspiration? Check out our lawn care guides for extra pro tips to keep your yard thriving all season long!