
Propagation
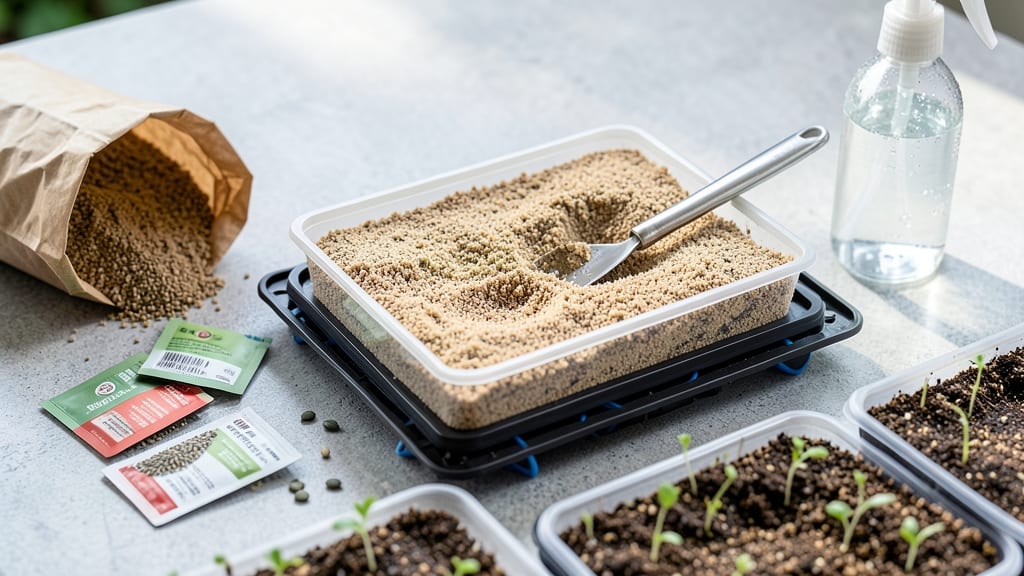
Starting seeds with vermiculite cuts germination time by nearly half—that’s the game-changer I discovered after struggling with slow, moldy seedling trays. 🌱 This lightweight mineral holds moisture like a sponge while letting roots breathe, creating the perfect cozy environment for tiny sprouts to pop up strong and fast.
The magic happens when you mix vermiculite with coco coir or perlite (a 1:1 ratio works wonders). Sterilize everything first—just pop your vermiculite in the oven at 200°F for 30 minutes to kill any lurking fungi. Too much moisture?
Drainage improves when you add one part perlite to every three parts vermiculite. You’ll notice roots reaching for the light within 3-5 days instead of the usual two weeks. The seedlings grow stockier too, with fewer leggy stretchers.
Just keep the mix lightly moist—not soggy—and you’ll avoid the dreaded mold that turns your tray into a science experiment gone wrong. Works for everything from delicate herbs to stubborn heirloom tomatoes.
Once your seedlings hit true leaves, transplant them carefully—vermiculite holds its structure better than peat moss, so they’ll handle the move like pros. Ready to speed up your growing season?
📚 In This Guide
- What you need
- Instructions
- Tips and common mistakes
- Wrapping up and next steps
What you need
- ● Vermiculite: 2–5 lbs (depending on seed tray size). Opt for sterile, horticultural-grade vermiculite (avoid playground or insulation types).
- ● Seed trays or containers: 1–2 trays (10x20 inches) or small pots (2–4 inches deep) with drainage holes.
- ● Seeds: Your chosen variety—check seed packets for planting depth and spacing.
- ● Spray bottle: For gentle watering (avoid over-saturating).
- ● Grow lights or sunny windowsill: 12–16 hours of light daily (LED grow lights are ideal).
- ○ Heat mat (optional but helpful): For seeds needing warmth (e.g., peppers, tomatoes).
- ● Perlite or coconut coir: Mix with vermiculite (1:1 ratio) for better aeration.
- ● Humidity dome or plastic wrap: Retains moisture for slow-germinating seeds.
- ● pH testing kit: Vermiculite is neutral (pH 6.5–7.5), but testing ensures optimal conditions.
- ● Fertilizer (diluted): A balanced liquid fertilizer (e.g., 5-5-5) for seedlings after 2–3 weeks.
How to use vermiculite for faster seed germination
Here's the method I rely on to speed up germination—lightweight, sterile, and perfect for delicate roots.
🌱 Step 1: Prepare Your Vermiculite Mix
Vermiculite is sterile by nature, but I always rinse it first to remove any dust that might cling to the particles. Place 1 part vermiculite in a clean bucket and add 1 part warm water—just enough to moisten it thoroughly. Let it sit for 10 minutes until it looks like dampened sand and holds its shape when squeezed but doesn’t drip.
This hydration step is critical. Over-soaking creates a muddy mess that suffocates seeds, while too little leaves them dry and struggling. Think of it like prepping a cozy nest—just damp enough to hold moisture without being soggy. Spread the mix on a tray to cool slightly before use, as warm vermiculite can overheat seeds.
🌱 Step 2: Sow Seeds at the Right Depth
Fill your seed-starting containers—whether 2-inch cells or small pots—with the prepared vermiculite, leaving ½ inch of space at the top. Gently press the mix down to eliminate air pockets, but don’t compact it. Vermiculite’s lightweight nature means it won’t hold seeds in place like soil, so I use a toothpick to create ¼-inch-deep wells for each seed.
Place 1-2 seeds per well, pressing lightly to ensure contact with the vermiculite. Cover them with an additional ⅛-inch of the mix—just enough to shield them from light but not bury them too deep. Seeds need darkness to germinate, but too much coverage slows their progress. Think of it like tucking them into a light blanket.
💧 Step 3: Create the Ideal Moisture Environment
Mist the surface with a spray bottle until the vermiculite looks uniformly damp but not wet. Vermiculite dries out faster than soil, so I place the containers in a clear plastic bag or under a humidity dome to trap moisture. This creates a mini greenhouse effect, which speeds up germination—often by 3-5 days compared to traditional soil.
Check daily for condensation on the bag’s interior. If it’s foggy, you’re golden. If it’s dry, mist again lightly. Overwatering here is impossible—vermiculite drains excess instantly—but under-moisture will stall germination. Place the setup in a warm spot (70-75°F)—a seedling heat mat works wonders if your home runs cooler.
☀️ Step 4: Provide Light at the Right Time
Seeds germinate best in darkness, so keep them covered until you see tiny green sprouts breaking through—usually 5-10 days. Once they emerge, remove the cover immediately and move them to bright, indirect light for 12-14 hours daily. Direct sunlight now will scorch delicate seedlings, so a grow light 4 inches above is ideal.
You’ll notice the first true leaves (not the initial seed leaves) appear within 7-14 days after germination. This is your cue to thin seedlings if you planted more than one per cell. Use scissors to snip at soil level—never pull—to avoid disturbing roots. Vermiculite’s loose texture makes this easier than soil, but be gentle.
✂️ Step 5: Transition to Soil and Harden Off
When seedlings have 2-3 sets of true leaves, it’s time to transplant. Gently remove them from the vermiculite—roots will be visible and delicate. Plant them in regular potting mix (vermiculite lacks nutrients), burying up to the first true leaves. Water lightly to settle the soil, but don’t drown them.
Harden off over 7-10 days by gradually exposing them to outdoor conditions. Start with 1 hour of shade on day one, increasing by 1 hour daily. Watch for wilting or yellowing—signs they’re not ready. Once they tolerate full sun and breezes, they’re ready for the garden. Vermiculite’s fast-draining nature means they’ll adapt quickly to outdoor moisture levels.
Tips & tricks for perfect seed starting with vermiculite
Real talk: Vermiculite speeds up germination, but small details make all the difference between thriving seedlings and wasted effort.
Moisture Mastery: That 10-minute soak in Step 1 is your sweet spot—vermiculite should feel like a damp sponge, not a dripping mess. I test by squeezing a handful: it should hold its shape but not leave water marks. Too dry? Seeds won't activate. Too wet? Roots suffocate. Spread the mix on a tray to cool slightly before use, or you'll risk overheating delicate seeds. Think of it like prepping a cozy nest—just right.
Depth Precision: The ¼-inch wells in Step 2 are non-negotiable for most seeds. Tiny seeds like lettuce need just ⅛-inch coverage, while larger seeds like beans can handle ½-inch. Use a toothpick to create consistent wells—this prevents uneven germination. Press seeds lightly to ensure contact with the vermiculite, but don't compact the mix. Vermiculite's lightweight nature means seeds won't stay put like they would in soil.
Light Timing: Those 12-14 hours of bright, indirect light in Step 4 are critical after germination. I use a grow light on a timer set to 14 hours daily—consistency matters more than intensity. Direct sunlight now will scorch seedlings, so position your light 4 inches above. Watch for the first true leaves (not seed leaves) to appear within 7-14 days after sprouting. This is your cue to thin if needed, using scissors to snip at soil level rather than pulling.
Harden Off Gradually: The 7-10 day hardening process in Step 5 is where many seedlings fail. Start with just 1 hour of shade on day one, then increase by 1 hour daily. Watch for wilting or yellowing—these are red flags. Vermiculite's fast-draining nature actually helps here, as seedlings adapt quickly to outdoor moisture levels. Once they tolerate full sun and breezes, they're ready for transplanting. Don't rush this step, or you'll shock delicate roots.
Pro Tips for Seed Starting Vermiculite
- Real talk: Vermiculite speeds up germination, but small details make all the difference between thriving seedlings an...
- Moisture Mastery: That 10-minute soak in Step 1 is your sweet spot—vermiculite should feel like a damp sponge, not a ...
- Depth Precision: The ¼-inch wells in Step 2 are non-negotiable for most seeds. Tiny seeds like lettuce need just ⅛-in...
Frequently asked questions
Got questions about using vermiculite for seed starting? You’re not alone! Here are some of the most common concerns—and clear, actionable answers to help you grow with confidence.
What’s the best ratio of vermiculite to seed-starting mix?
For most seeds, a 50/50 blend of vermiculite and peat moss or coco coir works wonders. Vermiculite alone can dry out too quickly, while too much mix may retain excess moisture. Adjust based on your seeds: delicate seedlings (like lettuce) thrive with more vermiculite for aeration, while heavy seeds (tomatoes, peppers) benefit from a slightly denser mix.
How long does vermiculite last for seed starting?
Vermiculite is reusable for 1–2 growing seasons if stored properly in a dry, sealed container. After that, its moisture-retention and aeration properties degrade. Pro tip: Sterilize used vermiculite by baking it at 200°F (93°C) for 30 minutes to kill pathogens before reuse. Discard if it crumbles easily or smells musty.
Can I use vermiculite alone without soil?
Yes! Vermiculite is a sterile, lightweight medium perfect for germinating seeds like succulents, orchids, or slow-to-sprout varieties (e.g., parsley). However, once seedlings develop true leaves, transplant them into a soil-based mix to prevent nutrient deficiencies. Vermiculite lacks organic matter, so it’s ideal for short-term use only.
How often should I water seeds in vermiculite?
Keep vermiculite consistently moist but not soggy—think of it like a wrung-out sponge. Water when the top inch feels dry (every 2–3 days for most seeds). Overwatering causes rot, while underwatering stunts roots. Use a spray bottle for precision, and always water at the base to avoid disturbing seeds.
What’s a good alternative if I can’t find vermiculite?
If vermiculite is unavailable, try these seed-starting substitutes:
- Perlite: Better for drainage but less moisture-retentive (mix 1:1 with peat moss).
- Coco coir: Sustainable and holds moisture well, but may need extra aeration.
- Sand: Only for large seeds (like beans)—sterilize first to avoid disease.
- Peat moss alone: Works but compacts easily; fluff with perlite.
Note: Perlite and vermiculite are often sold together—check labels!
Wrapping up and next steps
Starting seeds with vermiculite is a game-changer for gardeners eager to see faster germination and healthier roots! This lightweight, moisture-retaining medium creates the perfect environment for tiny seedlings to thrive—without the hassle of heavy soil or overwatering.
Whether you're a beginner or a seasoned green thumb, vermiculite simplifies the process while boosting success rates.
Now that you’re equipped with the how-to and pro tips, it’s time to roll up your sleeves and get growing! 🌱 Try experimenting with different seed types or mix vermiculite with coconut coir for even better results. Happy planting—your future garden starts right here!