
Lawn
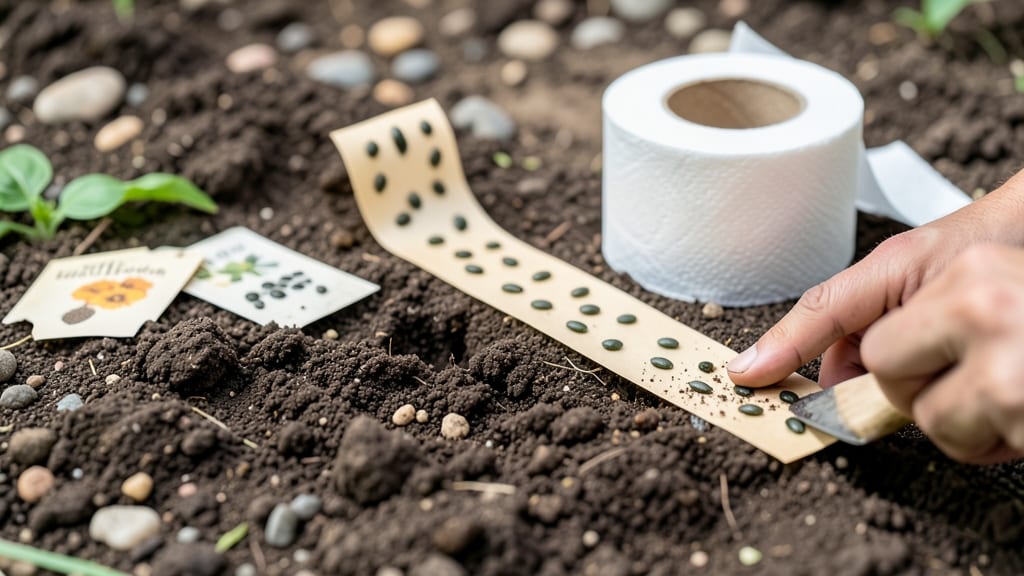
Creating seed tape from toilet paper turns trash into a zero-waste gardening game-changer. 🌱 I stumbled onto this trick after wasting rolls of expensive seed tape—now I reuse toilet paper rolls and save money while reducing waste.
The process is simpler than it sounds, and your seedlings will thank you with perfect spacing every time.
All you need is toilet paper (or biodegradable paper towels), a glue-water mix, and your favorite seeds. Cut the paper into strips, apply the glue, and place seeds at your desired spacing—no more guessing or overcrowding.
This method works for tiny seeds like lettuce or delicate flowers, making transplanting a breeze.
Once planted, the paper dissolves naturally, leaving no mess behind. You'll see even germination rates and healthier seedlings because they're not disturbed during transplanting. The best part? No special tools—just what you already have at home.
Perfect for beginners or anyone tired of seedling chaos. Try it with your next batch of flowers or veggies, and you'll never buy seed tape again. The garden—and the planet—will thank you.
📚 In This Guide
- What you need
- Instructions
- Tips and common mistakes
- Wrapping up and next steps
What you need
- ● Toilet paper rolls: 1–2 rolls (unbleached, 100% recycled preferred 🌿)
- ● Seeds: Small seeds like basil, marigold, or lettuce (check seed packet for spacing—aim for tiny seeds!)
- ● Water: A spray bottle or small cup for dampening
- ● Scissors or craft knife: For trimming rolls to size
- ○ Non-toxic glue (optional but helpful): A dab of flour-and-water paste or school glue works!
- ● Ruler or measuring tape: To mark even seed spacing (¼" apart is ideal!)
- ● Pencil or toothpick: For poking holes in the toilet paper (if seeds need extra grip)
- ● Newspaper or paper towels: For drying glued sections (if using adhesive)
- ● Plastic bag or damp cloth: To keep seed tape moist while drying
- ● 💡 Seed size matters: Skip large seeds (like beans)—they’ll jam the tape!
- ● 🌡️ Test your setup: Lay out seeds first to plan spacing before gluing.
- ● ✨ Reuse rolls: Save empty rolls for future projects or compost them!
Step-by-Step instructions for making seed tape from toilet paper
Here’s how to create this brilliant zero-waste gardening tool—no fancy supplies needed!
🌱 Step 1: Cut and Soak the Toilet Paper Roll
Unroll a full sheet of unbleached, 100% recycled toilet paper (the kind without dyes or lotions). Lay it flat on a clean surface and cut it into 1-inch-wide strips—this gives you enough space for seeds while keeping them evenly spaced. I like to use a ruler and a sharp craft knife for clean edges.
Fill a shallow dish with lukewarm water and add 1 tablespoon of unflavored gelatin (the key binder!). Stir until fully dissolved—this creates a sticky, seed-friendly glue. Place your toilet paper strips in the gelatin mixture and let them soak for 5-10 minutes until they’re flexible but not soggy. Here’s the thing—don’t skip the gelatin! It’s what holds seeds in place during planting.
🌱 Step 2: Apply Seeds to the Strips
Drain the strips and lay them flat again. Using a toothpick or tweezers, place your seeds 1 inch apart along each strip. For small seeds like lettuce or basil, I gently press them into the gelatin-coated paper—just enough to stick without crushing. Larger seeds like beans can sit right on top.
Pro tip: If working with multiple seed types, label each strip with a pencil or marker before planting. I write the variety name along the edge—it’ll wash out when you plant, but it keeps things organized until then. Let the strips dry completely on a wire rack or paper towel for 12-24 hours in a warm, dry spot.
☀️ Step 3: Plant the Seed Tape Directly
Once dry, your seed tape is ready for the garden! Simply unroll the strip into a prepared furrow or pot, pressing it gently into the soil so the seeds make contact with moist, loose dirt. Cover lightly with ¼ inch of soil—just enough to hold the tape in place without burying the seeds too deep.
Water gently with a spray bottle to activate the gelatin and encourage even moisture. You’ll see the seeds sprout faster and more uniformly than traditional planting because they’re already at the perfect depth. This method also eliminates the guesswork of thinning seedlings—every seed gets its own space right from the start!
💧 Step 4: Monitor and Maintain
Keep the soil consistently moist (not soggy) for the first 7-10 days—this is when germination happens. The toilet paper will break down naturally, so you won’t need to remove it later. Watch for first true leaves (not the initial seed leaves) as your signal that everything’s working.
Once seedlings are 2-3 inches tall, you can either transplant them directly or let them grow in place if they’re small plants like lettuce or carrots. The tape dissolves completely within 4-6 weeks, leaving no waste behind. Real talk: This method saves time, reduces seed waste, and makes gardening way more satisfying!
Tips & tricks for perfect seed tape from toilet paper
This clever zero-waste gardening hack is all about precision—and these little tricks will help you avoid common pitfalls while making the most of your seed tape!
Precision Cutting Matters: When cutting your 1-inch-wide toilet paper strips in Step 1, use a ruler for perfect alignment. I learned this the hard way—uneven strips make planting messy and seeds unevenly spaced. For extra clean edges, fold the paper once before cutting, which gives you two identical strips at once.
Gelatin Consistency is Key: The 5-10 minute soaking time in Step 1 is crucial—your strips should be pliable but not dripping wet. If the gelatin mixture feels too thick, add a teaspoon of lukewarm water. Too thin? Let it sit another minute. The perfect consistency ensures seeds stick without sliding off during planting.
Labeling System for Organization: In Step 2, I can't emphasize enough how helpful labeling is when working with multiple seed varieties. Use a pencil to write the seed type along the edge of each strip before drying. The writing will wash away when planted, but it keeps everything organized until then. For large batches, consider color-coding with different colored pencils for seed families.
Drying Strategy for Success: The 12-24 hour drying time in Step 2 is your chance to prevent curling. Place strips on a wire rack in a warm, dry spot away from direct sunlight. If your kitchen is humid, prop the strips slightly upright with toothpicks to ensure even drying on both sides. Proper drying prevents the gelatin from activating prematurely in your pocket or bag.
Pro Tips for Seed Tape Toilet Paper
- This clever zero-waste gardening hack is all about precision—and these little tricks will help you avoid common pitfa...
- Precision Cutting Matters: When cutting your 1-inch-wide toilet paper strips in Step 1, use a ruler for perfect align...
- Gelatin Consistency is Key: The 5-10 minute soaking time in Step 1 is crucial—your strips should be pliable but not d...
Frequently asked questions
Is seed tape toilet paper really strong enough to use?
Yes! While it’s not as durable as traditional TP, seed tape’s thin but sturdy paper backing holds up well for light use. For extra strength, layer two strips or use it for quick cleanups (like wiping hands or surfaces). Avoid heavy-duty scrubbing—think "eco-friendly wipes" rather than heavy-duty TP.
Will the seeds still germinate after contact with water or waste?
Most likely, no—but it depends on the seed type! Water-soluble seed tapes (like those for herbs or flowers) dissolve quickly, while others may need a good rinse to remove residue. For best results, use non-toxic, biodegradable seed tape and compost the used strips in soil (away from edibles).
How long does a roll of seed tape toilet paper last?
That depends on your usage! A standard roll of seed tape (about 100–200 feet) can last 1–2 weeks for light household use. For reference, a 4-ply TP roll (12 sheets per sheet) has ~500 sheets—so seed tape is thinner but longer. Track your roll’s length to plan ahead for refills.
Can I use seed tape for bidet sprayers or flushable wipes?
Not ideal! Seed tape isn’t designed to dissolve in water quickly, so it may clog pipes or linger in septic systems. Stick to dry use (like wiping hands or surfaces) or only flush small, torn pieces in small quantities. For bidets, opt for certified flushable wipes instead.
What’s a good alternative if I run out of seed tape TP?
No worries—here are a few zero-waste swaps:
- Bamboo toilet paper: Super soft and compostable!
- Recycled paper towels: Cut into strips for quick cleanups.
- Hemp or cotton rags: Wash and reuse like sponges.
- Corn husks or banana leaves: Biodegradable and surprisingly effective!
Wrapping up and next steps
Transforming your toilet paper rolls into seed tape isn’t just a clever hack—it’s a game-changer for eco-conscious gardeners! 🌱 This zero-waste method saves space, ensures precision planting, and turns everyday trash into a thriving garden starter.
Whether you’re a beginner or a seasoned green thumb, this simple technique proves that sustainability and simplicity go hand-in-hand.
Ready to grow your green thumb? Start small—try a few seed tapes with fast-growing herbs or flowers, then expand to your full garden plan. Every roll you repurpose is one less wasteful item in the landfill and one more step toward a healthier planet. Happy planting! 🌿