
Lawn
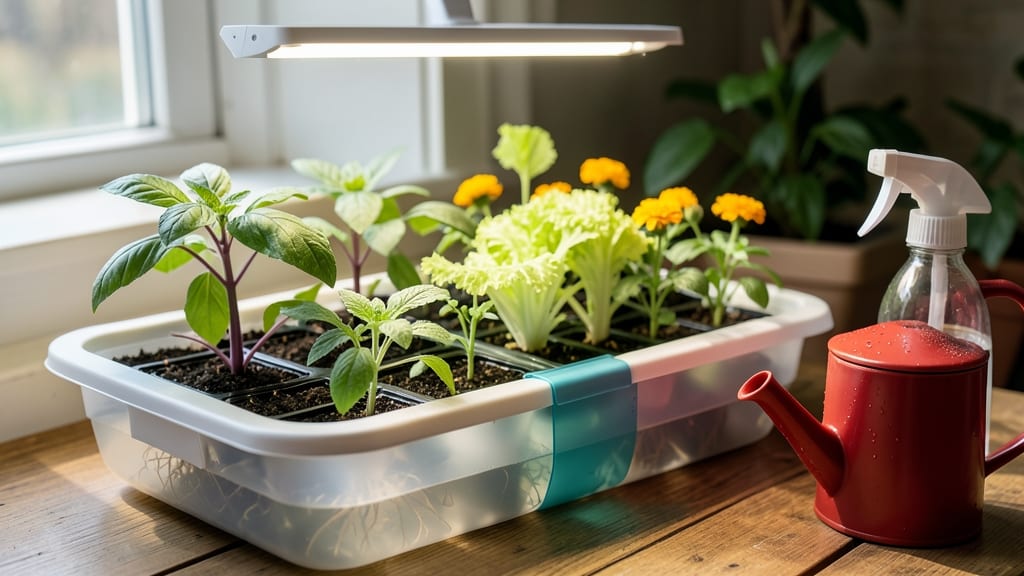
A self-watering seed starter turns fussy seedlings into foolproof growth. 🌱 I’ve struggled with drowned roots and dried-out trays for years—until I discovered how a simple wicking system keeps moisture perfect without the guesswork. The right setup means stronger seedlings, faster growth, and zero stress over watering schedules.
You’ll need just three supplies: a seed tray with a reservoir, a wicking material (like felt or paper towels), and your favorite starter mix. Store-bought kits work, but a DIY version with a plastic container and a cut-up towel does the job just as well.
The key is balancing water in the reservoir so roots drink steadily, not flood. By the time your seedlings are ready to transplant, they’ll be stocky and vibrant, not leggy or weak.
Herbs like basil and veggies like peppers thrive in this system, while finicky flowers like snapdragons finally germinate reliably. No more wilting before you even see sprouts! Works year-round, from early spring starts to late-winter herbs. Here’s how to set yours up without a single overwatered seedling in sight.
📚 In This Guide
- What you need
- Instructions
- Tips and common mistakes
- Wrapping up and next steps
What you need
- ● Clear plastic bottle (16–20 oz): Choose a clean, empty bottle (e.g., soda or water bottle) with a screw-on cap.
- ● Scissors or utility knife: For cutting the bottle and making drainage holes.
- ○ Drill or awl (optional but helpful): For precise drainage holes (¼-inch diameter).
- ● Potting soil: Lightweight, seed-starting mix (1–2 cups, depending on bottle size).
- ● Seeds: Your favorite flowers, herbs, or veggies (adjust quantity based on bottle size).
- ● Water: Room-temperature, filtered water (½ cup per bottle).
- ● Rubber band or string: To secure the bottle’s top and bottom sections (if cutting).
- ● Label maker or masking tape: To mark seed types and planting dates.
- ● Spray bottle: For gentle watering before the wicking system is active.
- ● Seedling heat mat: If starting seeds in cooler climates.
- ● Clear tape or glue: To seal edges if the bottle leaks.
Step-by-Step instructions for building a self-watering seed starter
Here's how to create a foolproof system that keeps seedlings happy while you focus on other tasks.
🪴 Step 1: Gather and Prepare Materials
You'll need a clear plastic container with lid (like a takeout tub), a small plastic cup (3-4 oz size), scissors, potting mix, and seeds. The container should be at least 6 inches deep—deeper is better for root growth. Cut the cup in half horizontally, keeping the bottom portion. This becomes your reservoir.
Poke 4-6 small holes in the base of the cup using a nail or drill. These holes let water wick up through the soil via capillary action. Place the cup in one corner of your container. Fill the rest of the bottom with 1-2 inches of pebbles or gravel to create an air gap between water and soil, preventing root rot.
💧 Step 2: Assemble the Watering System
Fill the cup reservoir with water until it reaches just below the pebble layer—about ½ inch below the top of the pebbles. This ensures water will wick up but not overflow. Place a coir or paper towel wick (cut into strips) from the reservoir, over the pebbles, and across the container. The wick should reach every corner of the planting area.
Here's the thing—this wick system is your secret weapon. It delivers moisture directly to the roots without oversaturating the surface. You'll only need to add water to the reservoir every 5-7 days, depending on your climate. Watch for when the water level drops below the pebbles—that's your signal to refill.
🌱 Step 3: Plant Your Seeds
Fill the container with 2-3 inches of moist potting mix, leaving about ½ inch from the top edge. Press the soil down gently to remove air pockets. Plant seeds according to packet instructions—typically ¼ inch deep for most vegetables and flowers. I like to use a toothpick to make small holes for precise planting.
Cover the container with the lid (or plastic wrap) to create a humid microclimate. Place it in a warm spot—70-75°F is ideal for most seeds. You'll see germination in 5-14 days, depending on the plant type. Remove the lid once sprouts emerge to prevent fungal growth from trapped moisture.
☀️ Step 4: Position for Optimal Growth
Move your seed starter to a location with bright, indirect light immediately after germination. A south-facing window works well, but supplement with a grow light if natural light is weak. Keep the light 2-3 inches above seedlings to prevent leggy growth. You'll know your setup is working when seedlings grow compact and sturdy rather than stretching toward light.
Don't worry about watering the soil surface—your wick system handles that. Only check the reservoir level when you notice the soil surface starting to dry out. This system prevents both underwatering and overwatering, two of the biggest killers of young seedlings. Real talk: You'll be amazed at how little maintenance these need compared to traditional seed trays.
⏰ Step 5: Transplant When Ready
Seedlings are ready for transplant when they develop 2-3 true leaves and the first set of leaves between the seed leaves (cotyledons). Gently remove them from the starter by lifting from the bottom—this protects delicate roots. Plant in your garden or larger pots, burying up to the first set of true leaves to encourage strong stems.
Here's where it gets fun—because your seedlings have been consistently moist but never soggy, they'll establish quickly in their new home. Water deeply after transplanting to help them settle in. This system gives you a head start on healthy, vigorous plants that outperform seedlings from dry or waterlogged trays.
Tips & tricks for perfect self-watering seed starters
A few clever adjustments that'll transform your seed-starting game—and save you from those dreaded seedling casualties.
Wick Placement Matters: When laying down your coir or paper towel wicks in Step 2, make them slightly longer than needed. The extra length gives you flexibility to adjust placement after filling with potting mix. I've found that wicks should reach all corners of the planting area but not overlap—this ensures even moisture distribution without creating soggy spots. The key is to press them gently into the soil after filling, creating direct contact with the root zone.
Material Upgrade for Long-Term Use: While the instructions call for a simple plastic cup, consider using a small terra cotta pot instead for your reservoir. Terra cotta's porous nature allows for better oxygen exchange at the roots while still maintaining moisture. Just be sure to drill more holes (6-8) in the base—this material wicks water differently than plastic. I've used this upgrade for multiple planting seasons with zero root rot issues.
Lighting Troubleshooting: If your seedlings start stretching toward light in Step 4, you're dealing with etiolation—a classic sign of insufficient light. Move your starter closer to the window or adjust your grow light position to within 1-2 inches of the seedlings. I've found that rotating the container daily ensures even growth, and supplementing with a 12-hour light cycle (using a timer) can make all the difference for indoor starters.
Pro Tips for Self Watering Seed Starter
- A few clever adjustments that'll transform your seed-starting game—and save you from those dreaded seedling casualties.
- Wick Placement Matters: When laying down your coir or paper towel wicks in Step 2, make them slightly longer than needed.
- Material Upgrade for Long-Term Use: While the instructions call for a simple plastic cup, consider using a small terra cotta pot instead for your reservoir.
Frequently asked questions
Got questions about self-watering seed starters? You’re not alone! Here are some of the most common queries—and their answers—to help you grow with confidence.
How often do I need to check on my self-watering seed starter?
A self-watering starter reduces the need for daily checks, but you should peek in every 2–3 days to ensure the water reservoir isn’t empty or clogged. Most models hold enough moisture for 5–7 days between refills, depending on seed type and humidity. Pro tip: If condensation forms on the lid, your setup is working perfectly!
How long until seeds sprout in a self-watering starter?
Sprouting times vary by seed type, but most fast growers (like lettuce or radishes) appear in 5–14 days, while slower ones (tomatoes, peppers) may take 10–20 days. Keep the starter in a warm, bright spot (not direct sun) until you see tiny green shoots. Troubleshooting: If nothing emerges after 2 weeks, check moisture levels or seed viability.
What happens if I overfill the water reservoir?
Overfilling can drown seeds or cause root rot. Fill the reservoir just below the seed tray’s base—most designs include a max-fill line. If water pools on top, empty it immediately. Safety tip: Use room-temperature water to avoid shocking seeds with cold or hot liquid.
Can I reuse a self-watering seed starter?
Clean the tray and reservoir thoroughly with soapy water and a 1:10 bleach solution (rinse well) after each use. Avoid harsh chemicals near seeds. Bonus: Some kits include reusable mesh inserts—save them for your next planting!
What’s a good alternative if I don’t have a self-watering starter?
No starter? Try these easy fixes:
- Mist method: Use a spray bottle to keep soil damp (check daily).
- Paper towel trick: Moisten a towel, wrap seeds, and place in a sealed bag until sprouts appear.
- DIY tray: Add a shallow dish of water under a regular seed tray (elevate to prevent soggy bottoms).
Note: These require more attention but work in a pinch!
Wrapping up and next steps
Growing seeds with a self-watering seed starter is a game-changer—no more guesswork, no more drowned seedlings, just consistent, stress-free sprouting! 🌱 Whether you're a gardening newbie or a seasoned green thumb, this simple system saves time, water, and frustration while boosting your success rate.
Now that you’re equipped with the know-how, why not start small? Try a few easy-to-grow seeds like basil or marigolds, then expand your garden with confidence. Happy planting—your future plants will thank you! 🌿