
Lawn
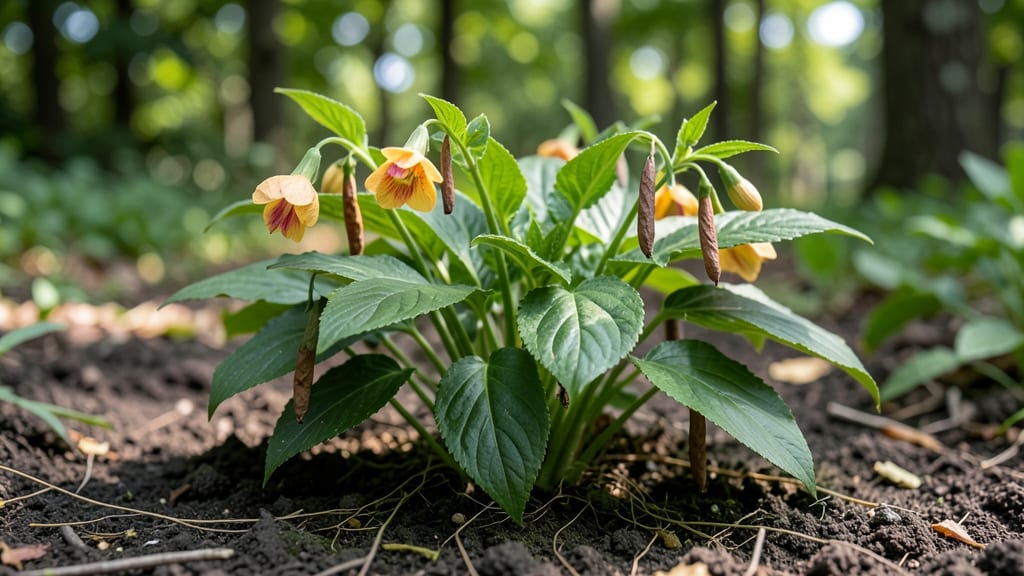
Twisting those Touch-Me-Not seed pods reveals whether they're ready for next year’s garden. 🌱 I’ve learned that the classic "twist test" isn’t just folklore—it’s the best way to know when these delicate pods are mature enough to collect.
The moment they snap open with a satisfying pop, you’ve got viable seeds inside.
Timing matters most: harvest pods when they’ve turned from green to brown but before they split open naturally, usually in late summer or early fall. A simple paper bag under the plant catches any early releases, while a gentle twist confirms readiness.
Store dried pods in an envelope labeled with the variety and date—viability lasts up to two years if kept dry and cool.
When spring arrives, nick open mature pods to release tiny, jelly-coated seeds. Scatter them lightly on moist soil—they germinate best in partial shade, just like their parent plants.
You’ll see sprouts within weeks, and before you know it, your garden will be dotted with those familiar vibrant pink and purple blooms.
Pro tip: If pods split too soon, try harvesting earlier and drying them indoors. Overripe seeds lose viability, so don’t wait too long. This method works for both garden centers and wild-collected varieties—just remember, patience is key with these finicky little pods.
📚 In This Guide
- What you need
- Instructions
- Tips and common mistakes
- Wrapping up and next steps
What you need
- ● Mature Touch-Me-Not seed pods – Harvest at least 10-15 pods (more = better accuracy). Ensure they’re fully developed but not yet opened.
- ● Paper towels or coffee filters – 2-3 sheets per test batch (for moisture control).
- ● Small plastic bags or resealable containers – 1 per pod sample (quart-sized works well).
- ● Spray bottle with water – For gentle hydration (avoid soaking!).
- ● Notebook & pen – To track pod behavior over 24-48 hours.
- ● Permanent marker – For labeling bags/containers.
- ● Drying rack or mesh screen – For airflow if pods pass the test (e.g., a wire cooling rack).
- ● Paper bags or breathable fabric sacks – For long-term storage (1-2 per pod batch).
- ● Humidity pack – Silica gel packets to prevent mold in storage.
- ● Digital scale – To monitor weight loss during drying (aim for <10% moisture).
- ● Clear tape or labels – For labeling storage dates (e.g., "2024 Pods – Plant Feb 2025").
- ○ Seed viability test kit – Optional backup (e.g., tetrazolium chloride for lab-like results).
How to test and preserve touch-me-not seed pods for future planting
Here's how I check which pods will sprout next year—and which to toss.
🌿 Step 1: Harvest Mature Pods at the Right Time
Wait until pods turn a deep brown color and begin splitting open naturally—this means seeds are fully mature. I gently twist each pod to release the seeds, but I never force open green or partially open ones. The best time to harvest is in late summer or early fall, just before the first frost, when pods are dry but still intact.
Lay them out on a clean towel in a single layer. Avoid stacking pods—they'll trap moisture and rot. A sunny windowsill works perfectly, but keep them out of direct afternoon sun to prevent overheating. You'll know they're ready for testing when they feel completely dry and brittle to the touch.
⏰ Step 2: Perform the Twist Test for Viability
Take one pod and hold it between your thumb and forefinger. Apply gentle pressure and twist slowly—if it snaps cleanly with a slight crackling sound, those seeds are likely viable. I test at least 10 pods from different plants to get an accurate reading. If most pods resist twisting or crumble into dust, those seeds probably won't germinate.
For pods that pass the twist test, I make a small slit along the seam with a sharp knife to expose the seeds inside. This helps me see their condition—healthy seeds are plump and dark, while shriveled or pale seeds should be discarded. I always label each batch with the harvest date and plant variety to track performance.
💧 Step 3: Dry Seeds Properly for Long-Term Storage
Spread seeds in a single layer on a paper towel or mesh screen in a warm, dry place with good airflow. I use a small fan on low setting to circulate air without blowing seeds around. Keep them in this position for 3-5 days, checking daily. You'll know they're dry enough when they feel light and make a rattling sound when shaken in their container.
Once completely dry, store seeds in a sealed, airtight container like a glass jar or envelope. I add a small silica gel packet to absorb any remaining moisture. Label the container with the plant name, harvest year, and date of storage. Store in a cool, dark place—my basement corner works perfectly. Test a few seeds annually to ensure they remain viable.
☀️ Step 4: Prepare Pods for Next Year's Planting
In early spring, I fill small pots with moist seed-starting mix and plant 2-3 seeds per container at a depth of about ¼ inch. Cover lightly with soil and mist gently with water. Place the pots in a warm location with indirect light—touch-me-nots need consistent moisture but hate soggy soil. I keep the soil damp (not wet) by watering only when the top inch feels dry.
Germination typically occurs within 2-3 weeks if conditions are right. Once seedlings appear, move them to a sunny windowsill or under grow lights for 12-14 hours daily. Watch for the first true leaves—these will be small and round, signaling healthy growth. Transplant outdoors after the last frost when soil temperatures reach at least 60°F.
Tips & tricks for perfect touch-me-not seed preservation
Real talk: Testing seed viability saves you from wasting time and energy on seeds that won't sprout. Here's how to get it right every time.
Harvest Timing: Don't rush it—wait until pods are fully brown and beginning to split naturally. I've learned the hard way that forcing open green pods releases immature seeds that won't germinate. The "just before first frost" window is critical because it gives pods time to fully mature while avoiding winter moisture damage.
Twist Test Technique: The clean snap is your golden ticket. When testing pods, apply even pressure—uneven twisting can give false results. I test at least 10 pods from different plants to account for natural variations. If more than 30% fail the test, consider collecting more pods next season from healthier plants.
Drying Strategy: Those 3-5 days of drying are non-negotiable. I use a small fan on low to circulate air without creating drafts that could scatter seeds. Watch for that "rattling sound" when shaking the container—it's your confirmation that moisture levels are perfect. Too fast, and seeds won't store properly; too slow, and they risk mold.
Storage Wisdom: The cool, dark basement corner isn't just my preference—it's the ideal environment. Temperature fluctuations and light exposure both reduce seed viability. I test a few seeds annually by planting them in small pots to verify they're still good. If germination drops below 50%, it's time to collect fresh pods.
Pro Tips for Touch Me Not Seed Pods
- Real talk: Testing seed viability saves you from wasting time and energy on seeds that won't sprout. Here's how to ge...
- Harvest Timing: Don't rush it—wait until pods are fully brown and beginning to split naturally. I've learned the hard...
- Twist Test Technique: The clean snap is your golden ticket. When testing pods, apply even pressure—uneven twisting ca...
Frequently asked questions
Got questions about testing Touch-Me-Not seed pods before drying them for next year? You’re not alone! Here are some of the most common queries—and their answers—to help you prep like a pro.
How do I know if a Touch-Me-Not seed pod is still viable?
Gently twist the pod open—if the seeds inside are plump, dark, and not shriveled or moldy, they’re likely viable. For extra assurance, conduct a float test: Drop seeds in water. Viable ones sink; floaters are past their prime.
When is the best time to harvest Touch-Me-Not seed pods?
Harvest pods when they turn brown and papery but before they split open naturally (usually late summer to early fall). Overripe pods release seeds prematurely, reducing your yield. Aim for 70-80% dryness—they should feel light but intact.
Can I store Touch-Me-Not seeds in the fridge or freezer?
Yes! Store pods or seeds in a paper bag or envelope (not plastic) with a silica gel packet to absorb moisture. Label with the harvest date and refrigerate (not freeze) for up to 2 years. Avoid humidity—it’s the enemy of seed longevity.
What if my seed pods won’t twist open?
If pods resist twisting, they may be underripe or too dry. Try soaking them in warm water for 10–15 minutes to soften, then retry. If still stuck, snip the pod open with clean scissors—just avoid damaging the seeds inside.
Are there alternatives if my seeds don’t pass the viability test?
If seeds fail, try layering (stratification) for 4–6 weeks in a damp paper towel in the fridge to mimic winter conditions. For stubborn cases, purchase fresh seeds from a nursery or swap with fellow gardeners—community seed banks are a great backup!
| Quick Troubleshooting | Solution |
|---|---|
| Pods moldy or musty-smelling | Discard immediately—mold spreads fast. |
| Seeds attract pests | Store in a sealed container with cedar chips or neem powder. |
| Low germination after testing | Try scarifying seeds (lightly sanding) to break dormancy. |
Wrapping up and next steps
From testing touch-me-not seed pods to ensuring their viability, you’ve now got the know-how to prepare them for next year’s garden blooms! 🌱 Whether you’re a seasoned gardener or a curious beginner, this twist test is a simple yet effective way to save seeds and nurture future growth.
Ready to put your skills to the test?
Your next step? Grab those pods, follow the steps, and share your success—or even challenges—with fellow gardening enthusiasts! 🌿 Who knows? You might just inspire someone else to grow their own touch-me-nots—or another favorite plant—next season.