
Propagation
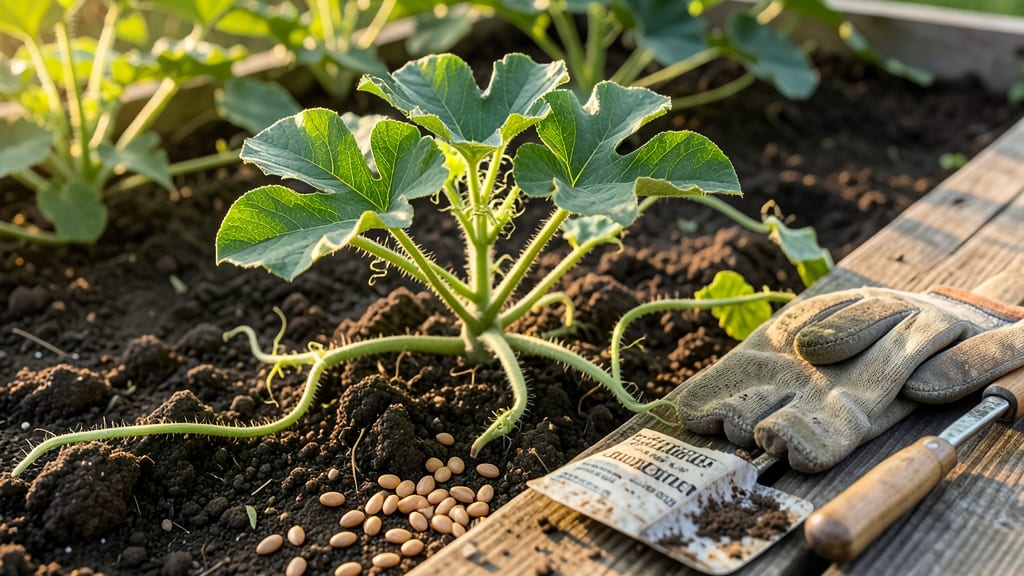
Your watermelon seed germination won’t succeed if the seeds are dead inside—here’s how to test them before planting. 🌱 I've wasted too many seasons on seeds that never broke ground, and this simple twist-free viability check saves you from the same frustration.
The trick is a glass of water and a little patience, because even the best seeds lose viability over time.
All you need is a few seeds, a glass of water, and a week of waiting. Drop 10 seeds in water and count how many sink—those are your best candidates for germination.
Healthy seeds sink within 30 seconds, while floaters are likely duds. This method works for any melon seed, not just watermelon, and takes just minutes to set up.
Once you've confirmed viable seeds, germination happens fastest in warm, moist soil at 75-85°F. Use a seed-starting mix, keep it damp (not soggy), and expect sprouts in 5-10 days.
The first leaves appear small and round—don't mistake them for failure. With the right setup, you'll see strong seedlings ready for transplanting in 2-3 weeks.
For slow starters, check soil moisture and warmth—cool soil delays germination. If mold appears, reduce watering and improve airflow. The key is consistency: keep conditions stable, and you'll break through that stubborn seed coat every time. Now let's get those seeds growing!
📚 In This Guide
- What you need
- Instructions
- Tips and common mistakes
- Wrapping up and next steps
What you need
- ● Watermelon seeds: Freshly extracted (or stored) seeds—aim for at least 10 seeds for accurate testing.
- ● Paper towels: 2–3 sheets (unbleached, seed-free, and slightly damp).
- ● Plastic ziplock bag: A quart-sized bag (or similar airtight container).
- ● Water: Room-temperature, filtered if possible (avoid chlorinated water).
- ● Permanent marker: For labeling your bag (e.g., "Watermelon Seeds – [Date]").
- ○ Ruler or measuring tape: To track seed growth (optional but helpful).
- ● Seedling tray or small pots: For transplanting viable seeds after germination.
- ● Planting soil: Lightweight potting mix (sterilized to prevent mold).
- ● Spray bottle: For gentle misting if seeds dry out.
- ● Notebook: To record dates, seed counts, and germination progress.
- ○ Heat mat (optional): Speeds up germination in cooler climates (70–85°F ideal).
How to test watermelon seeds for germination success
Here's the simple twist-free method I use to check viability before storing seeds for next season.
🌱 Step 1: Collect and Dry the Seeds
Remove seeds from ripe watermelons by cutting them open and scooping out the pulp with the seeds still attached. Place the pulp and seeds in a bowl and let them ferment for 3-5 days at room temperature. This process helps separate the seeds from the pulp naturally.
After fermentation, rinse the seeds under cool water to remove any remaining pulp. Spread them out on a paper towel in a single layer and let them air-dry completely. They're ready when the seeds feel dry to the touch and make a rattling sound when shaken in their container. This drying process typically takes 3-5 days depending on humidity levels.
💧 Step 2: Prepare the Germination Test
Take 4 watermelon seeds and place them between two damp paper towels. Fold the towels so the seeds are sandwiched inside and place them in a sealed plastic bag. This creates a humid environment that mimics ideal germination conditions. Label the bag with the watermelon variety and date for tracking.
Put the bag in a warm location, such as on top of your refrigerator or near a sunny window. The ideal temperature for germination is 75-85°F. You'll see the first signs of germination in 3-7 days, depending on seed freshness and conditions. Keep the towels moist but not soggy throughout the process.
☀️ Step 3: Monitor for Sprouting
Check the seeds daily for signs of sprouting. Healthy seeds will begin to sprout with a small white root emerging first, followed by the shoot. Count how many of the 4 seeds you started actually sprout. If 3 or 4 seeds sprout, your seeds are highly viable and ready for storage.
If only 1-2 seeds sprout, your batch has moderate viability but may benefit from additional drying before storage. If none of the seeds sprout after 7 days, it's best to discard them and try seeds from a different watermelon or source. This test gives you a clear picture of what to expect when you plant these seeds in the spring.
⏰ Step 4: Store Viable Seeds Properly
Once you've confirmed seed viability, place the dried seeds in a paper envelope or small glass jar. Store them in a cool, dark place like your refrigerator or a seed storage container. Watermelon seeds can remain viable for 4-5 years when stored properly in these conditions.
Label the storage container with the variety name and the year you collected the seeds. This will help you keep track of which seeds are freshest and ready for planting. When you're ready to plant, simply take the seeds out of storage and follow your regular planting instructions for best results.
Tips & tricks for perfect watermelon seed viability testing
These simple secrets will help you get the most accurate results from your seed germination test.
Fermentation Timing: The 3-5 day fermentation in Step 1 is crucial—don't rush it! If your kitchen is humid (above 70°F), you might need the full 5 days. The goal is to break down the pulp completely while keeping seeds intact. I've learned the hard way that skipping this step can leave sticky residue that interferes with drying.
Drying Test: For Step 1, seeds are properly dried when they rattle like marbles in their container. If they still feel damp after 5 days, spread them on a fresh paper towel and give them another 24 hours. Over-drying isn't a problem, but under-dried seeds won't store well and may develop mold.
Germination Environment: In Step 2, the 75-85°F temperature range is ideal, but don't stress if you can't hit it perfectly. A warm spot like on top of your fridge works well. The key is consistency—keep the paper towels consistently moist (not dripping) by misting them lightly every 1-2 days. A spray bottle works perfectly for this.
Pro Tips for Watermelon Seed Germination
- These simple secrets will help you get the most accurate results from your seed germination test.
- Fermentation Timing: The 3-5 day fermentation in Step 1 is crucial—don't rush it!
- Drying Test: For Step 1, seeds are properly dried when they rattle like marbles in their container.
Frequently asked questions
Got questions about watermelon seed germination? You’re not alone! Here are answers to the most common queries to help you grow those juicy vines with confidence.
How long does it take for watermelon seeds to germinate?
Watermelon seeds typically sprout within 5–10 days under ideal conditions (warmth, moisture, and indirect light). If your soil stays above 70°F (21°C) and is consistently damp (not soggy), germination speeds up. Patience is key—some varieties may take up to 2 weeks!
What’s the best way to speed up germination?
Boost your seeds’ chances by pre-soaking them in warm water for 12–24 hours before planting. Use a seedling heat mat (75–85°F) or place pots in a sunny windowsill. Keep the soil moist but not waterlogged, and avoid overcrowding—give each seed 1 inch of space.
Why aren’t my watermelon seeds sprouting?
Common culprits include cold soil (watermelons hate chill!), dry conditions, or old/low-quality seeds. Test viability by floating seeds in water—sinkers are viable; floaters are likely dead. If using store-bought seeds, check the packaging date (most last 2–3 years).
Can I grow watermelon from seeds saved from the grocery store?
Yes! But expect unpredictable results—store-bought watermelons are often hybridized for sweetness, not seed consistency. For reliable germination, buy seeds from a reputable nursery or save seeds from heirloom varieties. If grocery-store seeds sprout, they’ll grow… just don’t count on identical fruit!
What if my seedlings look weak or leggy?
Leggy seedlings mean they’re stretching for light. Move them to a sunny spot (or under grow lights) and ensure they’re 1–2 inches apart. Thin crowded seedlings to avoid competition. For extra vigor, use a balanced fertilizer (5-5-5) once true leaves appear—but go easy!
Wrapping up and next steps
Germinating watermelon seeds before storage is a simple yet effective way to ensure viability and sprout success—no twisty tests required! 🌱 By following the right steps, you’ve learned how to efficiently check seed quality while preparing them for long-term storage.
Whether you’re a seasoned gardener or just starting out, this method saves time and frustration down the road.
Now that you’re armed with this pro tip, why not put it to use? Grab those seeds, test their germination rate, and store them confidently. Happy growing! 🌞