
Lawn
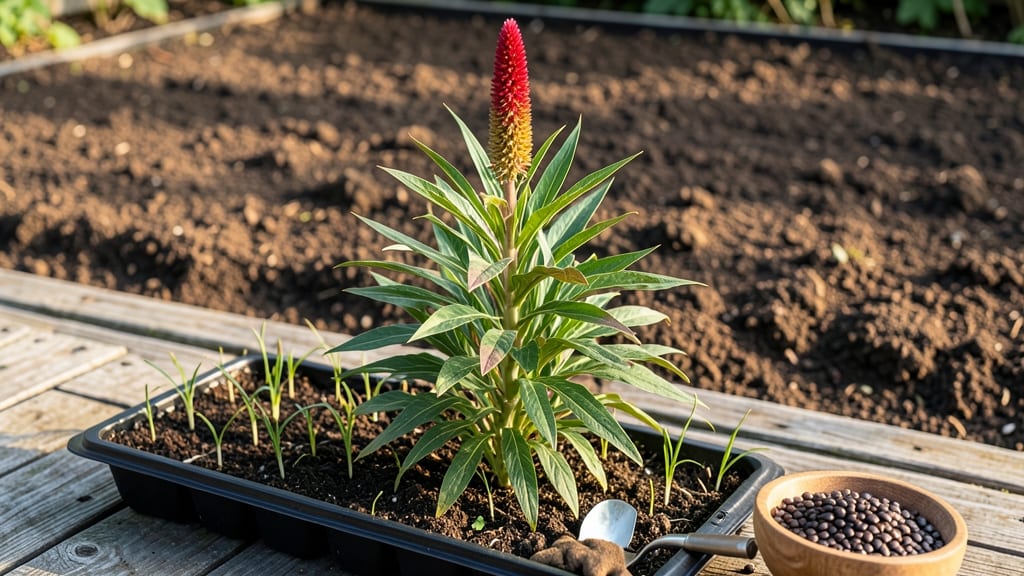
Planting amaranth seeds unlocks a crop that thrives where others fail—drought, heat, and even poor soil can’t stop it. 🌱 I’ve grown amaranth for years, and the secret to reliable seed production starts with the right timing and technique.
These seeds are versatile too: use them for vibrant ornamental foliage or harvest the nutritious grains for cooking. The process is simple but requires patience. Start seeds indoors 8-10 weeks before your last frost (zones 4-10) or direct-sow after soil warms to 60°F.
Plant seeds ½ inch deep, spacing them 12-18 inches apart—crowding leads to weak stems and poor seed viability. Germination takes 7-14 days, so keep soil moist but not soggy.
Once seedlings sprout, thin to the strongest plants and watch them grow into 6-foot-tall giants with striking red, gold, or green foliage. The key to twist-resistant harvesting? Let the seed heads mature fully before cutting—this ensures plump, viable seeds that store well for next year’s planting.
Amaranth’s hardiness makes it perfect for small spaces, urban gardens, or even containers. With the right care, you’ll end up with seeds that outperform store-bought varieties—and a crop that doubles as both food and beauty.
📚 In This Guide
- What you need
- Instructions
- Tips and common mistakes
- Wrapping up and next steps
What you need
- ● Amaranth seeds: 1–2 lbs (organic, non-GMO preferred for best viability).
- ● Well-draining soil: 10–12 inches deep, with a pH of 6.0–7.5. Mix in compost for nutrients.
- ● Sunlight: Full sun (6–8+ hours daily).
- ● Water: Consistent moisture (1–1.5 inches per week).
- ● Planting container or garden bed: Minimum 12-inch spacing between plants (or 18 inches for bushier varieties).
- ○ Fertilizer (optional but helpful): Balanced 10-10-10 or compost tea to boost growth.
- ● Stakes or trellis (for tall varieties): 4–6 ft tall to support plants and prevent seed loss.
- ● Pruning shears: For harvesting seed heads.
- ● Drying trays or paper bags: To cure seeds post-harvest.
- ● Seedling trays for early starts (if planting indoors).
- ● Row covers to protect young plants from pests.
- ● pH test kit to monitor soil acidity.
- ● Label markers for tracking varieties.
Step-by-Step guide to planting amaranth for reliable seed harvests
Here's how to grow amaranth from seed with techniques that ensure strong plants and twist-resistant seed heads.
🌱 Step 1: Prepare the Planting Site and Soil
Choose a location with full sun exposure and well-draining soil. Amaranth thrives in loose, fertile ground with a pH between 6.0 and 7.5. Work in 2-3 inches of compost or aged manure into the top 6-8 inches of soil to improve drainage and nutrient availability.
If your soil is heavy clay, mix in 1 part sand or perlite to 3 parts soil to prevent waterlogging, which can cause seedling rot. Amaranth roots run deep, so avoid compacted areas where roots can't penetrate easily. A simple scratch test—digging down 4 inches with a trowel—will tell you if the soil is workable.
🌱 Step 2: Sow Seeds at the Right Depth and Spacing
Plant seeds ½ inch deep and 12-18 inches apart in rows spaced 18-24 inches apart. Amaranth seeds are small and dark, so I like to scatter them in a 1-inch-wide band and cover lightly with soil. Press the soil gently to ensure good seed-to-soil contact—this prevents air pockets that can delay germination.
Sow seeds after the last frost when soil temperatures reach at least 60°F. You'll see sprouts in 7-14 days, depending on warmth. If nights are still chilly, use a row cover to protect young seedlings until they reach 2 inches tall. Overcrowding leads to weak stems, so thin seedlings to the recommended spacing once they develop 2-3 true leaves.
☀️ Step 3: Maintain Consistent Moisture and Fertility
Water deeply 1-2 times per week, providing 1 inch of water total each week. Amaranth plants are drought-tolerant once established, but consistent moisture during germination and early growth prevents seedling stress. Water at the base to avoid wetting leaves, which can promote fungal diseases like powdery mildew.
Apply a balanced fertilizer (10-10-10) at planting and again when plants reach 6 inches tall. Side-dress with compost tea every 4-6 weeks to boost nutrient uptake. You'll notice stronger stems and more robust foliage when plants receive steady nutrients. Avoid excessive nitrogen, which promotes leafy growth at the expense of seed production.
✂️ Step 4: Support Seed Heads for Twist-Resistant Harvesting
When seed heads form, gently tie them to small stakes or bamboo canes using soft twine or cloth strips. This prevents the heads from twisting and breaking under their own weight. Harvest seed heads when they turn golden-brown and begin to dry on the plant, usually 90-120 days after sowing.
To collect seeds, cut the entire head and hang it upside down in a well-ventilated, dry place for 1-2 weeks. Shake the dried heads over a tray to release seeds. Store seeds in a cool, dry place in airtight containers for up to 3 years. Proper support ensures the heads remain intact, maximizing seed yield and viability.
🌿 Step 5: Monitor for Pests and Diseases
Keep an eye out for aphids, spider mites, or leaf miners, which can stress plants. Treat infestations early with neem oil or insecticidal soap. Amaranth is generally pest-resistant, but crowded plants attract more issues. Prune lower leaves to improve airflow and reduce humidity around the base.
If powdery mildew appears as a white, powdery coating, remove affected leaves immediately and apply baking soda spray (1 tsp baking soda + 1 quart water + a drop of dish soap). Healthy plants with strong stems resist most diseases. Regularly inspect the undersides of leaves—this is where pests and fungal spores often hide.
Tips & tricks for perfect amaranth seed harvesting
Here's what I learned after years of trial-and-error growing amaranth—these tricks ensure strong plants and reliable seed production.
Soil Preparation Secret: The 6-8 inch deep compost incorporation in Step 1 isn't just about nutrients—it creates ideal rooting depth. Amaranth roots can grow up to 3 feet deep, so compacted soil at 4 inches (as tested by the scratch method) will stunt their development. For heavy clay soils, I recommend mixing in vermiculite instead of perlite—it holds moisture better while improving drainage. The goal is soil that crumbles easily when squeezed, not clumps that resist breaking.
Planting Precision: Those ½-inch seed depths might seem shallow, but amaranth seeds need light to germinate properly. If your soil is sandy, press the seeds just slightly deeper (⅝ inch) to prevent drying out. I've found that scattering seeds in a 1-inch band rather than individual rows gives more uniform germination—just be sure to cover them lightly with soil or they'll dry out before sprouting. The gentle pressing after planting ensures maximum soil contact for quick germination.
Temperature Matters: The 60°F soil temperature threshold in Step 2 is critical—below this, germination slows dramatically. I always check soil temp with a thermometer at planting depth before sowing. If your nights dip below 50°F, use a row cover immediately after planting to maintain warmth. The 7-14 day germination window assumes ideal conditions; if temps are cooler, you might extend to 21 days. Watch for the first true leaves to appear before removing covers completely.
Twist-Resistant Support: When tying seed heads in Step 4, use soft twine or even old fabric strips—rough materials can damage the delicate stems. I like to make a loose figure-eight knot around the main stalk and weave the twine through the seed head branches for extra stability. The 90-120 day harvest window assumes warm summer conditions; in cooler climates, you may need to extend to 140 days. Harvest when the seed heads turn golden-brown and begin to dry—this is when they're at peak viability.
Pro Tips for Amaranth Seed Planting
- Here's what I learned after years of trial-and-error growing amaranth—these tricks ensure strong plants and reliable ...
- Soil Preparation Secret: The 6-8 inch deep compost incorporation in Step 1 isn't just about nutrients—it creates idea...
- Planting Precision: Those ½-inch seed depths might seem shallow, but amaranth seeds need light to germinate properly....
Frequently asked questions
When is the best time to plant amaranth seeds?
The ideal time to plant amaranth seeds is after the last frost, when soil temperatures reach at least 60°F (15°C). For most regions, this means late spring to early summer. If you’re in a warm climate, you can even plant in early spring or fall for a second harvest. Amaranth thrives in warmth, so avoid planting too early—cold soil can stunt germination.
How do I prevent birds from eating my amaranth seeds before they sprout?
Birds love amaranth seeds! To deter them, cover freshly planted seeds with row covers, mesh netting, or even a lightweight tarp until seedlings emerge (about 7–14 days). Alternatively, plant in areas with taller plants nearby to create shade, or use bird repellent sprays (like hot pepper spray) as a last resort. Once seedlings are 2–3 inches tall, they’ll be safe from most bird damage.
Can I grow amaranth in containers, or does it need a garden bed?
Amaranth adapts well to containers if you choose dwarf or bush varieties (like ‘Love Lies Bleeding’ or ‘Joseph’s Coat’). Use pots at least 12 inches deep and wide, with drainage holes, and fill them with nutrient-rich soil. Place containers in full sun (6+ hours daily). For seed production, larger containers (18+ inches) work best, but space plants 12–18 inches apart to avoid overcrowding.
Why aren’t my amaranth seeds germinating? Troubleshooting tips.
If seeds aren’t sprouting, check these common issues:
- Cold soil: Amaranth needs warmth—wait until soil is 60°F+ (15°C+).
- Too deep: Plant seeds only ½ inch deep; deeper planting reduces germination.
- Dry soil: Keep soil consistently moist (not soggy) until sprouts appear.
- Old seeds: Amaranth seeds lose viability after 2–3 years—test a few in warm water to check.
How do I harvest amaranth seeds without losing them to birds or weather?
Harvest seeds when the flower heads turn brown and papery (usually 60–90 days after planting). Cut entire seed heads and hang them upside-down in a dry, well-ventilated space (like a garage or barn) for 2–3 weeks to fully dry. Once dry, rub the heads to release seeds, then winnow (blow away chaff) with a fan or by hand. Store seeds in airtight containers in a cool, dark place for up to 3 years.
Wrapping up and next steps
Planting amaranth seeds is a rewarding journey that yields not just a twist-resistant harvest, but also a sustainable food source packed with nutrients. By following the right techniques—from soil prep to post-harvest care—you’ll enjoy year-after-year success with minimal fuss. 🌱
Ready to dive in? Start small with a test patch this season, and soon you’ll be sharing your thriving amaranth harvest with friends (or your dinner table!). 😊