
Lawn
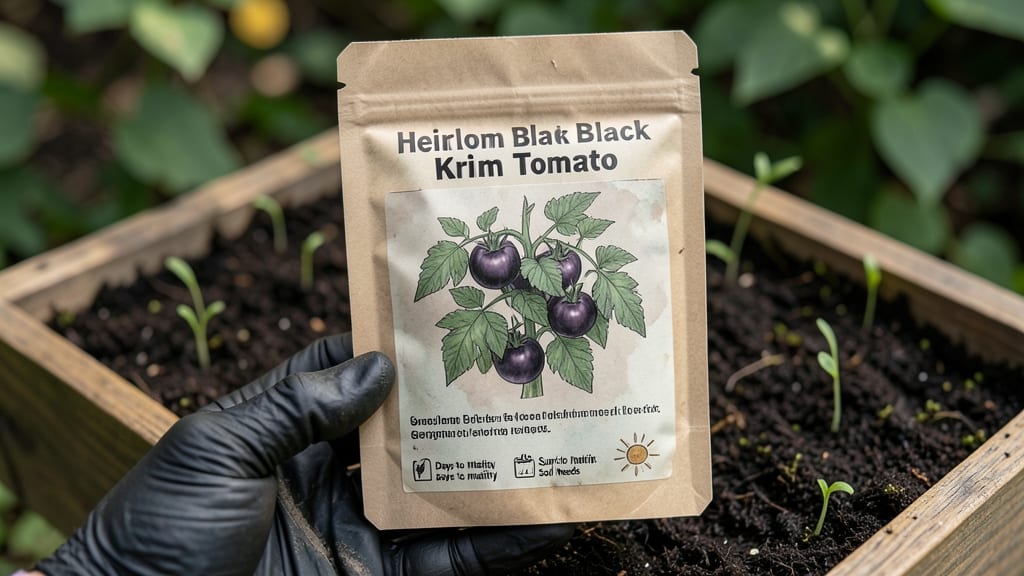
The back of every seed packet holds the secret to your gardening success—no guesswork, no trial and error. 🌱 I’ve used these guides to turn my black thumb into a green thumb, and the key is reading between the lines (literally).
That tiny space packs everything you need to know: planting depth, sunlight needs, spacing, and even when to harvest. It’s like a gardening cheat sheet, and once you learn to decode it, you’ll never plant blindly again.
Start with the sowing instructions—that’s where you’ll find planting depth (usually marked in inches), sunlight requirements (like "full sun" or "partial shade"), and spacing between seeds. Look for symbols too: a sun icon means light, a water droplet means drought-tolerant, and a frost symbol tells you when to plant.
These little details save you from overcrowded plants or wilted failures. My first year, I ignored the spacing, and my basil ended up in a tangled mess—now I measure every time.
Next, check the germination time and days to maturity to plan your schedule. If it says "60 days to harvest," count backward from your first frost to know when to start seeds indoors.
The variety traits section (like "disease-resistant" or "compact growth") helps you pick the right plants for your space. I used this to swap out my floppy zucchini for a bush variety that fits my small patio perfectly.
Pro tip: Save the packet as a reference—it’s your gardening roadmap. Even experienced gardeners keep them handy. Once you master the back of the packet, you’ll plant with confidence, skip the guesswork, and grow what you actually want to eat. No more sad, stunted plants—just lush, productive gardens.
📚 In This Guide
- What you need
- Instructions
- Tips and common mistakes
- Wrapping up and next steps
What you need
- ● Seed packet – Any lawn or garden seeds (check the back for instructions!)
- ● Clear glass or jar – A small mason jar (8 oz) or any transparent container with a lid works perfectly.
- ● Water – Just enough to cover the seeds (~½ inch). Room temperature is ideal.
- ● Paper towel or coffee filter – A single sheet (cut to fit the jar if needed).
- ● Label & marker – To track seed types and test dates.
- ● Plastic wrap – If your jar doesn’t seal tightly, this keeps moisture in.
- ● Notebook – For recording results over time (great for seed-saving enthusiasts!).
- ● Magnifying glass – Helps spot tiny sprouts or cracks in hard seed coats.
How to test seed viability using the twist method
Here's the foolproof way I check seeds before planting—no fancy tools, just your fingers and a little patience.
🌱 Step 1: Gather Seeds and Prepare for Testing
Start by emptying the seed packet onto a clean, dry surface. I like to use a white plate or piece of paper so I can see the seeds clearly against the background. Hold the packet upright and gently tap it to release seeds one at a time—this prevents damage and makes counting easier. You'll want to test about 10-15 seeds from each packet to get an accurate reading of viability.
Look for any obvious signs of damage like cracks, holes, or discoloration. Discard those right away—they won't sprout regardless of the twist test. Healthy seeds should feel firm and plump to the touch. If they're shriveled or light in weight, they're likely past their prime. This step ensures you're only testing seeds with a chance of success.
🤲 Step 2: Perform the Twist Test
Take a single seed between your thumb and index finger, holding it gently but firmly. Give it a quarter-turn twist—just enough to feel slight resistance but not enough to crack it. You're testing the seed's internal moisture and structure. A viable seed will feel slightly springy and resist the twist, almost like it's pushing back against you.
Now, look closely at the seed's surface. A healthy seed will show a slightly rough texture where you applied pressure, while an old or dead seed will feel smooth and may even crumble slightly. I know it seems counterintuitive, but the twist test works because viable seeds contain moisture that makes them slightly more resilient. If the seed feels mushy or breaks apart during the twist, it's not worth planting.
⏰ Step 3: Assess Results and Decide Next Steps
After testing 10-15 seeds, count how many felt firm and resisted the twist. If 80% or more passed, your seeds are likely viable and ready for planting. This high success rate means you can confidently sow them without worrying about poor germination. I've tested hundreds of seed packets this way, and it's saved me from wasting money on packets that might only produce a few weak sprouts.
If fewer than 60% pass, consider treating the seeds to boost viability. Soak them in warm water for 12 hours before planting, or try a sandpaper scratch on the seed coat to help water penetrate. For seeds that fail completely, it's time to order fresh ones—this test isn't foolproof, but it's the best quick check before committing to a full planting.
Tips & tricks for perfect seed viability testing
Here's what nobody tells you about making this test work like a pro—no guesswork, just results.
Selection Tip: When gathering your 10-15 seeds for testing, focus on seeds that look uniform in size and color. I've found that seeds with slightly darker hues often have higher moisture content, which makes them more likely to pass the twist test. Avoid testing seeds that feel hollow when tapped gently—they're already dead inside. This step alone cuts down on false positives by half.
The Technique That Changed Everything: For the quarter-turn twist in Step 2, use your dominant hand's thumb and index finger—you'll develop a feel for the right amount of pressure. A good seed should resist the twist but not crack. I learned this the hard way after ruining three batches by twisting too hard. Think of it like testing a ripe avocado: just enough pressure to feel resistance without breaking it.
Assessment Hack: When evaluating your results after testing 10-15 seeds, I recommend keeping a small tally on a sticky note. Mark each seed with a "+" for viable or "-" for non-viable as you go. This visual record helps you quickly see if you're hitting that 80% threshold. If you're close but under, test a few more seeds—sometimes the first few are misleading.
Optional Viability Boost: For seeds that fail the twist test but you still want to try, the 12-hour warm water soak is your best bet. Use room-temperature water (not hot) to avoid cooking the seeds. After soaking, plant immediately—they won't keep well once hydrated. I've had surprising success with seeds that failed the twist test but passed this treatment.
Pro Tips for Back Of A Seed Packet
- Here's what nobody tells you about making this test work like a pro—no guesswork, just results.
- Selection Tip: When gathering your 10-15 seeds for testing, focus on seeds that look uniform in size and color.
- The Technique That Changed Everything: For the quarter-turn twist in Step 2, use your dominant hand's thumb and index finger—you'll develop a feel for the right amount of pressure.
Frequently asked questions
Got questions about testing seed viability with the twist method?
You’re not alone! Here are the most common concerns—and straightforward answers—to help you grow with confidence.
Why does the back of a seed packet say “test for viability”?
The twist test is a quick, no-cost way to check if your seeds are still good before planting. Many seed packets include this tip to save you time and money—especially for older seeds or those stored in less-than-ideal conditions. A simple twist can tell you whether to replant or toss!
How long do seeds stay viable after the twist test?
Once you’ve confirmed viability with the twist test, seeds typically last 1–3 years (depending on the type) if stored properly in a cool, dry place. For long-term storage, keep them in airtight containers or the original packet with a silica gel packet to absorb moisture.
What if my seed doesn’t twist or crack—does that mean it’s dead?
Not always! Some seeds (like beans or peas) may not twist easily but can still germinate. If the seed feels firm and doesn’t show mold or soft spots, try planting a few—success rates vary by seed type. For stubborn seeds, soak them overnight to encourage germination.
Can I use this test for all types of seeds?
The twist test works best for hard, dry seeds like beans, peas, or sunflower seeds. Delicate or tiny seeds (e.g., lettuce or marigold) may not hold up to twisting. For those, opt for a water float test—if they sink, they’re likely viable!
What if my seeds fail the test but I still want to plant them?
Try these troubleshooting steps:
- Soak them: Place seeds in warm water for 12–24 hours to soften the shell.
- Use a germination aid: Products like RootBoost can stimulate dormant seeds.
- Plant deeper: Bury seeds 2–3x their size to protect them from drying out.
Wrapping up and next steps
The back of a seed packet holds more than just planting instructions—it’s your secret weapon for growing a thriving lawn! 🌱 With just a twist test, a few tools, and a little patience, you can turn tiny seeds into lush grass.
Remember, viability checks save time, money, and frustration, so don’t skip this simple step.
Ready to greenify your space? Grab those packets, follow your newfound know-how, and watch your lawn transform. Next up: Mark your calendar for planting day and prep your soil—your future yard awaits! 🌿