
Size
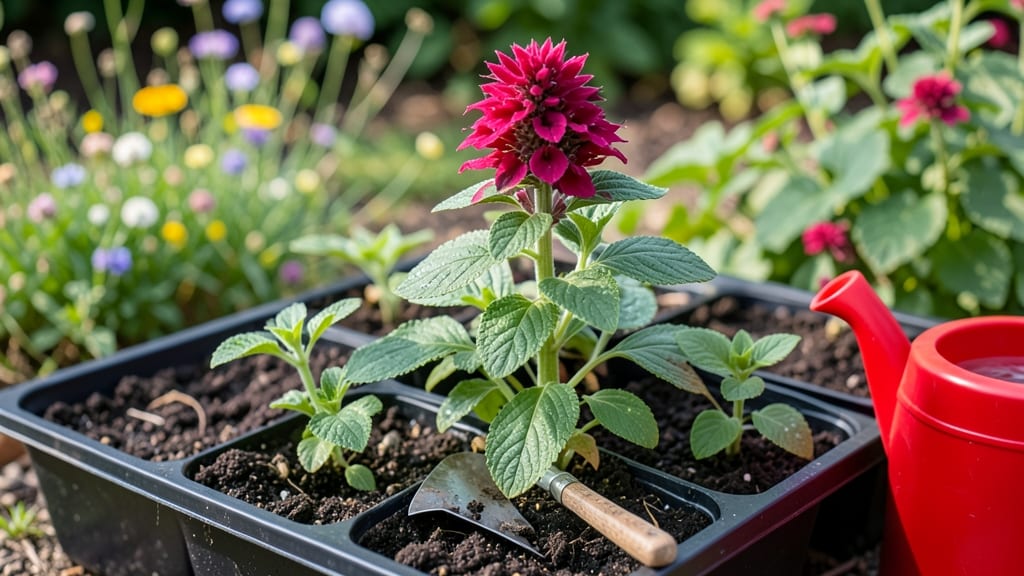
Growing bee balm seed in a garden gives you fragrant, hummingbird-loving blooms that outperform nursery plants. ✨ I learned the hard way that bee balm seeds need patience—germination can take 3-4 weeks, but once they sprout, they grow fast and spread wide.
The real magic happens when you save seeds from your own plants for next year, skipping the twisty stems that make harvesting tricky. Start seeds indoors 10-12 weeks before your last frost, or sow directly in spring when soil reaches 60°F.
Bee balm thrives in full sun to partial shade and moist, well-draining soil—think woodland edges or garden borders. The trick is keeping seedlings moist until they establish roots, then letting them spread naturally (they self-seed like crazy). By midsummer, you’ll have 3-foot-tall clumps of tubular flowers that hummingbirds can’t resist.
The scent is intoxicating up close, and the foliage stays lush even in heat waves. Just watch for powdery mildew in humid climates—space plants 18-24 inches apart to improve airflow. For a twist-free harvest next year, let a few stems go to seed, then collect and dry them indoors.
Store in paper envelopes until spring. Pro tip: Pair bee balm with coneflowers or black-eyed Susans for a pollinator magnet garden that blooms all season.
📚 In This Guide
- What you need
- Instructions
- Tips and common mistakes
- Wrapping up and next steps
What you need
- ● Bee balm seeds: 1–2 packets (50–100 seeds each) for a small garden, or more for larger plots. Choose Monarda didyma (common bee balm) or Monarda fistulosa (wild bergamot) for variety.
- ● Well-draining potting soil: 1–2 bags (10–20 quarts each) of high-quality, organic soil mix (or compost-amended garden soil).
- ● Containers or garden bed: For seedlings: 4–6 small pots (4–6 inches deep) with drainage holes, or a seed-starting tray.
- ● For transplanting: A garden bed with 18–24 inches of spacing between plants (or larger containers if growing in pots).
- ● Watering can or hose: With a gentle spray nozzle for even moisture.
- ○ Garden gloves: 1 pair (optional but recommended for handling soil and seeds).
- ● Plant labels: 10–20 labels (to track varieties and planting dates).
- ● Seedling heat mat: To speed up germination (especially in cooler climates).
- ● Grow lights: If starting indoors before the last frost.
- ● Organic fertilizer: Balanced 10-10-10 or compost tea to boost growth.
- ● Mulch: Straw or shredded leaves to retain moisture and suppress weeds.
- ● Pruning shears: For harvesting and shaping plants later.
- ● Bee-friendly companions: Plant near thyme, lavender, or coneflowers to attract pollinators!
Step-by-Step instructions for growing bee balm from seed
Here’s how to cultivate vibrant bee balm plants that reward you with fragrant blooms and easy seed harvesting.
🌱 Step 1: Start Seeds Indoors at the Right Time
Bee balm thrives when started indoors 6-8 weeks before your last frost date. Use a seed-starting mix in 2-3 inch deep containers to prevent overcrowding later. I like to place seeds ¼ inch deep—too shallow and they may dry out before germinating. Cover lightly with soil and mist gently to keep moisture even.
Place the containers in a warm spot (70-75°F) with bright, indirect light. A seedling heat mat speeds germination, which typically occurs in 10-14 days. Avoid overwatering—keep the soil damp but not soggy. Once seedlings emerge, remove any plastic wrap or cover immediately to prevent damping-off.
☀️ Step 2: Harden Off and Transplant Outdoors
After 4-6 weeks of indoor growth, when seedlings have 3-4 true leaves, it’s time to harden them off. Start by placing them outside in a sheltered spot for 1-2 hours the first day, gradually increasing exposure over 7-10 days. This prepares them for full sun and prevents shock.
Choose a sunny location with 6+ hours of direct sunlight and well-draining soil. Bee balm tolerates moist conditions but won’t thrive in standing water. Space plants 18-24 inches apart—they’ll spread and fill in beautifully. Transplant on an overcast day or in the evening to reduce stress on the roots.
💧 Step 3: Maintain Through the Growing Season
Water bee balm deeply once a week, ensuring the soil stays moist but not waterlogged. Mulch around the base with 2-3 inches of organic matter to retain moisture and suppress weeds. Fertilize lightly in spring with a balanced 10-10-10 formula—too much nitrogen encourages leafy growth over flowers.
Deadhead spent blooms regularly to encourage continuous flowering. Pinch back leggy stems in early summer to promote bushier growth. Bee balm attracts pollinators, so you’ll see bees and butterflies flocking to your garden—just be prepared for the occasional hungry caterpillar!
✂️ Step 4: Harvest Seeds for Next Year’s Garden
To save seeds, leave 2-3 of the healthiest flower stalks uncut until they turn brown and dry. Once the seed heads are crispy, gently twist them off and place them in a paper bag. Shake the bag to release the seeds, then store them in a cool, dry place for up to 2 years. This ensures you’ll have fresh, viable seeds for next season’s twist-free harvest.
Divide mature plants every 3-4 years to rejuvenate growth. In fall, cut back stems to 2-3 inches above the ground and mulch heavily for winter protection. With proper care, your bee balm will return year after year with vibrant blooms and minimal effort.
Tips & tricks for perfect bee balm seed growth
Here’s what I’ve learned from years of growing bee balm—these tricks will help you avoid common pitfalls and get the most vibrant plants possible.
Timing Secret: The 6-8 week indoor starting window is critical because bee balm seedlings need time to establish strong roots before facing outdoor conditions. I always check my local frost dates and mark the starting date on my calendar—this prevents rushing or delaying the process. If you live in a warm climate with no frost, you can start seeds directly outdoors in early spring, but still plant them ¼ inch deep in well-draining soil.
Seedling Survival: In Step 1, that 70-75°F warmth is non-negotiable for germination. I’ve tried growing them in cooler spots and the seeds either take forever or never sprout. If your home runs cooler, place containers on a seedling heat mat or near a sunny window with a clear plastic cover (just remember to remove it once sprouts appear to prevent damping-off). The 10-14 day germination window is just a guideline—some seeds sprout faster, others take longer, so be patient and keep soil consistently damp.
Transplanting Strategy: When hardening off in Step 2, I increase exposure gradually by 30-60 minutes each day rather than the full 1-2 hours immediately. This gives seedlings time to adjust to outdoor conditions without shock. Also, transplant on an overcast day or evening—this reduces stress from direct sunlight on tender new leaves. The 18-24 inch spacing might seem generous, but bee balm spreads aggressively and will fill in beautifully over time.
Harvesting Wisdom: For seed saving in Step 4, I always leave 2-3 of the healthiest stalks to fully mature. Watch for the seed heads to turn completely brown and crispy before harvesting—this ensures maximum viability. When storing seeds, I use small paper envelopes labeled with the year and variety. The 2-year storage life is accurate, but I’ve successfully grown seeds up to 3 years old if stored in a cool, dry place.
Pro Tips for Bee Balm Seed Grow A Garden
- Here’s what I’ve learned from years of growing bee balm—these tricks will help you avoid common pitfalls and get the most vibrant plants possible.
- Timing Secret: The 6-8 week indoor starting window is critical because bee balm seedlings need time to establish strong roots before facing outdoor conditions.
- Seedling Survival: In Step 1, that 70-75°F warmth is non-negotiable for germination.
Frequently asked questions
Got questions about growing bee balm from seed? You’re not alone!
Here are answers to the most common concerns—so you can plant with confidence and enjoy those vibrant blooms (and happy pollinators) all season long.
How long does it take for bee balm seeds to germinate?
Bee balm seeds can be slow starters—expect germination in 2–4 weeks if kept consistently moist and warm (70–75°F). Pre-soaking seeds for 24 hours may speed things up! Patience is key—don’t give up if sprouts don’t appear right away.
When is the best time to plant bee balm seeds indoors vs. outdoors?
For indoor starts, sow seeds 8–10 weeks before your last frost date (March–April in most zones). Transplant seedlings outdoors after frost risk passes and soil warms to 55°F+. Direct-sow outdoors in early spring (as soon as soil is workable) or late summer for fall blooms.
Why aren’t bees visiting my bee balm plants?
Bees love bee balm—but if they’re skipping yours, check these fixes:
- Timing: Plant in full sun (6+ hours/day) for peak nectar production.
- Water: Stress from drought or overwatering can reduce fragrance/nectar.
- Pests: Fungal diseases (like powdery mildew) or aphids may deter pollinators.
- Deadheading: Remove spent blooms to encourage new flowers and fresh nectar.
Can I save bee balm seeds from my garden for next year?
Yes! Collect seeds from healthy, disease-free plants in late summer/fall when seed heads turn brown. Dry them thoroughly, then store in a cool, dark place (like a paper envelope) for up to 2 years. Note: Bee balm can self-seed aggressively—consider deadheading if you want to control spread!
What can I plant instead of bee balm if I want bee-friendly flowers?
If bee balm isn’t your vibe, try these low-maintenance, pollinator magnets:
- Coneflowers (Echinacea) – Drought-tolerant and long-blooming.
- Black-eyed Susans (Rudbeckia) – Bright yellow blooms bees adore.
- Milkweed (Asclepias) – Essential for monarch butterflies.
- Lavender – Fragrant, deer-resistant, and bee-loved.
Wrapping up and next steps
Growing bee balm from seed is a rewarding journey that brings vibrant blooms, pollinator-friendly beauty, and next year’s harvest potential—all with a twist-free twist!
By choosing the right seeds, preparing your soil, and mastering simple harvesting techniques, you’ll create a thriving garden that hums with life. Now’s the time to roll up your sleeves and turn those seeds into a fragrant, pollinator paradise!
🌱 Your Next Step: Plant & Share the Buzz!
Start with a small patch of bee balm seeds this season, then expand your garden or share cuttings with fellow plant lovers. Tag us in your harvest photos—we’d love to see your blooming success! 📸🐝