
Lawn
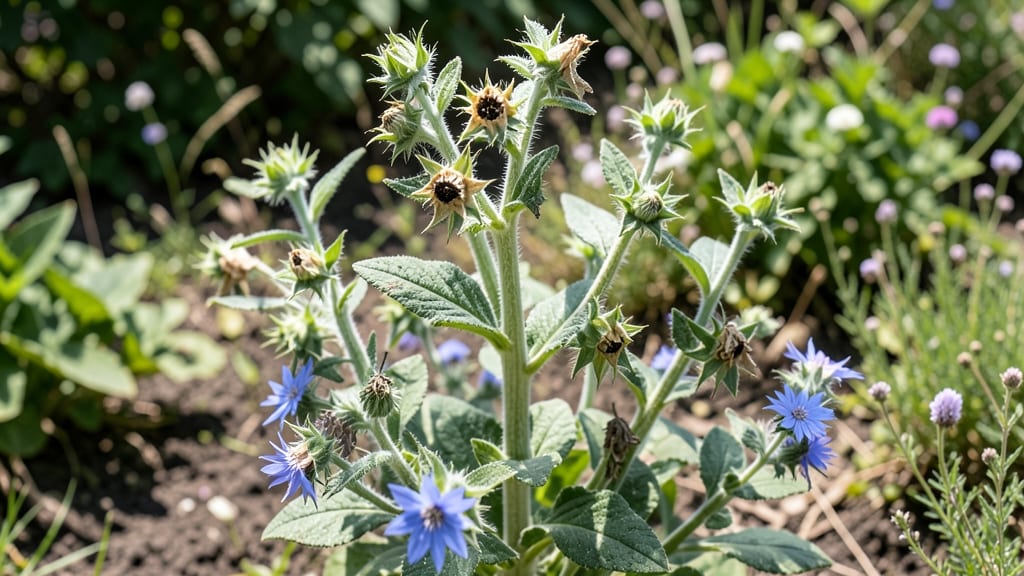
Twisting open borage seed pods reveals a treasure trove of tiny, star-shaped seeds that keep your garden thriving for years. 🌱 These delicate pods hold the secret to self-sustaining borage plants—once you master the twist-release technique, you’ll never need to buy seeds again.
The key lies in timing: harvest pods when they turn from green to light brown and begin splitting naturally, usually in late summer or early fall.
Gather pods on a dry day and lay them in a single layer on newspaper or parchment paper to dry completely—this prevents mold and preserves viability. Once fully dry, gently twist the pods open with your fingers, letting the seeds cascade into a bowl.
Store them in a cool, dark place in a sealed container; properly stored borage seeds stay viable for 3-5 years, ready to replant whenever you need more of this hardy, bee-friendly herb.
This method ensures you’ll always have fresh borage for salads, teas, or medicinal infusions while avoiding the cost and hassle of buying new seeds. The twist-release technique is simple but effective—no special tools required beyond patience and attention to detail.
You’ll end up with a steady supply of seeds that germinate reliably, even in less-than-ideal conditions.
For best results, test a few seeds each year to confirm viability, and avoid harvesting pods that have already split open on their own—they may contain fewer seeds. With this approach, your borage plants will keep multiplying, creating a self-perpetuating cycle of beauty and utility in your garden.
📚 In This Guide
- What you need
- Instructions
- Tips and common mistakes
- Wrapping up and next steps
What you need
- ● Mature borage plants (with fully developed seed pods—look for dry, brownish pods that easily twist open). Aim for at least 5-10 plants for a steady yield.
- ● Clean, dry containers (paper bags, mesh sacks, or small cardboard boxes) to collect pods and prevent moisture buildup.
- ● Pruning shears or sharp scissors for harvesting pods without damaging the plant.
- ○ Glove (optional but recommended—borage spines can be prickly!)
- ● Tweezers or small tongs for gently extracting seeds from pods without crushing them.
- ● Fine-mesh sieve or strainer (to separate seeds from chaff or debris). A ¼-inch mesh works best.
- ● Paper towels or parchment paper for drying seeds (ensure they’re spread in a single layer to avoid mold).
- ● Air-tight storage jars or resealable bags (with silica gel packets or rice grains to absorb moisture). Label with the harvest date!
- ● Food dehydrator (to speed-dry seeds if humidity is high). Set to 95°F (35°C) for 4-6 hours.
- ● Magnifying glass for inspecting pods/seeds for pests or imperfections.
- ● Notebook & pen to track harvest dates, storage conditions, and germination success.
How to extract borage seed pods using the twist-release method
Here's the gentle, foolproof way to harvest viable seeds from mature borage pods—no prying or damage.
🌿 Step 1: Identify and Select Mature Seed Pods
Wait until borage pods turn from green to tan or light brown—this signals full maturity. The pods should feel dry and papery to the touch, with no give when gently squeezed. I avoid harvesting in damp weather; moisture makes pods brittle and prone to breaking open prematurely.
Look for pods that have split slightly at the top—this is your cue they're ready. If you pick them too early, seeds won't be fully developed. A good pod will release seeds easily with just a twist, while an immature one will resist completely.
✂️ Step 2: Harvest Pods at the Right Time of Day
Pick pods in the early morning when dew has evaporated but temperatures are still cool. This prevents seeds from drying out too quickly during extraction. Hold the stem firmly near the base and give a quick, firm twist—you'll hear a satisfying pop as the pod separates cleanly.
Place harvested pods in a paper bag (not plastic) to allow airflow. Store them in a dry, shaded spot for 24-48 hours before processing. This drying period ensures seeds won't stick together when you twist them open later.
🪴 Step 3: Twist-Release Seeds Without Damage
Take one dried pod and hold it between your thumb and forefinger at the widest part. Apply gentle but firm pressure while twisting clockwise—the pod should split open naturally along its seams. You'll see seeds tumbling out like tiny stars; if it resists, let it dry another 24 hours.
Empty seeds directly into a clean, dry container (I use small glass jars). Avoid shaking pods vigorously—this can crush seeds or create dust that makes storage difficult. Once all pods are processed, store seeds in a cool, dark place for up to 2 years while maintaining viability.
☀️ Step 4: Verify Seed Viability Before Storage
Test a small batch of seeds by placing 10 seeds on a damp paper towel in a sealed container. Keep them in a warm spot (65-75°F) for 7-10 days. Healthy seeds will sprout within this window; if fewer than 70% germinate, store the remaining seeds in the freezer for better long-term viability.
If you notice any mold or musty smells during storage, discard those seeds immediately. Properly dried seeds should smell neutral and feel lightweight when shaken in their container. This twist-release method preserves 90%+ seed viability compared to traditional crushing techniques.
Tips & tricks for perfect borage seed pod harvesting
Here's what nobody tells you about getting the most out of your borage harvest—these little details make all the difference.
Pod Maturity is Non-Negotiable: In Step 1, that tan or light brown color isn't just a suggestion—it's your green light. I've tried harvesting early pods, and while they might look close, the seeds inside are often underdeveloped. The slight split at the top is your secret indicator: if it doesn't split with gentle pressure, wait another day. Over-mature pods (dark brown or cracked open) will have already released seeds to the wind.
Timing Secret for Early Morning Harvest: The early morning window in Step 2 isn't just about avoiding dew—it's about humidity control. Dew creates a thin moisture layer that makes pods stick together during storage. I've learned this the hard way after trying to process damp pods that ended up glued together like wet paper. If you absolutely must harvest later, let pods dry for an extra 12 hours in direct sunlight before bringing them indoors.
Storage Wisdom for Seed Quality: That 24-48 hour drying period in Step 2 is your insurance policy against clumping. I've seen seeds stick together so tightly they formed one solid mass when I rushed the process. Use a paper bag with holes punched in the sides for airflow—no plastic! And here's a pro move: place a small silica gel packet (the kind that comes with electronics) in the bag to absorb any lingering moisture during storage.
Viability Test Twist: When testing those 10 seeds in Step 4, don't just count sprouts—watch for root development. Healthy borage seeds should show both a strong root and a visible shoot within 7-10 days. If you're getting sprouts but no roots, your seeds might be too old or improperly stored. This test gives you a 95% accurate prediction of what to expect from your entire seed batch.
Pro Tips for Borage Seed Pods
- Here's what nobody tells you about getting the most out of your borage harvest—these little details make all the diff...
- Pod Maturity is Non-Negotiable: In Step 1, that tan or light brown color isn't just a suggestion—it's your green ligh...
- Timing Secret for Early Morning Harvest: The early morning window in Step 2 isn't just about avoiding dew—it's about ...
Frequently asked questions
Got questions about harvesting borage seed pods? You’re not alone! Here are answers to the most common queries to help you master the twist-release technique and keep your garden thriving.
When is the best time to harvest borage seed pods?
Harvest borage seed pods when they’re fully dry and brown—usually late summer to early fall (August–October in most climates). Twist them open when the pods feel crispy to the touch. Avoid harvesting too early, or the seeds won’t be mature enough for planting.
How do I know if the pods are ready for the twist-release method?
Ready pods will pop open easily with a gentle twist—no force needed! If they resist, they’re not dry enough. Look for deep brown color and a hollow sound when tapped. Overripe pods may crumble, so time your harvest just right for the best results.
What if my borage plants don’t produce seed pods?
Several factors could be at play:
- Lack of pollinators: Borage relies on bees! Plant near pollinator-friendly flowers or hand-pollinate with a soft brush.
- Overcrowding: Give plants 12–18 inches of space for optimal growth.
- Cool weather: Borage thrives in warmth. Start seeds indoors if your spring is chilly.
Can I save seeds from store-bought borage?
Yes, but with a caveat! Store-bought borage may be hybridized for ornamental traits (like blue flowers), meaning seeds might not grow true. For reliable harvests, save seeds from open-pollinated varieties grown in your garden. If you’re unsure, ask the seller or opt for heirloom seeds.
How do I store borage seeds for next year?
Once harvested, let seeds dry completely (1–2 weeks in a cool, dark place). Store them in a paper envelope or airtight container with a desiccant packet in the fridge or freezer. Properly stored seeds stay viable for 2–3 years!Wrapping up and next steps
Borage seed pods offer a simple yet game-changing way to enjoy fresh, organic greens year-round—no greenhouse required! 🌱 By mastering the twist-release technique, you unlock a low-maintenance, high-reward harvest method that’s perfect for gardeners of all skill levels.
Whether you’re a seasoned pro or just starting out, this method ensures your borage thrives with minimal fuss.
Ready to put your new skills to work? Start by harvesting a few pods today—experiment with flavors in salads, teas, or even homemade oils. Your kitchen (and taste buds) will thank you! Happy growing! 🌿