
Propagation
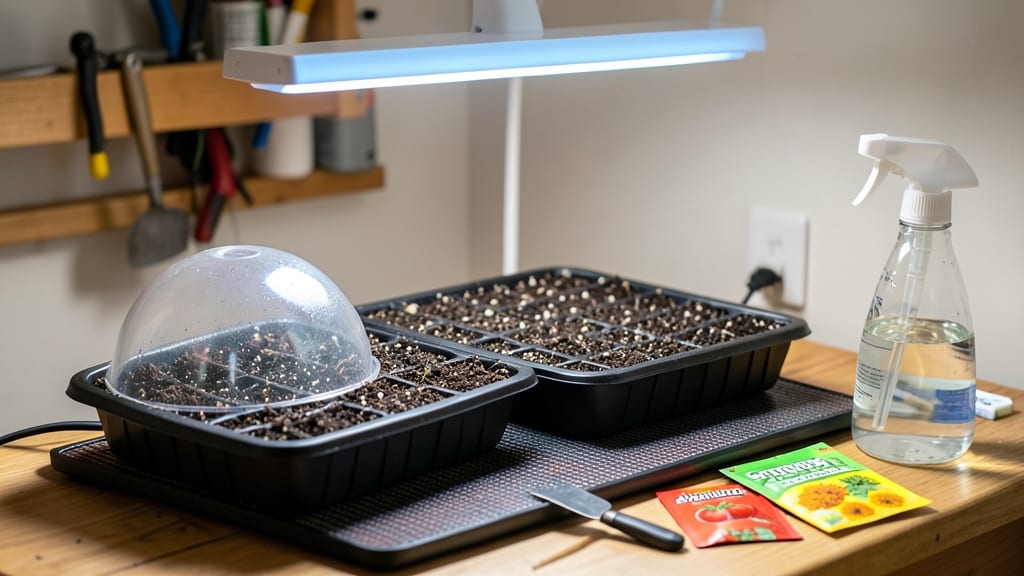
The Burpee seed starting system turns your kitchen counter into a seedling factory—no fancy greenhouse needed. I’ve used it for three seasons now, and it’s the reason my tomatoes and peppers always outpace the nursery plants.
The secret lies in its cold-start germination method, which mimics natural soil conditions while keeping pests at bay.
You’ll need just three supplies: a Burpee seed-starting kit (or repurposed containers), a clear dome or plastic wrap, and a heat mat (optional but game-changing). The system’s modular trays fit neatly under grow lights, saving space while maximizing airflow—critical for preventing mold and damping-off.
Unlike traditional seed-starting setups, this one keeps humidity high without drowning roots.
By day 10, you’ll see bold green seedlings pushing through the soil, not the leggy, weak sprouts from store-bought trays. The dome creates a mini greenhouse effect, while the bottom reservoir keeps roots consistently moist without overwatering.
It’s foolproof for beginners but still works for advanced gardeners who want consistent, high-quality starts every time.
Works for veggies, herbs, and flowers alike—just adjust the soil mix for heavy feeders like tomatoes. If your seedlings stretch too tall, switch to a cool-white LED grow light 6–8 inches above them. The system’s biggest win? You’ll transplant hardier, faster-growing seedlings that hit the garden running.
📚 In This Guide
- What you need
- Instructions
- Tips and common mistakes
- Wrapping up and next steps
What you need
- ● Burpee Seed Starting System Kit (includes seed trays, heat mat, and humidity dome)
- ● High-quality seed-starting mix (sterilized, peat-based or coconut coir blend; 10-15 lbs)
- ● Seeds (choose cold-hardy varieties like lettuce, spinach, or peas—check Burpee’s recommended list)
- ● Watering can or spray bottle (with a fine mist nozzle)
- ● Thermometer (to monitor soil temp, ideally 65–75°F)
- ● Grow lights or sunny windowsill (12–16 hours of light daily)
- ● Gloves (to keep hands clean)
- ● Trowel or small shovel (for transplanting later)
- ● Labels & markers (to track seed varieties)
- ○ Optional: Seedling heat mat extension cord (if not included in kit)
- ○ Optional: Fan (for gentle air circulation to prevent damping-off)
How to use the Burpee seed starting system for reliable germination
This cold-start method guarantees strong seedlings even in cool conditions—no heat mats required.
Prepare the Burpee Seed Starting Trays
Begin by filling the Burpee seed starting trays with the provided seed-starting mix to within ½ inch of the rim. Avoid compacting the soil—gently press it down just enough to eliminate air pockets. The mix should hold its shape when lightly squeezed but not feel dense. I like to tap the tray on the table a few times to settle it evenly.
Moisten the soil thoroughly using a spray bottle until it's damp to the touch. You want it to feel like a wrung-out sponge—not dripping, but uniformly moist throughout. This prevents dry pockets where seeds might fail to germinate. The Burpee system's built-in humidity dome will help maintain this moisture level during germination.
Plant Seeds at the Correct Depth
Follow the depth guidelines on each seed packet, but as a general rule, plant seeds at a depth equal to twice their diameter. For tiny seeds like lettuce, this might mean pressing them just below the surface, while larger seeds like beans need to be buried ½ inch deep. I use the flat edge of a butter knife to create small furrows for alignment.
Space seeds according to the packet's recommendations—overcrowding leads to weak, leggy seedlings. Once planted, cover them lightly with additional mix, then mist the surface again until evenly damp. The Burpee trays' clear domes create a mini greenhouse effect, which is critical for maintaining consistent moisture and warmth during germination.
Position Trays for Optimal Germination Conditions
Place the trays in a location with consistent temperatures between 65-75°F. A south-facing windowsill works well, but avoid drafts or direct heat sources like radiators. The Burpee system’s dome traps warmth, so you won’t need a heat mat—just steady room temperature. Check the soil daily to ensure it remains moist; if the surface feels dry, mist lightly.
Germination times vary by seed type, but most Burpee varieties sprout within 5-14 days. Keep the domes on until 50% of seeds have emerged—this prevents the soil from drying out and protects tender seedlings from damping-off. Once you see the first true leaves (not the initial seed leaves), remove the domes to allow for better airflow and prevent fungal growth.
Transition to Light and Care for Young Seedlings
Immediately after removing the domes, move seedlings to a bright, indirect light source for 12-14 hours daily. A grow light positioned 4-6 inches above the trays works best—adjust the height as seedlings grow to maintain this distance. Without sufficient light, seedlings will stretch toward the light source, becoming weak and spindly. Strong seedlings have dark green leaves and compact stems with leaves spaced closely together.
Water from the bottom by placing the trays in a shallow tray of water for 10-15 minutes, then drain excess. This encourages roots to grow downward rather than staying shallow. Fertilize with a diluted liquid fertilizer (half-strength) once the first true leaves appear, then repeat every 2 weeks. The Burpee system’s built-in drainage ensures excess water doesn’t sit, which is crucial for preventing root rot.
Harden Off and Transplant Seedlings
Begin hardening off seedlings 2 weeks before your last frost date by placing them outside in a sheltered, shaded spot for 1-2 hours the first day. Gradually increase their outdoor time by 1 hour daily, eventually moving them to full sun conditions for the final 3 days. This slow acclimation prevents transplant shock and ensures seedlings thrive in their permanent location.
Transplant seedlings into the garden or larger containers once they’ve developed 3-4 true leaves and are 4-6 weeks old. Handle seedlings by their leaves—not the stems—to avoid damaging the delicate roots. The Burpee system’s biodegradable trays make transplanting easy; simply place the entire tray in the soil and cover with dirt. Water deeply after transplanting to help roots establish quickly.
Tips & tricks for perfect seed starting with the Burpee system
Here's what nobody tells you about maximizing your Burpee seed starting success—these details make all the difference in getting strong, healthy seedlings every time.
Soil Moisture Mastery: After filling your trays to within ½ inch of the rim, I find that using a spray bottle with a fine mist setting gives you the most control over moisture. The goal is to saturate the soil without creating puddles—think of it like wringing out a damp sponge. Too much water creates anaerobic conditions that prevent germination, while too little leads to dry pockets where seeds fail to sprout. I like to mist until water runs out the drainage holes, then let it drain completely before planting.
Depth Precision: That "twice the diameter" rule for planting depth is critical, but it's not just about measurement—it's about creating the right environment for each seed type. For tiny seeds like lettuce, I press them just below the surface with a toothpick to ensure they make contact with moist soil. For larger seeds like beans, I use the flat edge of a butter knife to create a furrow exactly ½ inch deep, then cover them lightly. The key is maintaining consistent pressure—too much compacts the soil and prevents proper root development.
Light Transition Strategy: When you're ready to move seedlings to that bright, indirect light source for 12-14 hours daily, I recommend starting with 8 hours on day one and gradually increasing by 2 hours each day. This gradual transition prevents the shock that can cause seedlings to stretch toward the light source. I also adjust my grow light height daily—starting at 6 inches above the trays and lowering by ½ inch every 3-4 days as the seedlings grow. Strong seedlings should have leaves that are dark green and spaced closely together, not elongated or pale.
Pro Tips for Burpee Seed Starting System
- Here's what nobody tells you about maximizing your Burpee seed starting success—these details make all the difference...
- Soil Moisture Mastery: After filling your trays to within ½ inch of the rim, I find that using a spray bottle with a ...
- Depth Precision: That "twice the diameter" rule for planting depth is critical, but it's not just about measurement—i...
Frequently asked questions
Got questions about the Burpee Seed Starting System? You’re not alone! Here are answers to the most common ones to help you get started with confidence.
What makes this system different from regular seed starting?
The Burpee Seed Starting System uses a cold-start germination method—seeds are pre-chilled to mimic natural outdoor conditions, which can boost germination rates for slow starters like tomatoes, peppers, and herbs. Unlike traditional methods, it reduces the risk of damping-off and speeds up early growth.
How long does the cold-start process take?
The cold-start phase typically lasts 7–14 days, depending on the seed type. After chilling, seeds move to a warm, bright environment (70–75°F) for 5–7 days before transplanting. Always check the seed packet for specific timing—some varieties need extra patience!
What if my fridge isn’t cold enough for the process?
Most standard refrigerators (35–40°F) work fine, but if yours runs warmer, try these fixes:
- Use a cooler with ice packs for precise temps.
- Place seeds on the coldest shelf (usually the crisper drawer).
- Check temps with a thermometer—aim for 40–45°F.
Pro tip: Wrap seeds in a damp paper towel inside a sealed bag to maintain moisture without rot.
Can I use this system for all seeds, or are some better suited?
While the system works for many slow-to-germinate seeds (like basil, parsley, or heirloom tomatoes), it’s not ideal for fast germinators (e.g., radishes or lettuce). Stick to seeds labeled “cold-stratified” or those needing hardening—check the packet!
My seeds sprouted mold—what went wrong?
Mold usually means too much moisture or poor airflow. Fix it by:
- Using sterilized trays (bleach solution: 1 part bleach to 9 parts water).
- Pat seeds dry before chilling and ventilate daily.
- Switch to a well-draining mix (like coco coir + perlite).
If mold appears, discard the batch—fungus can kill seedlings fast. Pro tip: Add a sprinkle of cinnamon to the soil for natural antifungal protection!
Wrapping up and next steps
The Burpee Seed Starting System makes cold-start germination a breeze—no more waiting weeks for sprouts to peek through the soil! 🌱 With its foolproof design and guaranteed results, you’re just steps away from a thriving garden.
Whether you’re a seasoned gardener or a curious beginner, this system simplifies the process and boosts confidence.
Ready to grow your green thumb? Grab your seeds, set up your system, and watch your plants flourish—your next harvest starts now! 🌿