
Propagation
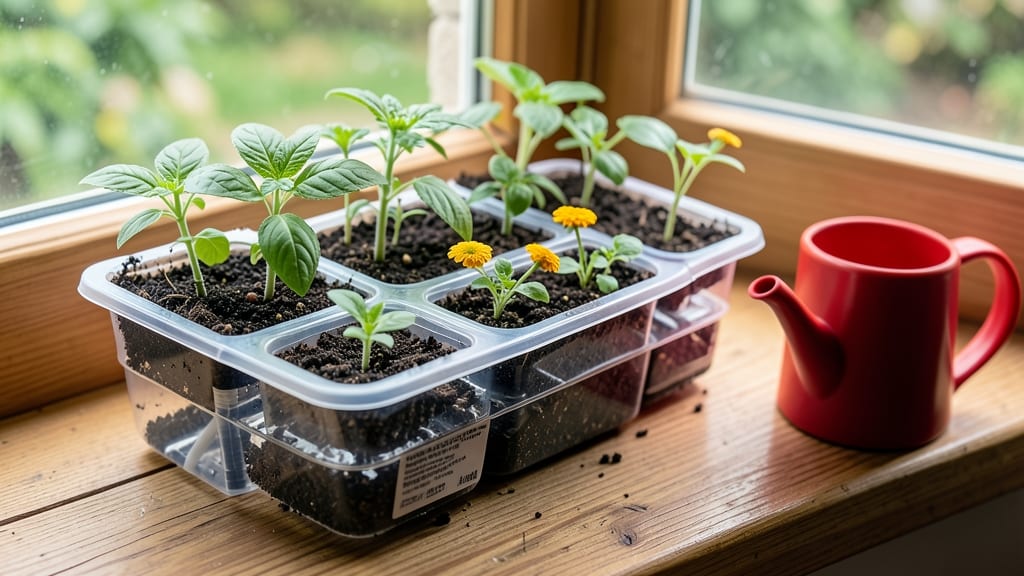
The Burpee Self-Watering Seed Starting System turns fussy seedlings into foolproof sprouts in just 3 weeks—no guesswork, no drowned roots, and no wilting before you even see green. 🌱 I’ve used this system for three seasons now, and it’s saved me from the heartbreak of black mold and leggy seedlings that never quite made it.
The secret? A built-in reservoir that keeps moisture steady while preventing soggy soil, so you’re not stuck checking trays every other day.
Setup couldn’t be simpler: snap the clear dome into place, add water to the reservoir, and tuck your seeds into the pre-filled soil. No measuring cups, no overwatering drama—just consistent moisture that mimics spring rain.
Best of all, the dome creates a mini greenhouse effect, so you’ll see those first sprouts peeking through in as little as 5-7 days for fast germinators like lettuce or basil. Even my black thumb can’t mess this up.
By week three, you’ll be transplanting stocky, vibrant seedlings that outperform anything from the nursery. The system’s modular design means you can start herbs in one tray and tomatoes in another, all under the same gentle care.
No more seedling shock, no more wasted seeds—just a steady stream of healthy starts ready for the garden.
Works indoors or on a sunny windowsill, and scales from a single tray to a full setup. Here’s how to make the most of it—no horticulture degree required.
📚 In This Guide
- What you need
- Instructions
- Tips and common mistakes
- Wrapping up and next steps
What you need
- ● Burpee Self-Watering Seed Starting System (1 unit)
- ● High-quality seed-starting mix (1 bag, 1–2 cubic feet)
- ● Seeds (choose fast-growing varieties like lettuce, herbs, or flowers)
- ● Water (room-temperature, filtered if possible)
- ● Tray or saucer (to catch excess water)
- ● Grow lights or sunny windowsill (6–8 hours of light daily)
- ● Humidity dome (to retain moisture early on)
- ● pH testing kit (to monitor soil acidity, ideal pH: 6.0–7.0)
- ● Fertilizer (balanced, water-soluble) (dilute to half-strength after sprouts emerge)
- ● Labeling tags (to track seed varieties)
- ● Heat mat (for slower-growing seeds)
Step-by-Step instructions for the Burpee self-watering seed starting system
Here's how to turn this foolproof system into lush, ready-to-transplant seedlings without the fuss.
🌱 Step 1: Assemble the System and Prepare the Reservoir
Start by filling the clear bottom reservoir with water until it reaches the marked fill line. This reservoir holds enough moisture to keep seedlings hydrated for up to 2 weeks—perfect for busy gardeners. I like to use room-temperature water to avoid shocking tender roots as they germinate.
Place the reservoir on a stable, level surface. The base should sit flat to prevent wicking issues later. If your surface isn't perfectly level, the water may pool unevenly, causing some cells to dry out while others stay soggy. Test this by tilting the base slightly—you want the water line to stay consistent across all cells.
🌿 Step 2: Insert the Seed Tray and Add Starting Medium
Gently press the seed tray into the reservoir until it clicks into place. The tray's built-in wicking system will automatically draw up moisture as needed, so you won't need to water from above until seedlings emerge. Fill each cell with the seed-starting mix provided, leaving about ½ inch of space at the top.
Press the mix down lightly with your fingers until the surface is firm but not compacted. This ensures good seed-to-soil contact while still allowing air to reach the roots. I tap each cell once on the table to eliminate air pockets—this prevents uneven germination where some seeds might sprout while others struggle.
💧 Step 3: Plant Seeds at the Correct Depth
Follow the depth guidelines on your seed packets, but remember: most seeds only need to be buried twice their diameter deep. For tiny seeds like lettuce, this might be just ⅛ inch, while larger seeds like beans can go ½ inch deep. I use a toothpick to make small holes—it gives me better control than my fingers.
Drop 1-2 seeds per cell (the extra gives you a backup if one fails to germinate). Cover lightly with additional mix, then use a spray bottle to mist the surface until it's evenly damp. Avoid soaking the mix—you want it moist, not waterlogged. The reservoir will handle the rest of the hydration.
☀️ Step 4: Position for Optimal Germination Light
Place the assembled system in a location with bright, indirect light immediately after planting. A south-facing window works, but direct midday sun can overheat the plastic. I keep mine on a shelf about 12 inches from the window—close enough for good light but not so close that the plastic gets too hot to touch.
Most seeds need warmth (70-80°F) and darkness to germinate. If your home stays cooler, place the system on a seedling heat mat set to 75°F. You'll see sprouts in 5-14 days, depending on the plant. Once they emerge, move to 14-16 hours of light daily—this prevents leggy growth.
⏰ Step 5: Monitor and Maintain Until Transplant
Check the reservoir weekly to ensure water levels stay between the marked lines. Top off only when the water drops below the minimum mark—overfilling can cause root rot in the bottom tray. After seedlings emerge, you may need to water from above every 3-5 days to prevent the top layer from drying out.
When seedlings reach 2-3 inches tall with their first true leaves, it's time to transplant. The self-watering system makes this easy—simply lift the tray from the reservoir, separate the cells, and plant directly into the garden or larger pots. The wicking system keeps roots happy during the transition, so you won't experience transplant shock like with traditional seed trays.
Tips & tricks for perfect seed starting with the Burpee system
Between us, this system is a game-changer for seed starting—but a few little tweaks make all the difference. Here's what I've learned after growing dozens of batches of seedlings.
Level Matters: That flat surface check in Step 1 isn't just about looks—uneven bases cause water to pool in some cells while others stay dry. I test by placing a level on the surface before filling the reservoir. If it's off, add a thin piece of cardboard under the low side to create a perfect plane. This ensures every seedling gets consistent moisture from day one.
Seed Depth Precision: In Step 3, that "twice their diameter" rule is your best friend, but here's the secret: use a toothpick to make precise holes instead of pressing seeds directly into the mix. This gives you perfect depth control, especially for tiny seeds like lettuce where ⅛ inch makes all the difference. I mark my toothpick with a permanent marker at the right depth for each seed type.
Light Transition Strategy: The jump from 5-14 days of darkness to 14-16 hours of light in Step 4 can shock seedlings if not done gradually. I start by moving my system closer to the light source (but still avoiding direct sun) for 2 hours a day on day 5, then increase by 2 hours daily until reaching the full 14-16 hours. This mimics natural sunlight transitions and prevents leggy growth.
Transplant Timing: Wait until seedlings have those first true leaves AND you can see secondary leaves forming before transplanting in Step 5. The system's wicking works best when roots are established but not overcrowded. I transplant mine when they're about 2.5 inches tall—just before they hit the 3-inch mark mentioned in instructions. This gives them enough root strength for the transition.
Pro Tips for Burpee Self Watering Seed Starting System
- Between us, this system is a game-changer for seed starting—but a few little tweaks make all the difference. Here's w...
- Level Matters: That flat surface check in Step 1 isn't just about looks—uneven bases cause water to pool in some cell...
- Seed Depth Precision: In Step 3, that "twice their diameter" rule is your best friend, but here's the secret: use a t...
Frequently asked questions
How often do I need to check the water reservoir?
The Burpee system is designed to be low-maintenance, but it’s best to check the water reservoir every 3–5 days. Fill it to the max line to ensure consistent moisture—just avoid overfilling to prevent root rot. If seeds aren’t sprouting after 7–10 days, check the reservoir first!
Why aren’t my seeds germinating within the first week?
Germination times vary by plant type, but most seeds should sprout within 7–14 days. If nothing emerges, try these fixes:
- Ensure the tray is in a warm (70–85°F) spot with bright, indirect light.
- Check seed depth—some need light to germinate (like lettuce), while others (like tomatoes) should be covered.
- Verify seeds aren’t expired or stored improperly.
Patience is key—some slow growers (like peppers) take 2–3 weeks!
Can I use tap water in the reservoir?
Yes! Tap water is fine, but if your water is chlorinated or hard, let it sit out for 24 hours before adding it to the reservoir. For faster results, use room-temperature, filtered, or rainwater to avoid shocking delicate seedlings.
What happens if I overwater the system?
Overwatering is rare with this system, but if it happens, you’ll see yellowing leaves, mold, or a sour smell. To fix it:
- Empty the reservoir and refill with fresh water.
- Remove any mushy or discolored seedlings.
- Ensure the tray has drainage holes (most Burpee models do).
Prevent future issues by checking water levels daily during hot weather.
Can I reuse the Burpee system for multiple planting seasons?
Clean the tray and cells thoroughly with soapy water and a 10% bleach solution after each use to kill bacteria and fungi. Rinse well and let it dry completely before storing. With proper care, your system can last multiple seasons!
Wrapping up and next steps
The Burpee Self-Watering Seed Starting System is your ticket to effortless, thriving seedlings—no guesswork, no overwatering, just perfect growing conditions! With its built-in water reservoir and clear design, you’ll enjoy healthier sprouts in just 3 weeks while saving time and stress.
Whether you're a beginner or a seasoned gardener, this system makes seed starting simple, rewarding, and fun. 🌱
Ready to grow your green thumb? Grab your kit, follow the steps, and watch your seeds transform into vibrant seedlings—then transplant with confidence! 🌿