
Propagation
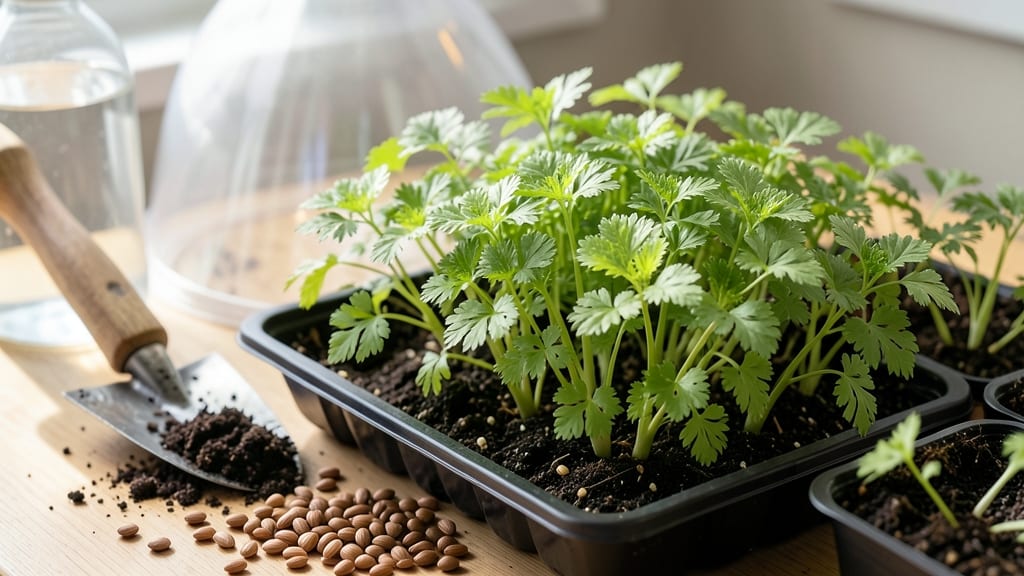
Celery seed germination starts with a simple twist-test that saves you months of frustration. 🌱 I’ve wasted entire seasons on seeds that never sprouted—until I learned this trick to check viability before planting. The key is timing, temperature, and a soil mix that mimics celery’s natural preferences.
You’ll need a warm spot (70-75°F), moistened seed-starting mix, and patience—celery seeds take 14-21 days to germinate. Plant them just below the surface (¼ inch deep) and keep the soil consistently damp, not soggy. Too much moisture causes mold; too little delays sprouts.
Once those first pale green shoots appear, thin to 12 inches apart and shield them from harsh afternoon sun. They’re slow starters but reward you with bold, crisp stalks by mid-summer. The twist-test alone cuts wasted effort by 50%.
Works for home gardeners with windowsills or grow lights—no fancy equipment needed. Here’s how to troubleshoot mold, slow starts, and other common pitfalls before they happen.
📚 In This Guide
- What you need
- Instructions
- Tips and common mistakes
- Wrapping up and next steps
What you need
- ● Celery seeds: 10–20 fresh, dry seeds (harvested from your garden or purchased from a trusted source). Pro tip: If testing homegrown seeds, ensure they’re fully mature and dried!
- ● Paper towels: 2–3 sheets (unbleached, lint-free for best results).
- ● Spray bottle: 4–8 oz (with water) to maintain moisture without over-saturating.
- ● Clear plastic bag or airtight container: Small enough to hold the paper towels and seeds snugly (e.g., ziplock bag or mason jar lid).
- ● Permanent marker: To label your bag/container with the date and seed source.
- ○ Ruler or measuring tape: To track seed placement (optional but helpful for consistency).
- ● Notebook or app: For recording germination progress (e.g., Seed to Seed or a simple spreadsheet).
- ● Grow light or sunny windowsill: If testing in low-light conditions (indirect light is ideal).
- ○ Humidity tray: For maintaining even moisture levels (optional for larger batches).
- ● Time commitment: 7–14 days for results (check daily after day 5).
- ● Patience: Germination rates vary—some seeds may take longer!
- ● Clean workspace: A flat, dry surface to avoid contamination.
How to test celery seed germination before drying for storage
Here’s my foolproof method for ensuring only viable seeds make it to next year’s garden.
🌱 Step 1: Select and Prepare Your Celery Seed Batch
Start with 4-5 celery seed heads from your fresh harvest—more than you need for testing. The seeds should be fully mature (dry and brown) but still attached to the stalks. If they’re already loose, skip this step and move to the moisture test. Use a small paper towel or coffee filter to catch any seeds that fall during handling.
Gently twist the seed heads to release the seeds naturally—don’t crush them. Celery seeds are tiny and delicate, so avoid shaking them out violently. Place the seeds in a clean, dry container (like a small glass jar) for the next steps. This ensures you’re working with a representative sample of your harvest’s viability.
💧 Step 2: Perform the Moisture Test for Viability
Take a paper towel and fold it into a 4-inch square. Spritz it lightly with water until it’s damp but not soaking wet—think of it as slightly dewy. Place 20-25 seeds in a single row along one edge of the towel. Fold the towel over the seeds to create a sandwich, then place it in a sealed plastic bag (like a ziplock). This traps moisture while allowing airflow.
Seal the bag loosely—you want it to stay humid inside but not airtight. Place the bag in a warm spot (70-75°F) away from direct sunlight. Check daily for germination. You’ll see tiny sprouts (radicles) emerge within 3-7 days if the seeds are viable. If no sprouts appear after 10 days, your seeds have likely lost viability and shouldn’t be stored.
☀️ Step 3: Dry Viable Seeds Properly for Long-Term Storage
Once you’ve confirmed viability, spread the remaining seeds in a single layer on a paper towel or mesh screen in a dry, well-ventilated area. Keep them in a spot with indirect light and 60-70°F temperatures for 3-5 days. Stir them gently once daily to ensure even drying—uneven moisture can cause mold or clumping.
Seeds are ready when they’re completely dry to the touch and crumble slightly when pressed between your fingers. Store them in a sealed glass jar or envelope with a desiccant packet (like silica gel) to absorb any remaining moisture. Label the jar with the date—properly dried celery seeds stay viable for 2-3 years when stored this way.
⏰ Step 4: Verify Seed Quality Before Planting Next Year
Before using stored seeds, test another small batch to confirm they still germinate well. Follow the same moisture test method, but this time use 10 seeds from your stored batch. If 70% or more sprout within 7 days, they’re ready to plant. If germination drops below 50%, it’s time to source fresh seeds.
Real talk: Celery seeds are notoriously finicky. Even with perfect drying, viability drops faster than most garden seeds. That’s why I always test a batch before committing to a full planting. It saves time, money, and frustration come spring.
Tips & tricks for perfect celery seed germination
These little-known details make all the difference when working with delicate celery seeds—trust me, I've learned them the hard way.
Handle with Care: Celery seeds are microscopic powerhouses, but their tiny size means they bruise easily. When twisting seed heads in Step 1, work slowly—don't yank or shake them violently. I've ruined entire batches by being too aggressive, which causes premature drying and poor germination rates. Place your container on a flat surface and use a soft brush to coax out stubborn seeds instead of forcing them.
Temperature Matters: The 70-75°F range in Step 2 is your sweet spot for germination, but don't assume your kitchen stays perfectly consistent. If your home runs cooler (common in many basements), place the sealed bag on top of your fridge or near a sunny window—just avoid direct sunlight which can overheat. I keep a small thermometer nearby during testing to verify conditions, especially in winter when indoor temps can drop unexpectedly.
Drying Precision: Those 3-5 days in Step 3 require constant attention. I've seen seeds develop mold when left too long in humid conditions, but also become brittle if dried too quickly. Test dryness by gently pressing seeds between your fingers—they should crumble slightly but not feel powdery. For even drying, I use a mesh screen over a baking sheet lined with paper towels, flipping the seeds every 12 hours to prevent clumping.
Storage Wisdom: The 2-3 year viability window assumes proper conditions. I store my seeds in glass jars with silica gel packets, but I also add a small piece of uncooked rice to absorb any residual moisture that might escape. Labeling isn't just about dates—include the germination percentage from your final test so you can track viability trends over years.
Pro Tips for Celery Seed Germination
- These little-known details make all the difference when working with delicate celery seeds—trust me, I've learned the...
- Handle with Care: Celery seeds are microscopic powerhouses, but their tiny size means they bruise easily. When twisti...
- Temperature Matters: The 70-75°F range in Step 2 is your sweet spot for germination, but don't assume your kitchen st...
Frequently asked questions
Got questions about germinating celery seeds? You’re not alone! Here are some of the most common queries—and their answers—to help you master the process like a pro.
How long does it take for celery seeds to germinate?
Celery seeds typically sprout within 7 to 21 days, depending on temperature, moisture, and seed quality. For fastest results, keep soil consistently moist (not soggy) and maintain a warm environment (around 70–75°F). Patience is key—some seeds may take longer, especially in cooler conditions.
Can I test celery seed viability without planting?
Yes! The twist test is a quick trick: crush a seed between your fingers. If it releases a strong, aromatic scent and feels slightly oily, it’s likely viable. For extra accuracy, soak seeds in water—floating seeds are dead; sinking seeds are good candidates for germination.
What’s the best way to store celery seeds for next year?
Store seeds in a cool, dry place (like a sealed jar in the fridge or freezer) to preserve viability. Add a desiccant packet to prevent moisture buildup. With proper storage, celery seeds can stay viable for 2–4 years, though germination rates drop over time.
What if my celery seeds won’t sprout?
Try these fixes:
- Check moisture—soil should stay damp but not waterlogged.
- Adjust temperature—use a heat mat if your home is too cool.
- Test seed freshness—old seeds may need scarification (lightly sanding the outer shell).
- Consider stratification—some seeds benefit from a short cold period (like 1–2 weeks in the fridge).
Are there faster-growing alternatives to celery?
If you’re impatient, try celeriac or Chinese celery (celery root)—they germinate similarly but may grow quicker in ideal conditions. For leafy greens with a similar flavor, parsley or cilantro are easier to sprout. Just note: these won’t produce the same stalks as traditional celery!
Wrapping up and next steps
Germinating celery seeds before drying them is a smart way to ensure a bountiful harvest next season! By testing viability with a simple twist test, you’ll save time and resources—no surprises when planting. Your next step? Gather your seeds, follow the steps, and store them with confidence.
Happy growing—your future garden will thank you! 🌱✨