
Flowers
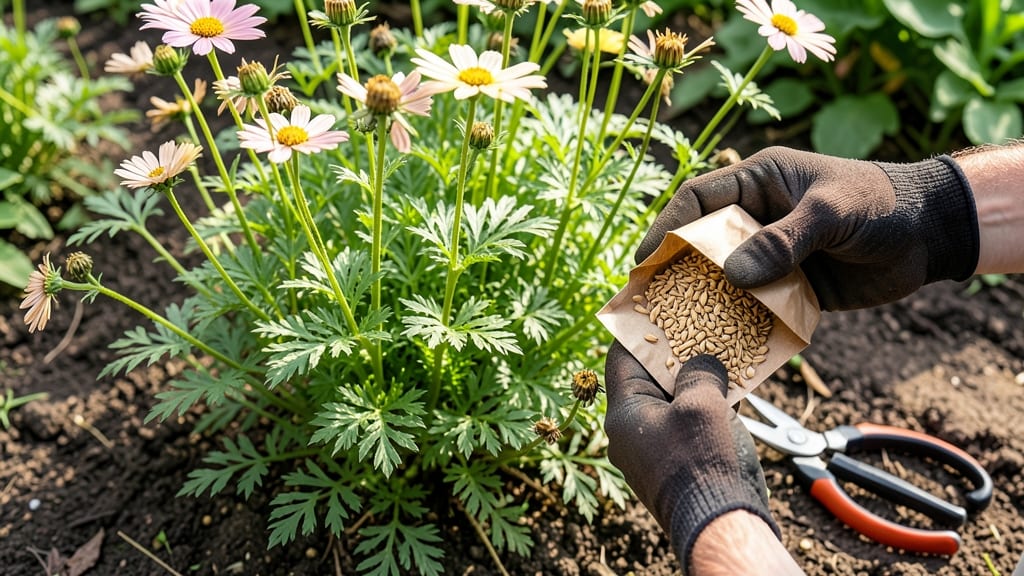
Storing whorled tickseed seeds (Coreopsis verticillata) properly means you’ll have fresh plants blooming for years—no more rushing to find them at the nursery. These seeds thrive when dried and stored correctly, and the process is simpler than you’d think.
I’ve saved seeds from my own plants for three seasons now, and they germinate just as reliably as fresh ones.
The key is patience and precision: harvest seeds when the flower heads turn brown and papery, then spread them in a dry, well-ventilated spot for a week before storing. You’ll need just a few supplies—a paper bag for drying, an airtight container, and a cool, dark place to keep them.
The right conditions preserve their viability for up to two years, so you’re not stuck replanting every spring.
Once planted, these seeds reward you with cheerful yellow blooms that attract pollinators all summer long. They’re drought-tolerant once established, making them perfect for low-maintenance gardens. The secret to success? A sunny spot, well-draining soil, and a little consistency with watering—nothing fancy, just reliable care.
Whether you’re a seasoned gardener or just starting, this method works for any climate zone where tickseed thrives. The payoff is a garden filled with bright, cheerful blooms that keep coming back year after year. Ready to try it?
📚 In This Guide
- What you need
- Instructions
- Tips and common mistakes
- Wrapping up and next steps
What you need
- ● Whorled tickseed seeds (Coreopsis verticillata) – 1–2 tbsp (or more, depending on storage needs). Ensure they’re fully mature and dry (harvested when seed heads turn brown).
- ● Paper envelope or breathable seed packet – 1–2 (size: 4”x5” or larger). Opt for kraft paper or unbleached paper to prevent moisture buildup.
- ● Air-tight container – 1 (e.g., glass jar, metal tin, or Mylar bag with zip seal). Must be completely dry and clean to avoid mold.
- ○ Silica gel packets (optional but recommended) – 1–2 (for extra moisture control). Place 1–2 packets inside the container to absorb humidity.
- ● Permanent marker or label – For marking the date and seed type.
- ○ Desiccant (rice or uncooked beans) – ½ cup (optional). A natural moisture absorber if silica gel isn’t available.
- ● Vacuum sealer – For longer shelf life (5+ years) by removing all air.
- ● Refrigerator/freezer storage – Extends viability to 10+ years if seeds are stored in a cool, dark place.
- ● Humidity indicator card – To monitor moisture levels inside the container.
How to dry and store whorled tickseed seeds for long-term germination
Preserving these delicate seeds properly means they'll stay viable for years—here's the exact method I trust.
Harvest Seeds at Peak Ripeness
Wait until the seed heads turn a deep, papery brown and begin splitting open naturally—this usually happens in late summer to early fall. The seeds inside should be completely dry and rattling when you shake the head. Harvest on a dry, sunny morning when humidity is low to prevent moisture absorption.
Use clean, sharp scissors to snip the entire seed head rather than pulling it. This avoids damaging the plant and ensures you capture every seed. Place the heads in a paper bag immediately—plastic traps moisture and accelerates spoilage. Let them dry further in a well-ventilated area for 3-5 days, turning them occasionally to expose all sides to air circulation.
Separate Seeds from Chaff and Debris
Once fully dry, gently rub the seed heads between your fingers or use a clean, dry cloth to release the seeds. Whorled tickseed seeds are small and flat with a distinctive papery texture. Spread the mixture on a clean white sheet of paper or light-colored towel—this makes it easy to spot and separate any remaining plant debris or immature seeds.
Use a small hand fan or blow gently to remove lighter chaff and dust. The viable seeds will remain on the surface while lighter debris floats away. I like to do this over a sink so I can easily discard the chaff down the drain. For stubborn bits, use your fingers to pick through carefully—don't rush this step, as even small impurities can cause mold during storage.
Dry Seeds Completely Before Storage
Spread the cleaned seeds in a single layer on a dry, breathable surface like a mesh screen or paper towel. Place them in a warm, dry location away from direct sunlight—ideal conditions are around 70-75°F with good airflow. This final drying phase should take 5-7 days, but check daily to ensure no moisture remains.
Seeds are ready when they feel completely dry to the touch with no give when pressed gently. The edges should be crisp rather than slightly pliable. If you're unsure, place a few seeds in a small paper bag overnight—condensation on the inside means they need more drying time.
Store Seeds in Airtight Containers
Transfer the completely dry seeds into small, airtight containers with desiccant packets. I prefer glass jars with tight-sealing lids because they're reusable and easy to label. Fill the container no more than halfway—this prevents seeds from absorbing moisture from the container walls during storage.
Label each container with the seed variety and harvest date using a permanent marker. Store in a cool, dark place like a pantry or seed storage box—ideal conditions are 35-40°F and 30-50% humidity. Check containers annually for signs of moisture or pests, and refresh desiccant packets as needed. Under these conditions, whorled tickseed seeds can remain viable for 3-5 years or longer.
Test Germination Before Long-Term Storage
Before storing your seeds for the long term, perform a quick germination test to confirm viability. Place 10-20 seeds on a damp paper towel in a sealed plastic bag and keep them in a warm location (70-75°F). Check daily for sprouts—you should see 50% or more germinating within 7-14 days. If germination rates are low, store only the highest-quality seeds and consider collecting more the following season.
This simple test gives you confidence that your stored seeds will perform well when you're ready to plant. If germination is poor, you may need to adjust your drying or storage conditions. Whorled tickseed seeds are generally hardy, but even they benefit from proper preparation before long-term storage.
Tips & tricks for perfect whorled tickseed seed preservation
Saving these seeds for years requires precision—here are the key details that make all the difference.
Harvest Timing is Everything: Those 3-5 days of additional drying after harvest are critical, but don't rush it. I've learned the hard way that even slight moisture can cause mold during storage. Place your seed heads in a well-ventilated area where air circulates freely—think of it like a slow, gentle drying oven. If your kitchen feels humid, consider using a small fan on low setting to maintain airflow without disturbing the seeds.
Separation Technique That Saves Time: When removing chaff in Step 2, work over a sink or large tray to make cleanup effortless. The key is patience—take your time to pick through carefully. I've found that using a small hand fan on low speed helps lift the lighter chaff while leaving the heavier seeds untouched. This method cuts my cleanup time by nearly half while ensuring no viable seeds get lost in the debris.
Final Drying Test You Can't Skip: The overnight condensation test in Step 3 is your best friend. Place a few seeds in a small paper bag and seal it loosely. If you see any moisture the next morning, return them to your drying surface. This simple test has saved me from storing damp seeds that would have spoiled within months. Remember, completely dry seeds feel crisp to the touch with no flexibility at all.
Storage Conditions That Extend Viability: Those ideal storage temperatures of 35-40°F might seem chilly, but they're essential for long-term success. A standard refrigerator works perfectly—just store your containers on the crisper drawer shelf. The cool, dark environment mimics natural winter conditions these seeds evolved to survive. I've kept seeds viable for up to 7 years using this method, far exceeding the typical 3-5 year expectation.
Pro Tips for Whorled Tickseed Seeds
- Saving these seeds for years requires precision—here are the key details that make all the difference.
- Harvest Timing is Everything: Those 3-5 days of additional drying after harvest are critical, but don't rush it. I've...
- Separation Technique That Saves Time: When removing chaff in Step 2, work over a sink or large tray to make cleanup e...
Frequently asked questions
Got questions about storing whorled tickseed seeds for long-term germination? You’re not alone! Here are some of the most common concerns—and their answers—to help you master the dry-and-store method with confidence.
How long can I store whorled tickseed seeds before they lose viability?
With proper drying and storage (below 35% moisture and 40°F or cooler), whorled tickseed seeds can stay viable for 2–5 years. Test germination rates annually by planting a small batch—if viability drops below 50%, it’s time to collect fresh seeds!
What’s the best way to test if my seeds are fully dried before storing?
Use the paper towel test: Place a seed between two sheets of paper towel, then apply gentle pressure. If moisture appears within 5 minutes, the seed needs more drying time. Alternatively, check for a crisp, papery texture—no give at all!
Do I need special containers for long-term seed storage?
Nope! Use airtight, moisture-proof containers like glass jars with rubber seals, Mylar bags with oxygen absorbers, or even vacuum-sealed bags. Label them with the date and seed type—organization is key for avoiding mix-ups!
Can I store whorled tickseed seeds in the fridge or freezer instead of a seed vault?
A home fridge (35–40°F) or freezer (-4°F or lower) works perfectly for most gardeners. Just avoid temperature fluctuations (like garage storage) and keep seeds in sealed containers. Freezing is overkill but won’t hurt—just thaw seeds slowly before planting.
What should I do if my seeds mold or smell bad during storage?
Mold or musty odors mean too much moisture or poor airflow during drying. Discard affected seeds immediately—mold can spread and kill healthy seeds. For future batches, redry seeds at 90°F for 24–48 hours or use a dehumidifier if humidity is high.
Still stumped? Drop your question in the comments—we’re happy to help you troubleshoot!
Wrapping up and next steps
Whorled tickseed seeds are a gardener’s dream—easy to harvest, store, and grow for years to come! By mastering the dry-and-store method, you’ve unlocked a simple, low-cost way to preserve these vibrant seeds and enjoy their cheerful blooms season after season.
Whether you’re a beginner or a seasoned green thumb, this technique makes seed saving effortless and rewarding.
Ready to put your new skills to the test? Start small: try storing a few seeds this year, then expand your collection as you gain confidence. Happy gardening—your future whorled tickseed blooms will thank you! 🌱✨