
Propagation
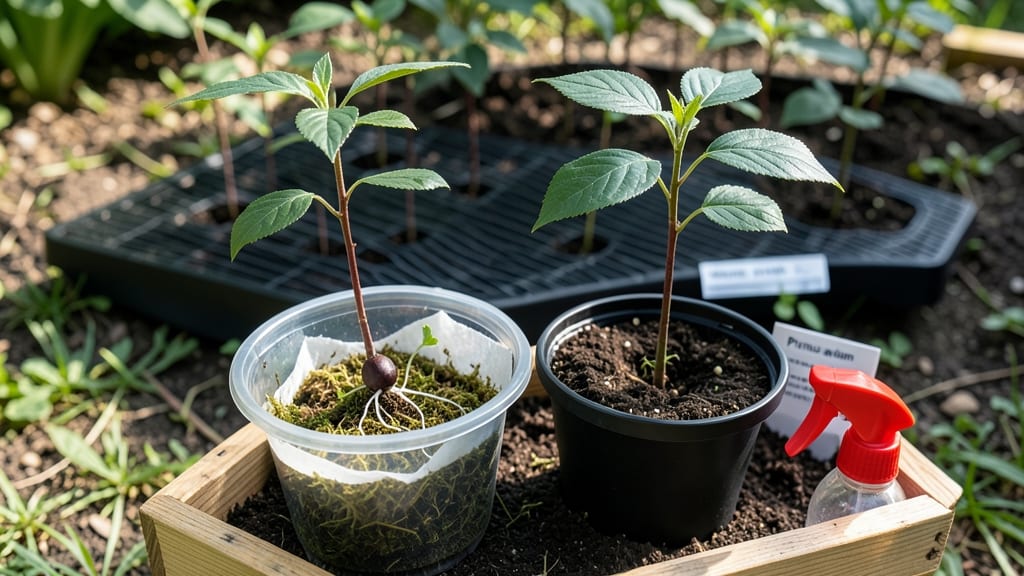
Cherry tree seed germination starts with a simple twist test—no fancy tools needed. ✨ I learned the hard way that skipping this step means months of waiting for seeds that might never sprout. The key? Checking viability first before you even think about drying or stratification.
You'll need just a few things: fresh cherry pits (from fully ripe fruit), a bowl of water, and patience—this isn't a fast process. Most seeds need 60-90 days of cold stratification to break dormancy, and even then, germination can take another 30-60 days.
The twist test saves you from false hope with seeds that won't wake up.
Once you confirm viable seeds, you'll move them to a moist paper towel in a sealed bag for 4-6 weeks in the fridge. That's where the magic happens—cold temperatures trick the seed into thinking winter has passed.
By spring, you might see tiny roots peeking out, ready for their first taste of soil.
Outdoor germination works best in well-draining soil under partial shade, while indoor starters need a sunny windowsill or grow light. Either way, transplant seedlings carefully—they're delicate at first but will reward you with strong roots if handled right. Years from now, that first bloom will make it all worthwhile.
📚 In This Guide
- What you need
- Instructions
- Tips and common mistakes
- Wrapping up and next steps
What you need
- ● Cherry tree seeds: Fresh, viable seeds (preferably from Prunus avium or Prunus cerasus). Aim for 5–10 seeds to maximize success.
- ● Paper towels or damp seed-starting mix: Use 2–3 sheets of paper towels or a small container (6–8 inches wide) filled with a sterile, well-draining mix (e.g., peat moss + perlite).
- ● Plastic bag or airtight container: A quart-sized zip-top bag or small plastic container with a lid to maintain humidity.
- ○ Spray bottle (optional but helpful): For gentle misting—8–12 oz with clean water.
- ● Small pots or seed trays: 3–4-inch diameter pots or a seed tray with drainage holes (for transplanting later).
- ● Potting soil: A lightweight, sterile mix (e.g., 50% peat moss, 30% perlite, 20% vermiculite).
- ○ Heat mat (optional but recommended): A seedling heat mat set to 70–75°F to speed up germination.
- ● Grow lights or sunny windowsill: A full-spectrum LED grow light or a south-facing window (6+ hours of light daily).
- ● Fertilizer (post-germination): A balanced, water-soluble fertilizer (e.g., 10-10-10) diluted to half-strength.
- ● 🔥 Viability check: Soak seeds in warm water for 24 hours—sinkers are viable! Floaters may need stratification (see next steps).
- ● 🌡️ Stratification (if needed): Mix seeds with damp sand in a bag, refrigerate for 4–8 weeks at 35–45°F to mimic winter.
- ● ✨ Sterilize tools: Wipe containers/pots with rubbing alcohol to prevent mold or fungal issues.
Step-by-Step instructions for germinating cherry tree seeds
Here's how to test and prepare seeds for successful cherry tree growth.
🌱 Step 1: Collect and Test Seed Viability
Gather fresh cherry pits—never use dried or store-bought seeds, as they won't germinate. Place them in a glass of water and let them soak for 24 hours. Healthy seeds will sink to the bottom, while hollow or non-viable ones will float. Remove the floating pits immediately—they won't grow.
For the viable seeds, gently twist them between your fingers. If the pit cracks or splits slightly, it's ready for planting. If it stays solid, it needs stratification (cold treatment) to break dormancy. I like to place these in a sealed plastic bag with slightly damp sand and refrigerate for 8-12 weeks before proceeding.
⏰ Step 2: Stratify Seeds for Dormancy Break
Fill a small container with a mix of equal parts sand and peat moss—this keeps moisture balanced without rotting seeds. Bury the viable cherry pits 2 inches deep in the mix, then cover the container with plastic wrap to retain humidity. Place it in the refrigerator's crispier drawer (around 35-40°F) for 8-12 weeks.
Check the mix every 2 weeks—it should feel damp like a wrung-out sponge. If it dries out, lightly mist it with water. This cold treatment mimics winter conditions, tricking the seed into thinking it's time to grow. Real talk: Skipping stratification means waiting years (or never) for germination.
🌿 Step 3: Plant Stratified Seeds in Pots
After stratification, fill 4-inch diameter pots with well-draining potting mix—avoid garden soil, as it compacts too easily. Plant 1-2 seeds per pot, burying them ½ inch deep. Press the soil gently around them to ensure good contact, then mist the surface lightly with water. Label each pot with the date and variety if known.
Place the pots in a warm, bright spot (around 70°F) but not direct sun—young seedlings can scorch. A seedling heat mat helps maintain consistent warmth. Germination can take 4-12 weeks, so patience is key. Watch for the first tiny green shoot—that’s your signal to start regular care.
☀️ Step 4: Provide Light and Care for Sprouts
Once seedlings emerge, move them to a south-facing window or under grow lights for 14-16 hours daily. Without enough light, they’ll grow leggy and weak. You’ll see strong seedlings with bold green leaves and sturdy stems—these are ready for their next phase.
Water gently when the top inch of soil feels dry, but avoid soggy conditions. Overwatering is the #1 killer of young cherry seedlings. After 3-4 months, when they’re 6-12 inches tall, you can transplant them outdoors in a protected spot. Don’t rush this—cherry trees need time to build roots.
Tips & tricks for perfect cherry tree seed germination
Here's what nobody tells you about getting your cherry seeds to sprout reliably.
Seed Selection Matters: In Step 1, when you're testing viability with the 24-hour water soak, pay close attention to the pits that sink. Some may feel slightly heavier than others—those are your best candidates. I've found that pits from fully ripe cherries (deep red, not purple) have the highest germination rates. If you're working with a mix of varieties, separate them now to track which types perform best.
Stratification Setup: For Step 2, when creating your sand and peat moss mix, consider adding a handful of perlite to improve drainage. The mix should be damp but never soggy—think of it like a wrung-out sponge. I place my containers in a resealable plastic bag with a few small holes punched in the top to maintain humidity without creating a greenhouse effect. This prevents mold while keeping the right moisture level for those critical 8-12 weeks at 35-40°F.
Planting Depth Visual: In Step 3, when planting your stratified seeds, use a toothpick to create small holes for the pits—this ensures consistent ½-inch depth without damaging the seed. Press the soil gently around the pit so there's good contact, then give it a very light mist. I've noticed that seedlings planted at exactly this depth tend to emerge more uniformly than those planted deeper or shallower.
Light Transition: When moving your sprouts to 14-16 hours of light in Step 4, do it gradually over 3-4 days. Start with just 2-3 hours of additional light per day to prevent shock. I use a simple LED grow light on a timer—it's more consistent than natural light variations. Watch for those bold green leaves and sturdy stems as your signal that the seedlings are thriving.
Pro Tips for Cherry Tree Seed Germination
- Here's what nobody tells you about getting your cherry seeds to sprout reliably.
- Seed Selection Matters: In Step 1, when you're testing viability with the 24-hour water soak, pay close attention to the pits that sink.
- Stratification Setup: For Step 2, when creating your sand and peat moss mix, consider adding a handful of perlite to improve drainage.
Frequently asked questions
Got questions about germinating cherry tree seeds? You’re not alone! Here are some of the most common queries—plus straightforward answers to help you succeed.
How long does it take for cherry tree seeds to germinate?
Cherry tree seeds can take anywhere from 3 to 6 months to germinate, depending on the variety and conditions. Sweet cherries often sprout faster (4–6 weeks in ideal settings), while tart cherries may take longer. Patience is key—keep the soil moist and warm (around 70–75°F) to encourage faster results.
Do cherry seeds need cold stratification before planting?
Yes! Cherry seeds require cold stratification to break dormancy. Place them in a damp paper towel or moist sand in the fridge (32–40°F) for 6–12 weeks before sowing. This mimics winter conditions and significantly boosts germination rates. Skip this step, and you might wait years—or never see sprouts!
Can I grow a cherry tree from a seed bought from the grocery store?
Technically yes, but there’s a catch: store-bought cherry seeds are often hybrids bred for fruit quality, not propagation. The resulting tree may not produce fruit true to the parent plant—or any fruit at all! For reliable results, source seeds from a wild cherry tree or a trusted nursery specializing in propagation.
Why aren’t my cherry seeds sprouting after months?
If your seeds refuse to sprout, check these common culprits:
- Improper stratification: Did you skip the cold treatment or use dry seeds?
- Poor soil conditions: Ensure the medium is moist but not soggy and well-draining.
- Old seeds: Cherry seeds lose viability quickly—use fresh ones (1 year or less).
- Temperature issues: Seeds need warmth (70°F+) after stratification.
How big should my cherry seedling be before transplanting outdoors?
Wait until your seedling has 3–5 true leaves and is at least 6–12 inches tall before transplanting. Harden it off gradually (place outdoors for a few hours daily over 1–2 weeks) to avoid shock. Choose a sunny spot with well-draining soil, and space saplings 20–25 feet apart for mature trees.
Wrapping up and next steps
Growing a cherry tree from seed is a rewarding journey filled with patience and potential! By following a simple twist-free viability check before drying, you’ve set the stage for success—whether you’re nurturing a sweet Prunus avium or a tart Prunus cerasus.
Remember, germination rates vary, but your effort could yield a stunning tree in just a few years.
Ready to take the next step? Once your seeds are prepped, plant them in a sunny spot and monitor their progress closely. Happy growing—your future cherry tree is waiting! 🌱✨